Model 574 Programmable Counting System (PCS)
196 - GSE Scale Systems
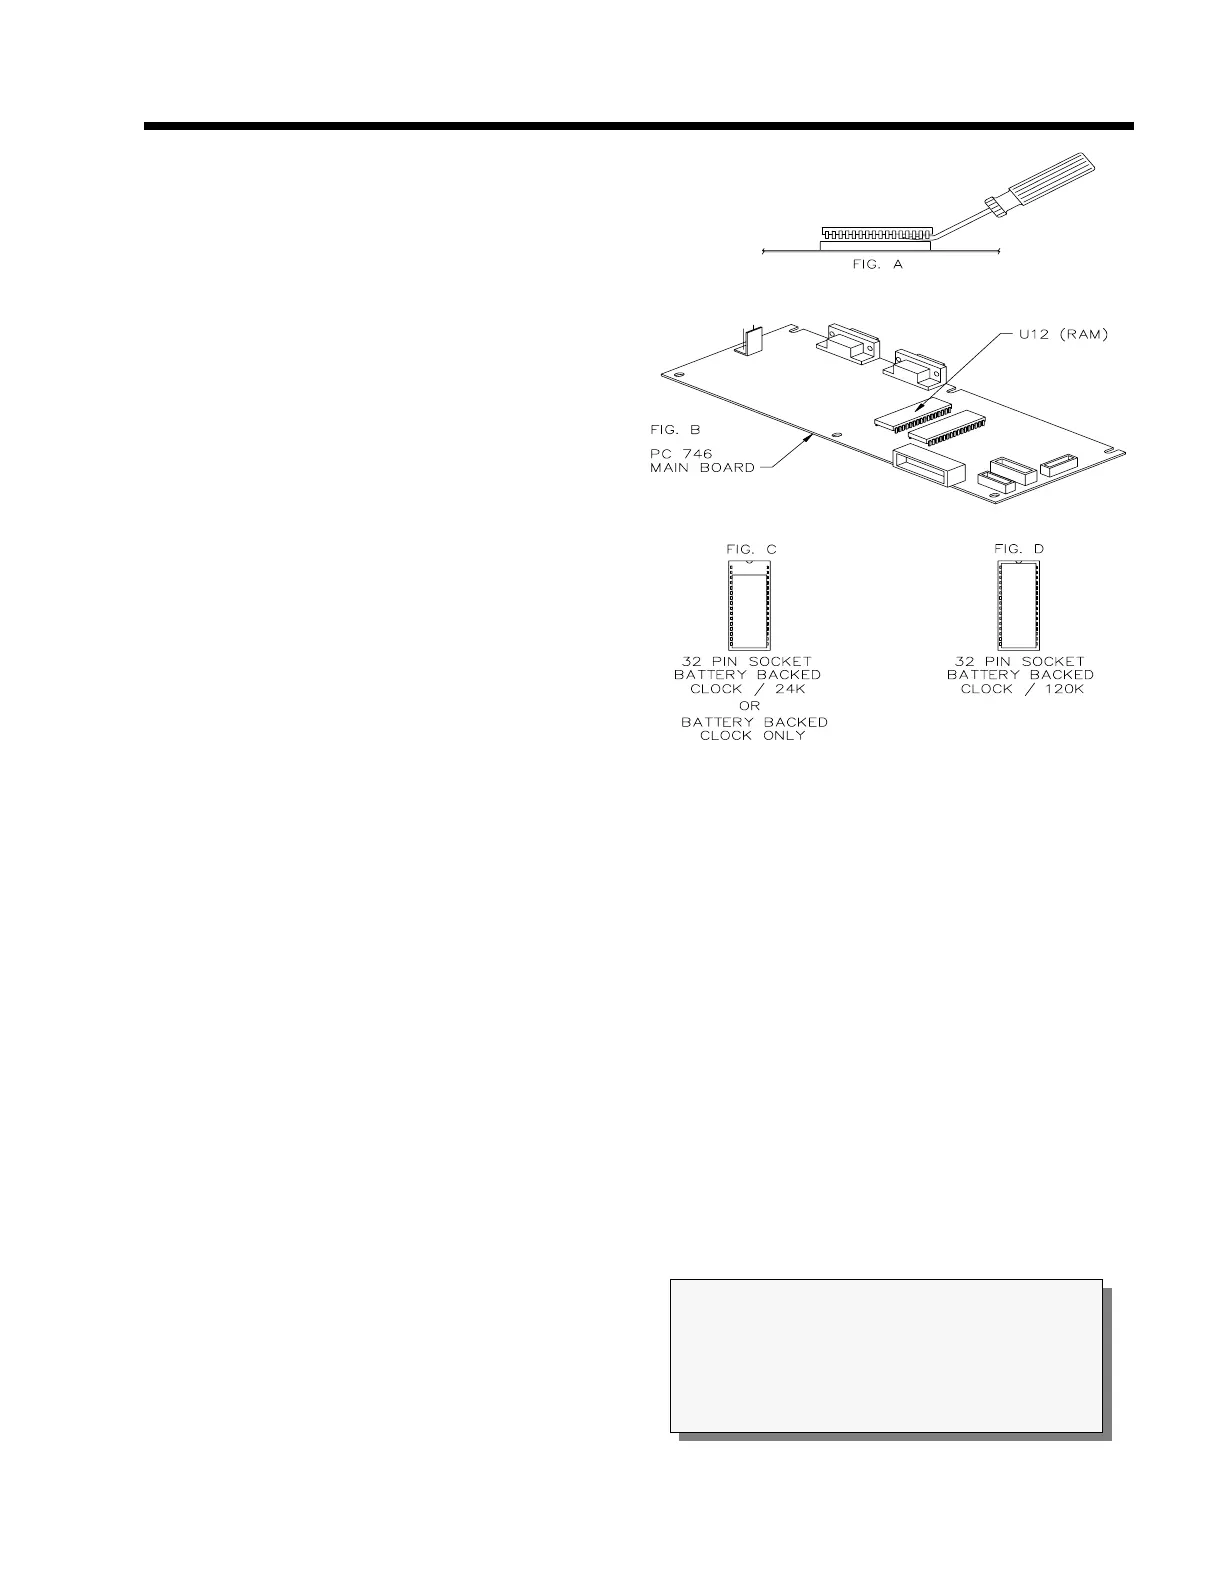
C on Figure 27.
n. Align and place the Time/Date module on top
of the socket as described in the previous step.
Carefully press the module into the socket.
Double check to verify that the proper
alignment has been achieved and that no pins
have been bent over.
o. Re-apply the power to the unit. The system
will automatically recognize that the clock chip
has been installed. Make sure the option is
working properly before proceeding to the next
step. This can be done by viewing parameter
11, recording it, removing the power from the
unit, wait a few minutes, re-apply the power and
then re-viewing parameter 11. If installation was
performed correctly, the data in parameter 11 should
have incremented the number of minutes the power
was removed.
p. Re-assemble the unit. Refer to chapter 2 for re-
assembly.
Time / Date Option Operation
Apply power to the unit and verify proper operation. To
verify the time and date values, select the time / date
mode. Key in:
<11> <SELECT>
The display will show the date on the large numeric
digits and the time on the dot matrix display. For
example, for July 16, 1994 at 3:27:23pm the display will
appear as follows:
07.16.94 03:27:23pm
Refer to the P500 setup parameters to enter the time and
date or to change the format of the time and date. To
include the current time and / or date into the data
transmissions to a printer or other peripheral, refer to the
Custom Transmit Setup in Chapter 15. The Time/Date
data is parameter ID 11.
Figure 27 Time/Date Option Installation on Main
Board
CAUTION
All electrical connections and access to the inside
of the instrument should be performed by
qualified service personnel only!