Do you have a question about the HEIDELBERG MLA150 and is the answer not in the manual?
Provides information and instructions for proper handling of the MLA150 system.
Lists local service office contact details for assistance with the MLA150 system.
Lists further manuals related to the machine and its operation.
Defines the system's purpose for exposing structures and lists prohibited uses.
Explains safety warning conventions (DANGER, WARNING, CAUTION, NOTICE) and symbols.
Details laser types, classes, and safety precautions for the MLA150 system.
Provides critical safety warnings and procedures related to electrical hazards.
Covers risks from moving parts, heat, pinch points, and system interlock functions.
Illustrates safety labels and their locations on the MLA150 system components.
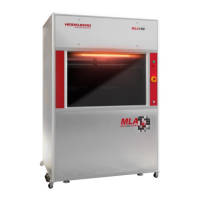
Describes the main unit's components including the flow box, granite construction, and optics.
Details the flow box as the system's housing, providing a stable environment.
Explains key system components like support, base plate, and operator panel.
Describes the optics system, including DMD, laser unit, camera unit, and autofocus.
Details the units within the electronics rack that drive and control the system.
Explains the correct orientation for loading substrates and aligning designs.
Introduces the Exposure Wizard as an intuitive interface for setup and procedures.
Describes the static elements of the Exposure Wizard interface.
Details the menu utilities available in the Exposure Wizard window.
Explains the Exposure Setup and Info tabs within the wizard.
Describes the four subsections within the Info Section: Exposure, Alignment, Progress, Hardware.
Explains the graphical depiction of the substrate showing design and camera positions.
Guides starting the Exposure Wizard and creating or managing jobs.
Instructions for selecting a substrate template from the system's list.
Instructions for loading design files for different exposure modes.
Procedure for loading designs for the first exposure layer.
Procedure for loading designs for subsequent alignment layers.
How to select design files for series exposure modes.
Step-by-step guide for placing the substrate onto the chuck.
Instructions for converting new design files into the required LIC format.
Guides the user in drawing shapes directly on the substrate in Draw Mode.
Procedure for drawing shapes like rectangles, ellipses, or circles in the camera window.
Instructions for drawing lines or polygons by setting points in the camera window.
How to expose alignment crosses in Draw Mode without loading a design.
Instructions for executing exposures in different modes: First Exposure, Overlay, Series, Draw Mode.
Details the steps for performing the initial exposure of a layer.
Procedure for executing overlay exposures after alignment.
Guide for performing series exposures to optimize dose and defoc settings.
Steps for starting exposure after creating structures in Draw Mode.
Information on setting up precise alignment for overlay exposures.
Details the Auto-Unload function and manual unloading procedure.
Explains the Control Panel utility for navigation and essential control functions.
Describes the camera software window used for viewing and manual alignment.
Provides advice on improving alignment and exposure outcomes.
Offers tips for improving measurement results affected by substrate surface conditions.
Guides on adjusting Defoc and Dose values to improve exposure outcomes.
Informs about the preparation and procedure for back side alignment (BSA).
Details the designated openings on the chuck for BSA marker detection.
Outlines the steps for preparing and executing back side alignment exposure.
Describes minimal operator maintenance tasks not involving protective panels.
Suggests corrective actions for common issues encountered with the MLA150.
Explains how to use TeamViewer software for remote service engineer access.
| Brand | HEIDELBERG |
|---|---|
| Model | MLA150 |
| Category | Mask Aligners |
| Language | English |