Adding Items to the Label Design
A label design is made up of Object Boxes and lines. The Object Boxes contain all the graphic, barcode, and text
information contained in the label design. So, to add graphics, barcodes, or text to your label design, you must first
draw an Object Box.
The Object menu contains all the items that can be used in the label design. The objects are also available on the left
tool bar.
Draw an Object
To draw an object, first select the type of object you want from the tool bar or the menu. Now move the cursor to
the label design. The cursor will have changed from an arrow to a cross. In the lower left of the cursor you will also
see an icon that matches the tool you chose.
Move the cursor to where you would like to place the first corner of your object. Click-and-hold the left mouse
button on that corner. Drag the mouse until you achieve the desired shape for your object. While dragging, the
object borders will be displayed by dashed lines. Release the mouse button to place the object. To move or change
an item in the label design, see the section later in this chapter titled “Changing Items in the Label Design”.
Select Tool
The Select tool is used to move and change items in the label design. You may also choose the Select tool if you
want to drop another tool that you have chosen.
Line Tool
A line can be drawn anywhere on the label design. You can adjust the width and color of the line from the tool bar.
Note: To force the cursor to stay within 45 degree increments, hold down the shift key on your keyboard while you
draw the line.
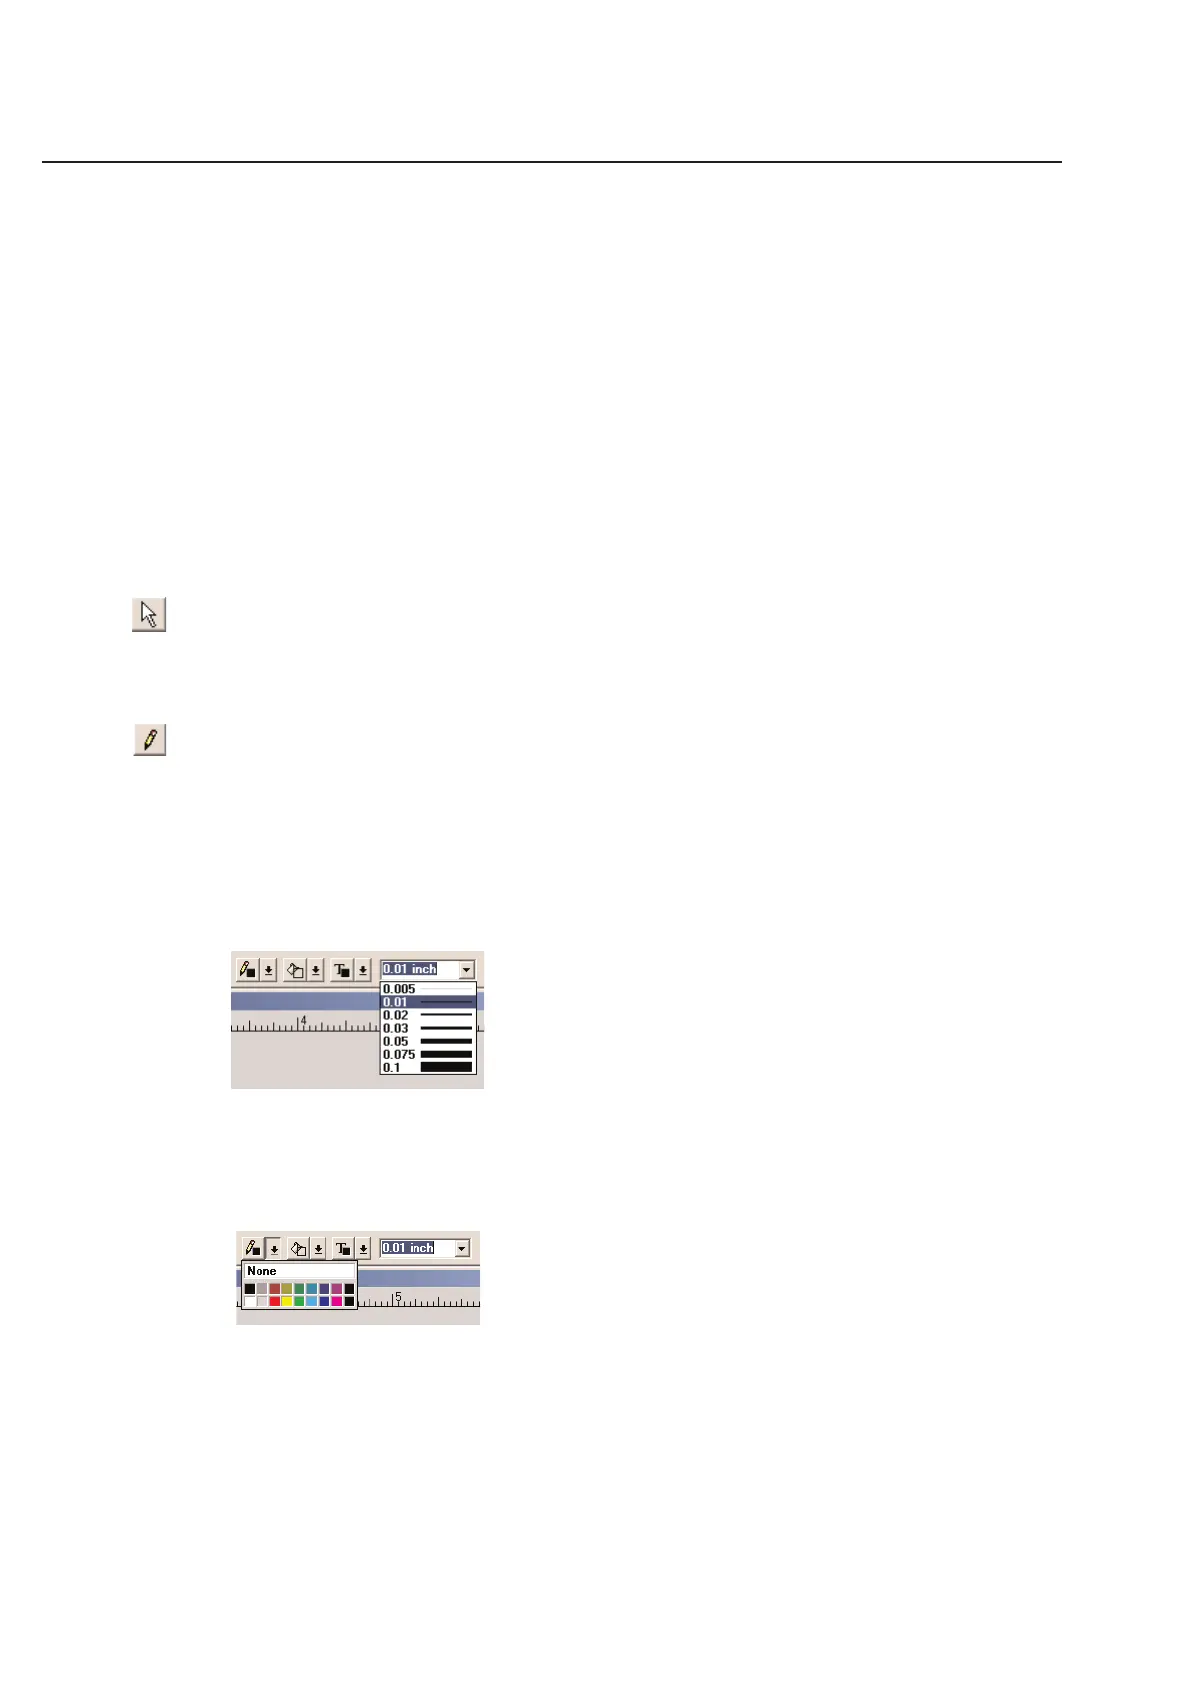
Adjusting Line Width
You can adjust the line width quickly using the Line Width window in the tool bar.
Simply click on the down arrow tab and a menu will appear allowing you to choose the line width.
Adjusting Line Color
You may adjust the line color using the Line Color component of the tool bar.
Simply click on the down arrow tab located next to the icon that looks like a pencil. A palette of colors will appear
from which you may choose a line color. The “None” option has been disabled for the line color. Only the basic 16
system colors are listed.
2-8
Chapter 2: Label Design