3-8
Chapter 3: Table
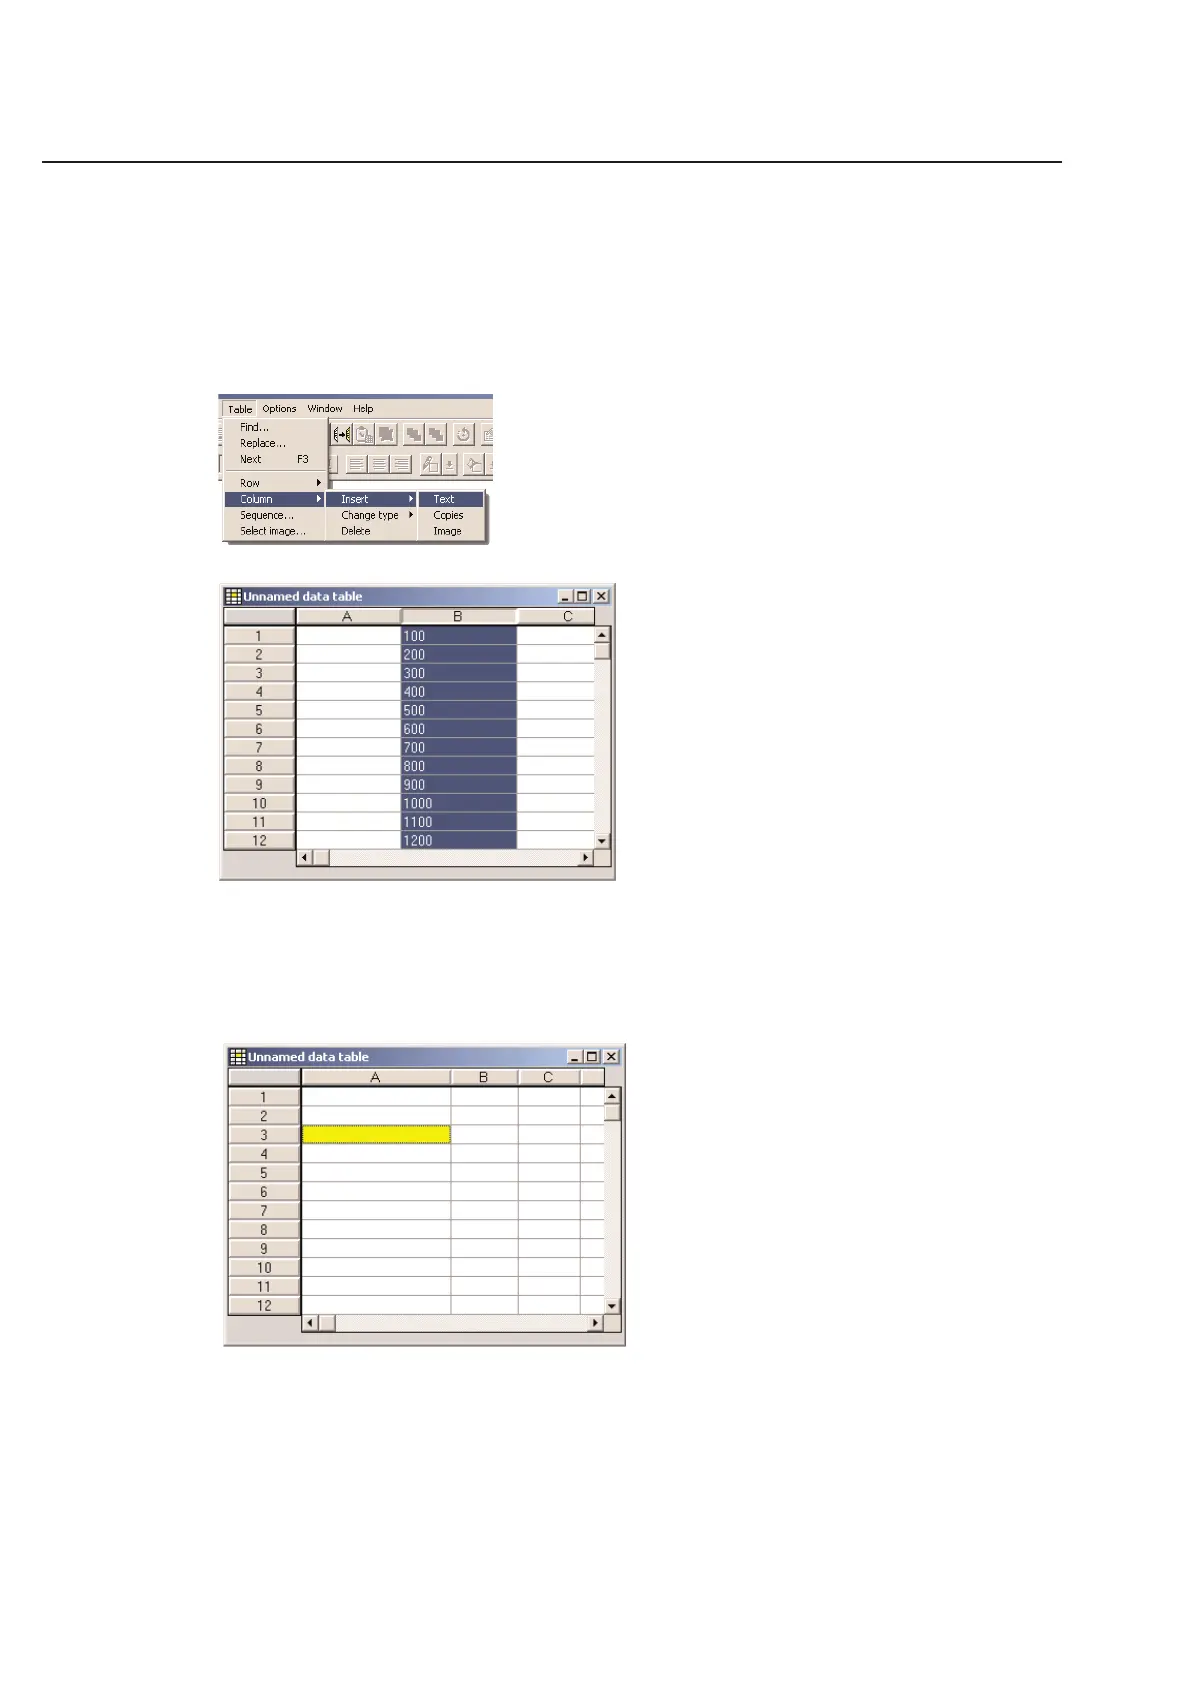
Inserting Columns
You may insert columns in much the same way that rows are added. All the data in the table will shift to the right
after you insert the column(s). The added column(s) can be defined for text, copies, or images. (Refer to the section
on “Column Types” later in this chapter to learn about what each type of column is used for.)
To start, simply select the spaces where you wish to insert blank columns.
Next, go to the Table menu and choose Column/Insert/Text (or whatever type of column you desire)
A new blank column will appear in your table.
Column Width
You can adjust the table column widths by placing your cursor between column header A and column header B. As
seen in the screen capture below, your cursor will change to a right/left move cursor.
To adjust the width, simply click and hold down your mouse button and move your mouse to the right or left. In this
example, if you want to make the “A” column larger, move to the right. If you want to make the “A” column
smaller, move to the left. Release the mouse button when the column looks like you want it to.
To adjust the size of the “B” column, you must put the cursor on the line between the “B” and the “C” headers.
Repeat the process as described above for the rest of your columns.