Image Tool
The image tool is used to create boxes that contain graphics. Images may be either constant or from a table.
Constant images remain the same on every label, while images in the table have the option of changing from label to
label.
New Label Wizard Creation
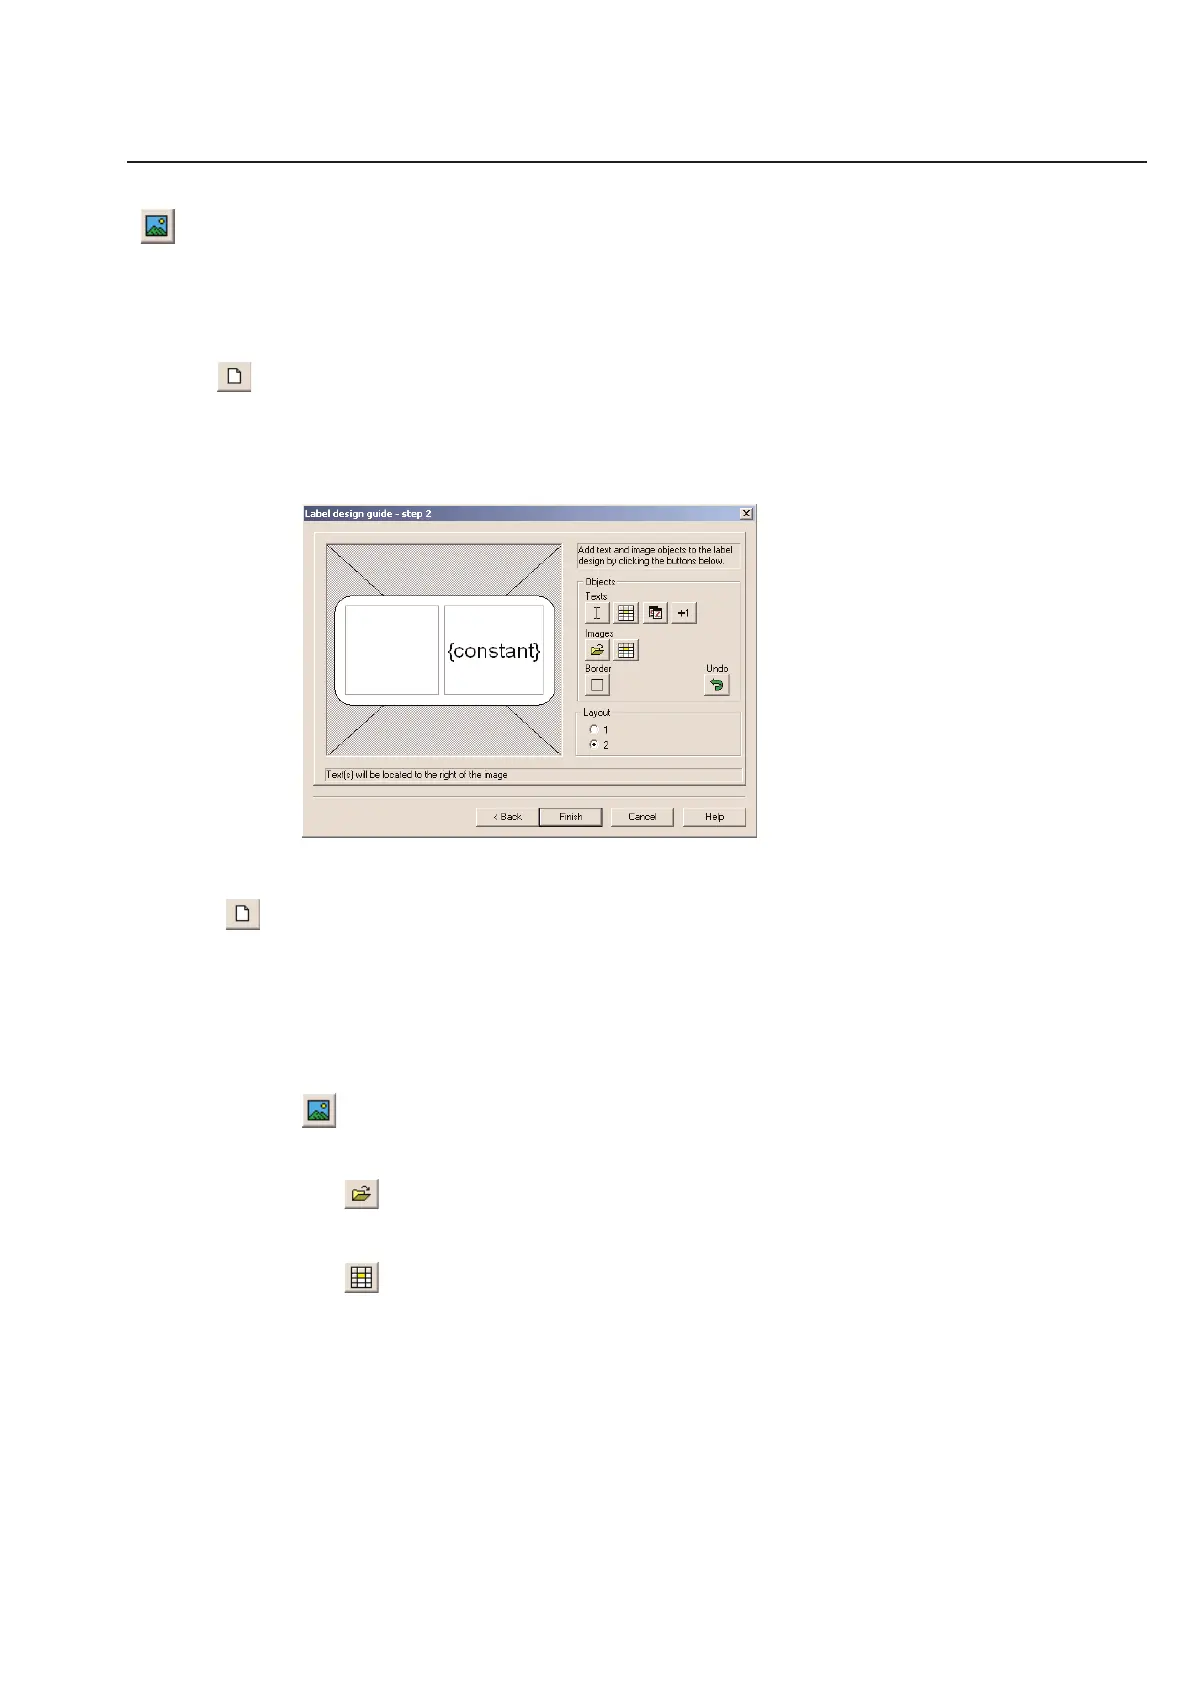
Create a new label design per the instructions on using the label design guide. When you get to step 2, you can
select a constant image or a variable image. In this example, a constant image and a constant text field were created
on one label with layout 2 selected.
Graphic Images Manual Creation
Graphic Images can also be created manually.
Once you have an unnamed label design, you are now ready to add a graphic image to your label.
Once the blank unnamed label design is created, there are a series of icons vertically listed on the far left side of the
screen.
The Graphic icon that appears second to last (near the bottom) of this vertical row appears like a small
mountain. Click once on this icon and you will see two familiar symbols.
Constant Image: One represents a constant image, in which the image will stay the same on every
label.
Variable Image: The other represents a variable image that changes from label to label.
In the case of this example, click on the Constant icon and click OK. You will now notice that your mouse pointer
now appears as + sign. This is your target pointer for creating an image box. Point this + marker to the position, on
the unnamed label design, in which you wish the upper left hand corner of the image to start. Click and hold the left
mouse button down and then drag the mouse to create a box that is as large as you require for the space allowed for
the image. The same thing can be done when adding a constant or variable text field to your design. For our exam-
ple, both fields have been added to a label design to show how multiple field types can be added to one label design.
When this action is completed, your unnamed label design will appear as follows:
2-13
Chapter 2: Label Design