2. System Description and Setup
•
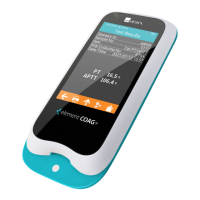
Do not use non-Heska Element COAG
™
cartridges with the Heska Element COAG
™
Analyzer. A non-Heska Element COAG
™
cartridge will not operate in the instrument
and will only generate an error message when used.
•
Before inserting the cartridge, make sure that there are no foreign objects in the
cartridge slot. Test cartridges should slide in easily into the cartridge slot. No force
is needed in the insertion.
•
Do not use excessive force or sharp objects on the Analyzer’s sensitive touch
screen. A light tap is sufficient.
•
The detachable power supply cord set and appliance inlet of the external power
supply are considered as the disconnecting device.
•
The USB interface connector of the Heska Element COAG
™
Analyzer must only
be connected to SELV circuits.
•
The LAN connector must only be connected to 10Base-T/100Base-TX circuits.
External computing devices connected to the USB and LAN interface connectors
have to comply with the standard UL60950 for US and Canada, and IEC60950 for
other countries.
•
Network/USB cables connected to Heska Element COAG
™
Analyzer should not
be more than 3 meters long.
2.2. Unpacking
When unpacking the instrument, be sure that the following guidelines are followed:
• Remove the Heska Element COAG
™
Analyzer from the shipping carton.
•
Place the Analyzer on a leveled surface relatively free of animal hair, dust and
other contaminants.
• Do not place near a window or a heat source.
Make sure that you received the following components:
• Heska Element COAG
™
Analyzer
• Sealing Cartridge
• Power supply with cord
• Power cord
• Heska Element COAG
™
Diagnostic System Operator’s Guide.
•
Quick Guide for each of the tests in the Heska Element COAG
™
test portfolio,
see Part II.
8