3. Configuring the Heska Element COAG
™
Analyzer
1. From the Home Screen, touch Setup (this opens the Settings Menu).
2.
From the Settings Menu, touch to the right of the Regional Setup category (this
opens the Regional Setup Menu).
3. From the Regional Setup, touch to the right of the Keyboard Layout entry field.
4.
To change to a different keyboard layout, touch the button to the right of the
desired layout. A dark purple button indicates the layout chosen.
Figure 3.12
shows the Keyboard Layout screen.
5. To apply the new setting, touch Done.
i
Touching
Cancel
clears any undesired change(s) and touching
Done
confirms
the change(s).
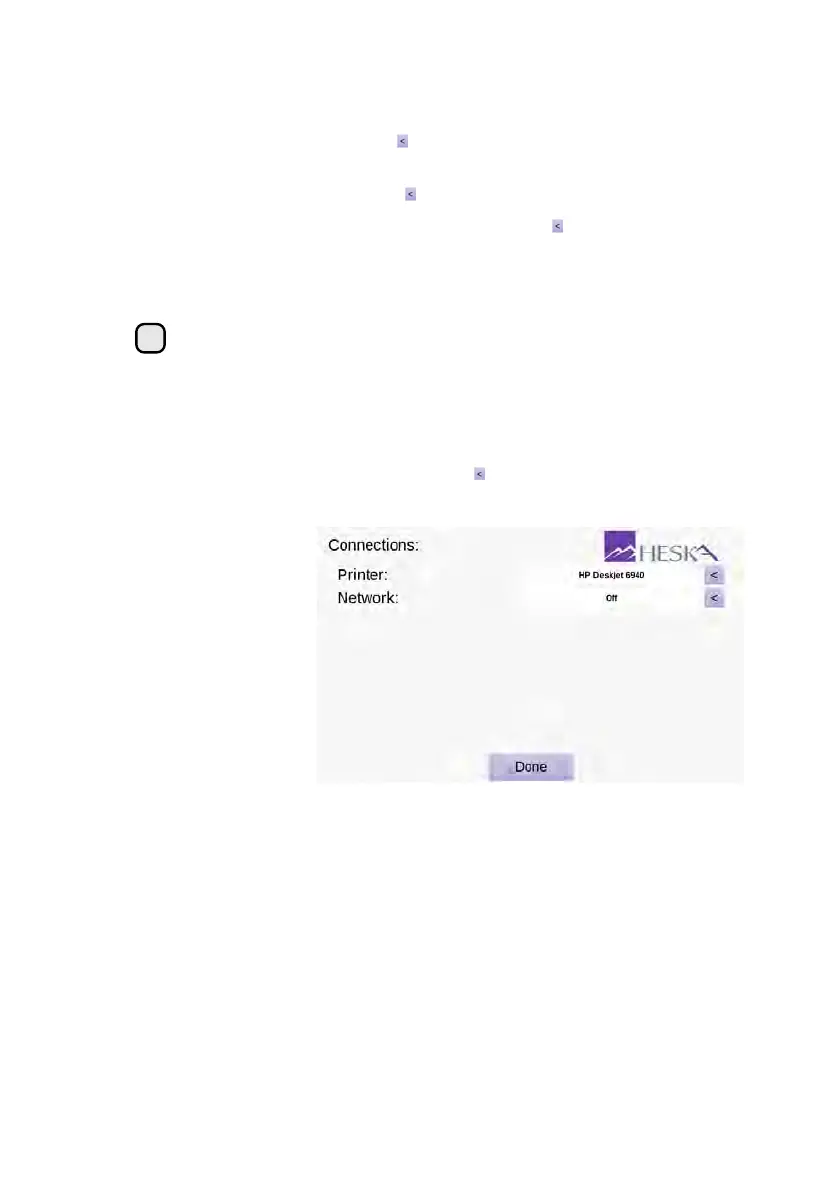
3.2.6. Connections
The Connections screen is shown in
Figure 3.13
. To enter the Connections menu, touch
Setup
on the Analyzer’s Home Screen and the across the Connections category in
the Settings Menu.
Figure 3.13:
Connections
Menu. The currently
selected printer and
the status for the LIS
system is shown in
the text fields in the
connection menu.
Two external connections are available from the Connections screen:
Printer
The name of the currently selected printer is shown in the text field to the right of
the Printer category. Refer to
Section 3.2.6.1
for details regarding how to change
to a different printer.
Network
The network text field shows the status of the build in Laboratory Information
System (LIS). By default, data export to a LIS is disabled. Refer to
Section 3.2.6.2
for details regarding how to configure the Heska Element COAG
™
Analyzer for
use with a LIS.
26