Chapter 2
2.4. Setup
2.3.2. The Heska Element COAG
™
Cartridge
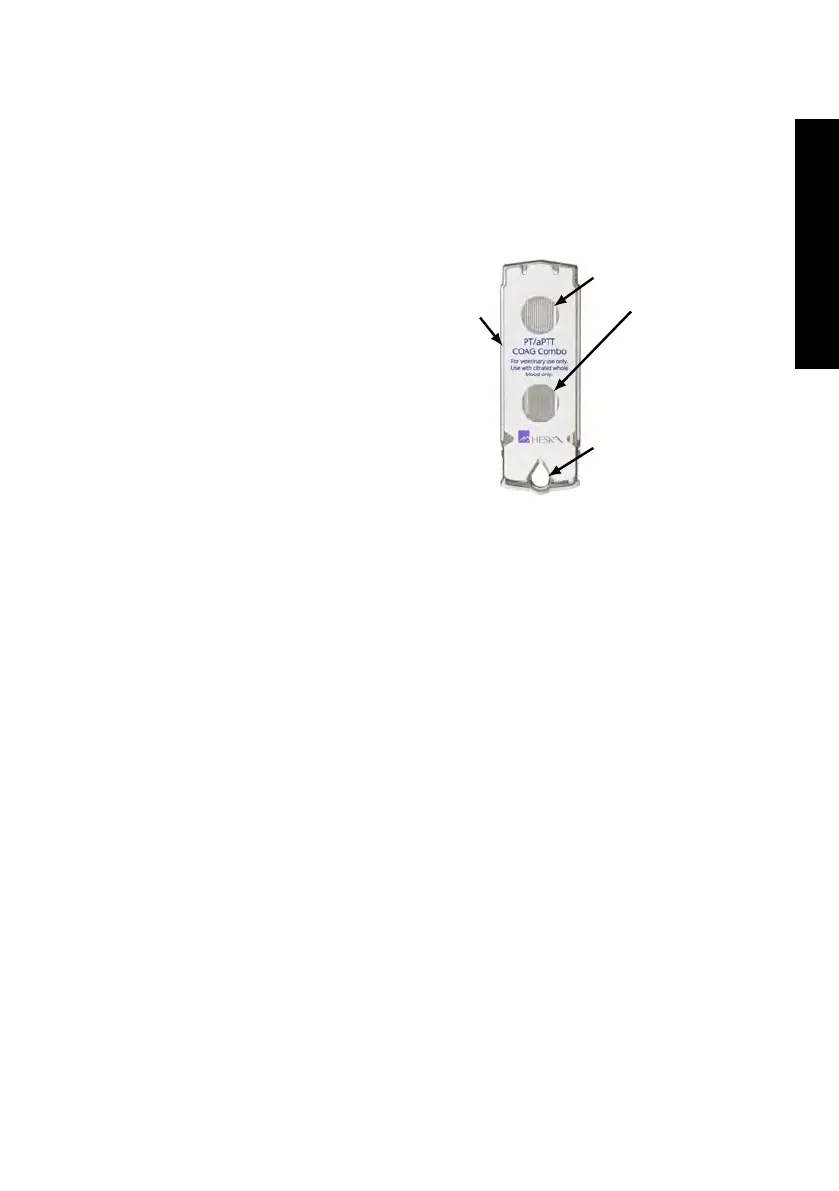
Figure 2.2
shows a typical Heska Element COAG
™
test cartridge. The Heska Element
COAG
™
cartridge has a label that indicates the kind of test the cartridge performs. It
has a sample well where the sample is being added or placed.
Optical
detection
windows
Sample
well
Cartridge
label
Figure 2.2: Heska Element COAG
™
cartridge.
Sample added to the Heska Element
COAG
™
cartridge is drawn by capil-
lary force into the cartridge where it
is mixed with reagents. The microflu-
idic based design makes it possible
to have two independent detection
windows on the cartridge with a sam-
ple volume below
100 µL
. Light pass-
ing through the two optical detection
windows is absorbed by the sample.
Test results are determined by using
the measurement technology of light
absorbance.
The cartridge contains the reagents
necessary to perform the tests. The
user only needs to insert the cartridge
in the instrument’s cartridge slot and
follow the on-screen instructions. A
small sample volume is enough to carry out the tests. Just add an adequate amount of
sample and see the results after a few minutes.
2.4. Setup
Before setting up the Heska Element COAG
™
Analyzer:
• Make sure that the room temperature is between 59 °F to 86 °F (15
◦
C to 30
◦
C).
•
If the instrument has been stored outside the aforementioned temperature range,
let the instrument reach room temperature prior to use.
•
When the abovementioned factors have been met, place the Heska Element
COAG
™
Analyzer on a clean, flat, and stable vibration free surface at least
15 cm
(6 in) from the nearest object.
• Plug the Heska Element COAG
™
Analyzer into the power supply.
•
Turn on the instrument by touching the power button at the back of the instrument.
11