Chapter 6
6.4. Screen Calibration
No. Cause Corrective Action
25 Test error Repeat the test with a new cartridge. Be
sure to follow the on-screen instructions
26 Autoaggulatination detected
Please check the sample quality and re-
peat the test with a new cartridge
27 Flow too slow in cartridge
Please ensure proper dilution of the sam-
ple and repeat test
29 Wrong calibration code
Ensure that the 11-digit code is correct
and that the calbration kit has not expired
30–33 Incorrect cartridge code Retype code from pouch
34 Incorrect cartridge code
Check date setting on instrument and re-
type code from pouch
35 Incorrect cartridge code Check expiry date from pouch
36 Internal error Contact technical service
37–38 Signal distortion Repeat the test with a new cartridge. Be
sure to follow the on-screen instructions
39
Poor sample quality due to hemol-
ysis, RBCs or lipemia
Check sample quality and if needed take
new sample
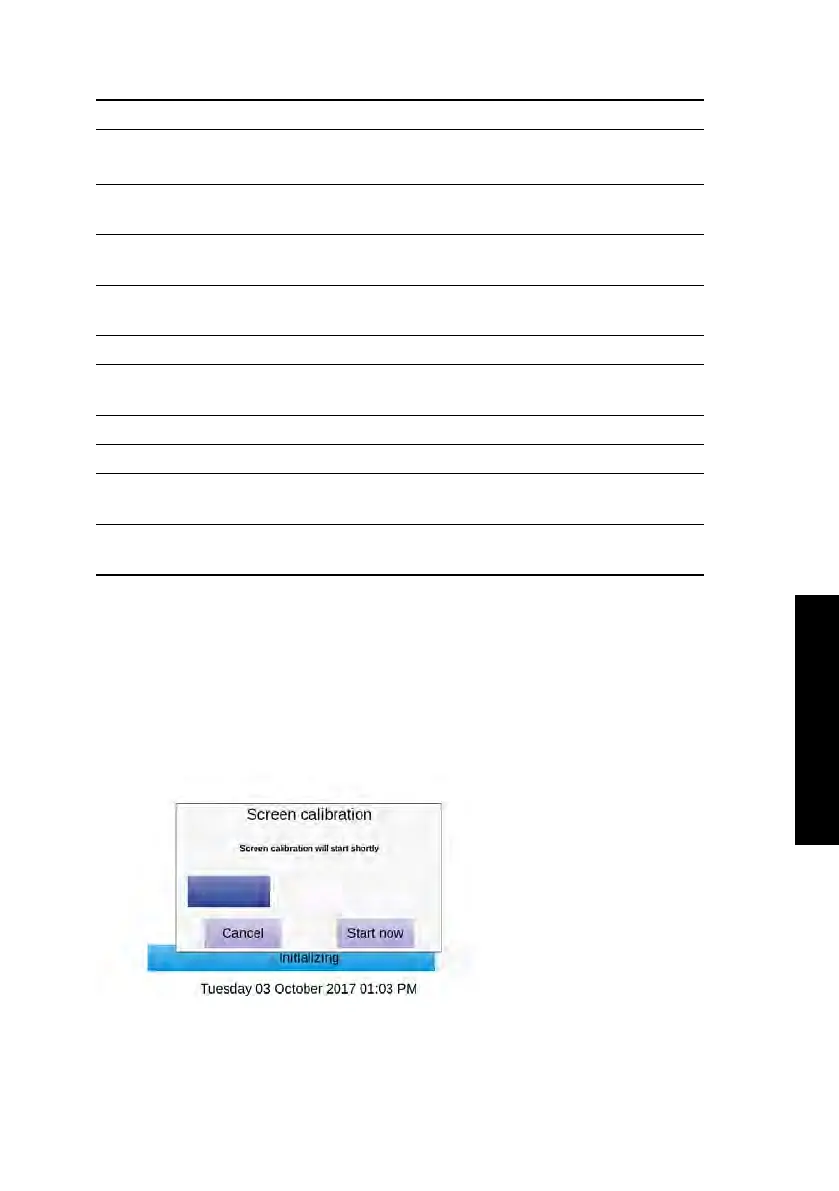
6.4. Screen Calibration
A screen calibration can be initiated by touching the touch screen (anywhere) during start-
up of the Heska Element COAG
™
Analyzer.
Figure 6.1
shows the Screen Calibration
initiation.
Figure 6.1:
Screen
Calibration. A screen
calibration can be
initiated by touching
the Heska Element
COAG
™
Analyzer’s
touch screen during
start-up.
45