3. Configuring the Heska Element COAG
™
Analyzer
1.
Touch the purple arrow button across the Clinic Info field on the Settings Menu.
This opens the Clinic Info screen shown in Figure 3.3.
2. Edit each field by touching across each field.
3. Use the on-screen keyboard to type in relevant information.
4.
When finished, touch
Done
. To clear any undesired changes and to start anew,
touch Cancel.
5. Repeat item 2 to 4 for each field that needs changing.
6. When all changes are applied, touch Done to return to the Settings Menu.
i
Touching
Cancel
clears any undesired change(s) and touching
Done
confirms
the change(s).
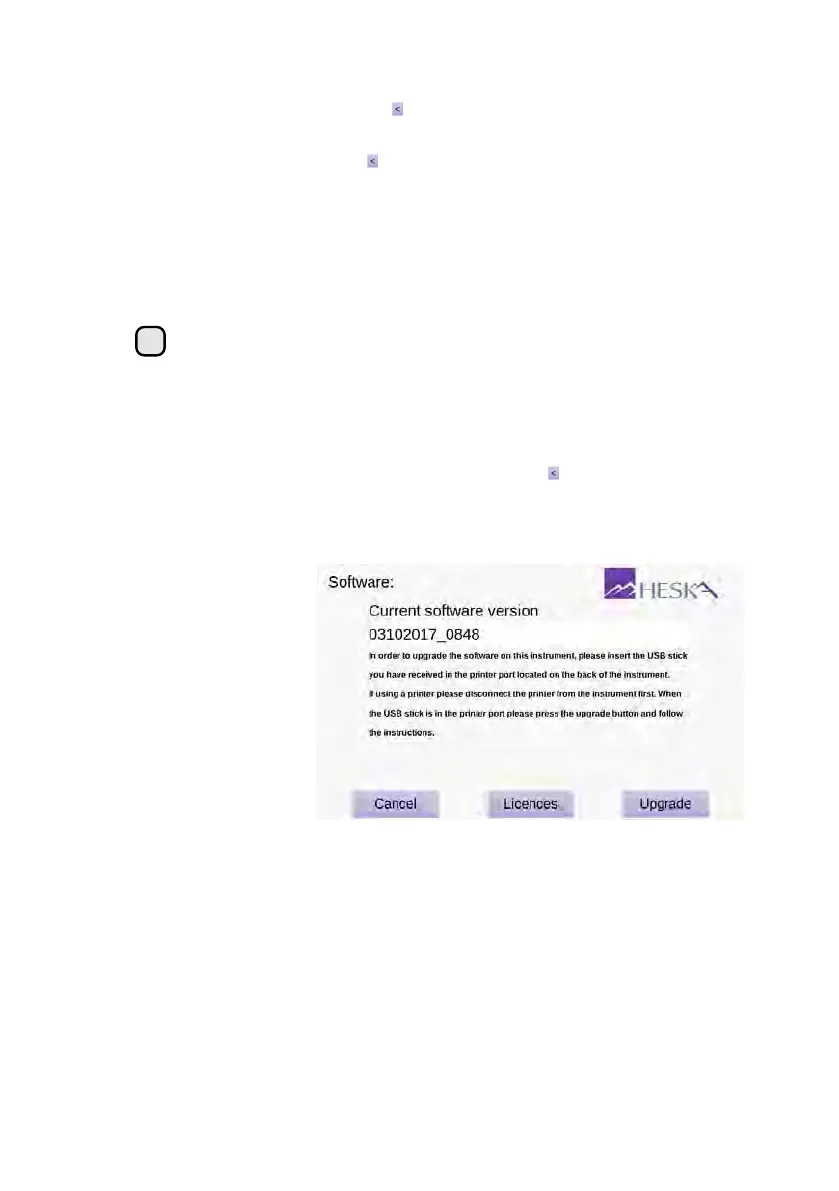
3.2.2. Software Version/Upgrade
The Software screen is shown in
Figure 3.4
. To enter the Software screen touch the
Setup
button on the Analyzer’s Home Screen and touch the to the right of the Software
v. category in the Settings Menu. The current version of the software installed on the
instrument is indicated on the Settings Menu screen and is also printed in the Current
software version text field on the Software screen.
Figure 3.4:
Software
Version Screen. The
currently installed soft-
ware version is printed
in the Current software
version text field. A
software upgrade can
be applied by touching
the Upgrade button.
To upgrade the Analyzer software:
1.
Unplug any device that may be plugged into the USB port at the back of the
Analyzer.
2.
Insert the installer USB memory stick into the USB port at the back of the instrument
and wait 10 seconds for the Analyzer to register the memory stick.
3.
Touch
Upgrade
on the lower right hand side of the screen of the Software screen.
16