MACH 100
Release
07/09
25
Warning
If the device is installed in a 19" switch cabinet without sliding/
mounting rails, increased vibration can cause damage to the de-
vice and/or its modules.
For more information on sliding/mounting rails and how to install them,
please contact your switch cabinet manufacturer.
Install the sliding/mounting rails in the 19" switch cabinet as instructed
by the manufacturer, and make sure the device is resting on both rails.
Figure 14: Installation in the switch cabinet with sliding/mounting rails
1 - MACH 100 device
2 - Chassis runner
3 - 19“ rack
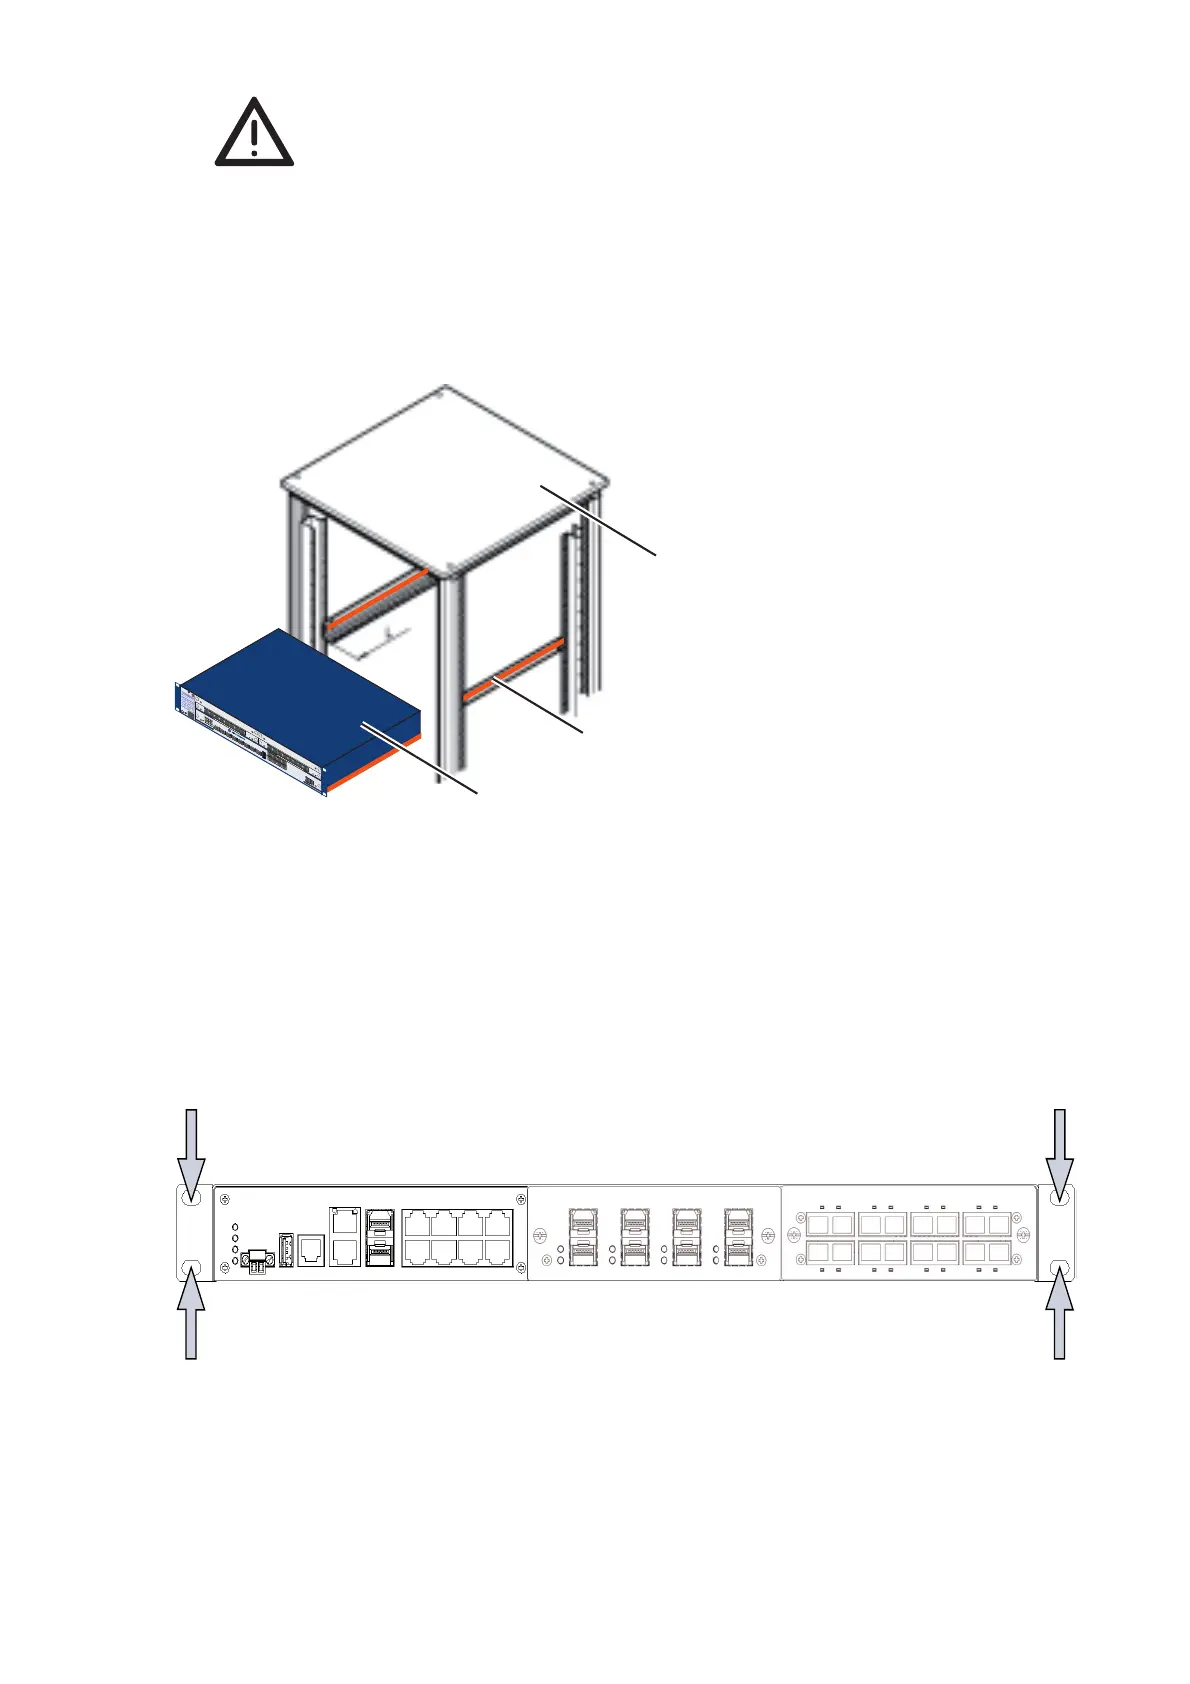
On delivery, two brackets are attached to the sides of the device (see
figure below).
Figure 15: Mounting the MACH 100 in the 19" cabinet
Fasten the device by screwing the brackets to the switch cabinet.
P
1
LS
DA
2
3
4
5
6
7
8
M4-8TP-RJ45
LS
DA
LS DA
LS
D
A
L
S
DA
L
S
DA
LS
DA
LS
DA
R
1
LS
D
A
2
3
4
5
6
7
8
LS
D
A
LS
D
A
LS
D
A
LS
DA
LS
DA
L
S
D
A
LS DA
P
1
LS/DA
2
3
4
5
6
7
8
1
4
7
2
5
8
3
6
M4
-
F
A
ST 8
SF
P
P
1
2
3
4
5
6
7
8
1
4
7
2
5
8
3
6
P
P1
P2
P3
P4
RM
R
L
1
RL
2
FAN
R
UN
L/D
FDX
1000
AN
T
P/
F
O
RING
PORT
S
T
B
Y
L
E
D
TE
S
T
2
1
1
2
3
4
L
ED
MEDIA SLOTS
M4-AIR
S
LOT
.
PORT
USB
V.24
6.
1
6.2
6.3
6
.
4
6.5
6.
6
6.7
6.8
S
EL
ECT
LED
MACH 4002 48+
4
G
FAULT
RL2
LS/DA 6.1
RL1
LS/DA
M4-FAST 8TP-RJ45-PoE
M4-F
A
ST 8
S
FP
6
.1
6.
2
6.3
6.4 6
.
5
6.6
6.7
6.8
2
3
1
MACH 100
LS DA
USB
V.24
MACH 1000
2
1
LS DA
3
4
9
10
P
StandByRM
FAULT
R1
R2
5
6
7
8
13
14
11
12
17
18
15
16
21
22
19
20
25
26
23
24
LS DA
LS DA
LS DA
LS DA