10 Servicing
323
10
SMGB0077 rev.0 - 01/2013
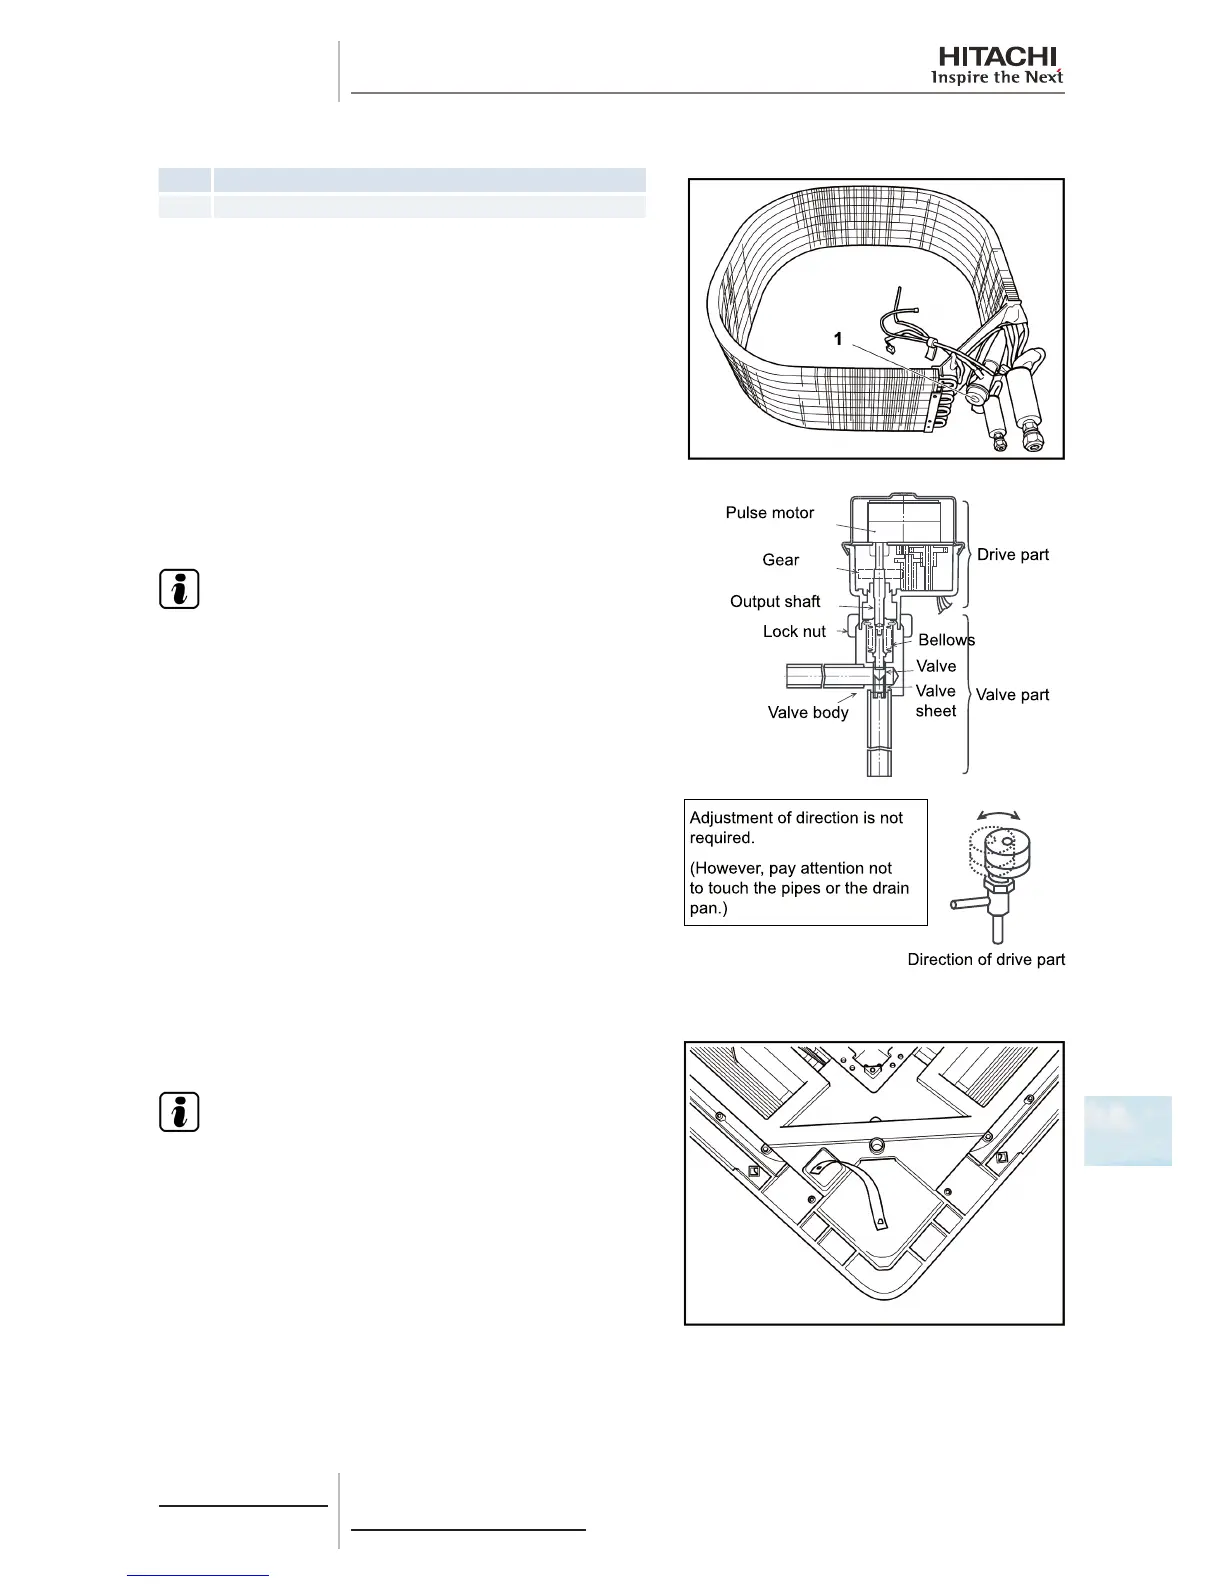
10.2.12 Removal of the electronic expansion valve coil
Nº Part
1 Expansion valve
Remove the optional air panel in line with the instructions given in
chapter Removal of the optional air panel.
Remove the fan duct in line with the instructions given in chapter
Bellmouth removal.
Remove the drain pan as indicated in chapter Removal of the
drain pan.
Remove the electronic expansion valve butyl sheet.
Secure the body of the valve using an appropriate wrench and
loosen the nut with another wrench, turning it anti-clockwise.
N O T E
Do not hold onto the motor when loosening the nut with a
wrench. The base of the transmission part could become
loose and break.
Loosen the nut several turns to release the transmission part from
the bolt.
Prepare the new transmission part (spare part) with the position of
the transmission wheel (transmission bolt) already adjusted.
N O T E
• Pay attention to removal while replacing and prevent dust
and foreign particles, etc. from entering it (the exposed
part during removal is the mechanical part of the valve).
• Do not damage the valve joint with tools.
Fit the transmission part to the body of the valve, hold onto both
and make sure their axes coincide before tting the nut to the
valve body bolt.
Tighten the nut by hand and apply the torque value: 12 Nm - 15 Nm.
 Loading...