2 Unit installation
40
SMGB0077 rev.0 - 01/2013
For ceilings without panels.
Once adjusted, tighten the suspension bracket nuts.
Apply a thread-locking product to the bolts and nuts to prevent them from loosening. Otherwise, abnormal noise may be
caused by mechanical vibrations and the indoor unit may become loose.
2.3.3 Accessories supplied with the air panel: P-N23DWA / P-N46DWA
Check that the following accessories are supplied with the unit.
N O T E
Please contact your HITACHI distributor if any of the accessories has not been supplied with the unit.
Accessory Appearance Quantity Purpose
Long screw (A) (M6 x 50)
4 For panel xing.
Long screw (B) (M6 x 30) 2
For panel xing (only for air panel
P-N46DNA)
2.3.4 Air panel installation
C A U T I O N
Take care while the air panel is unpacked and protect it by placing it on insulating or soft material so as not to
scratch the sealant insulation.
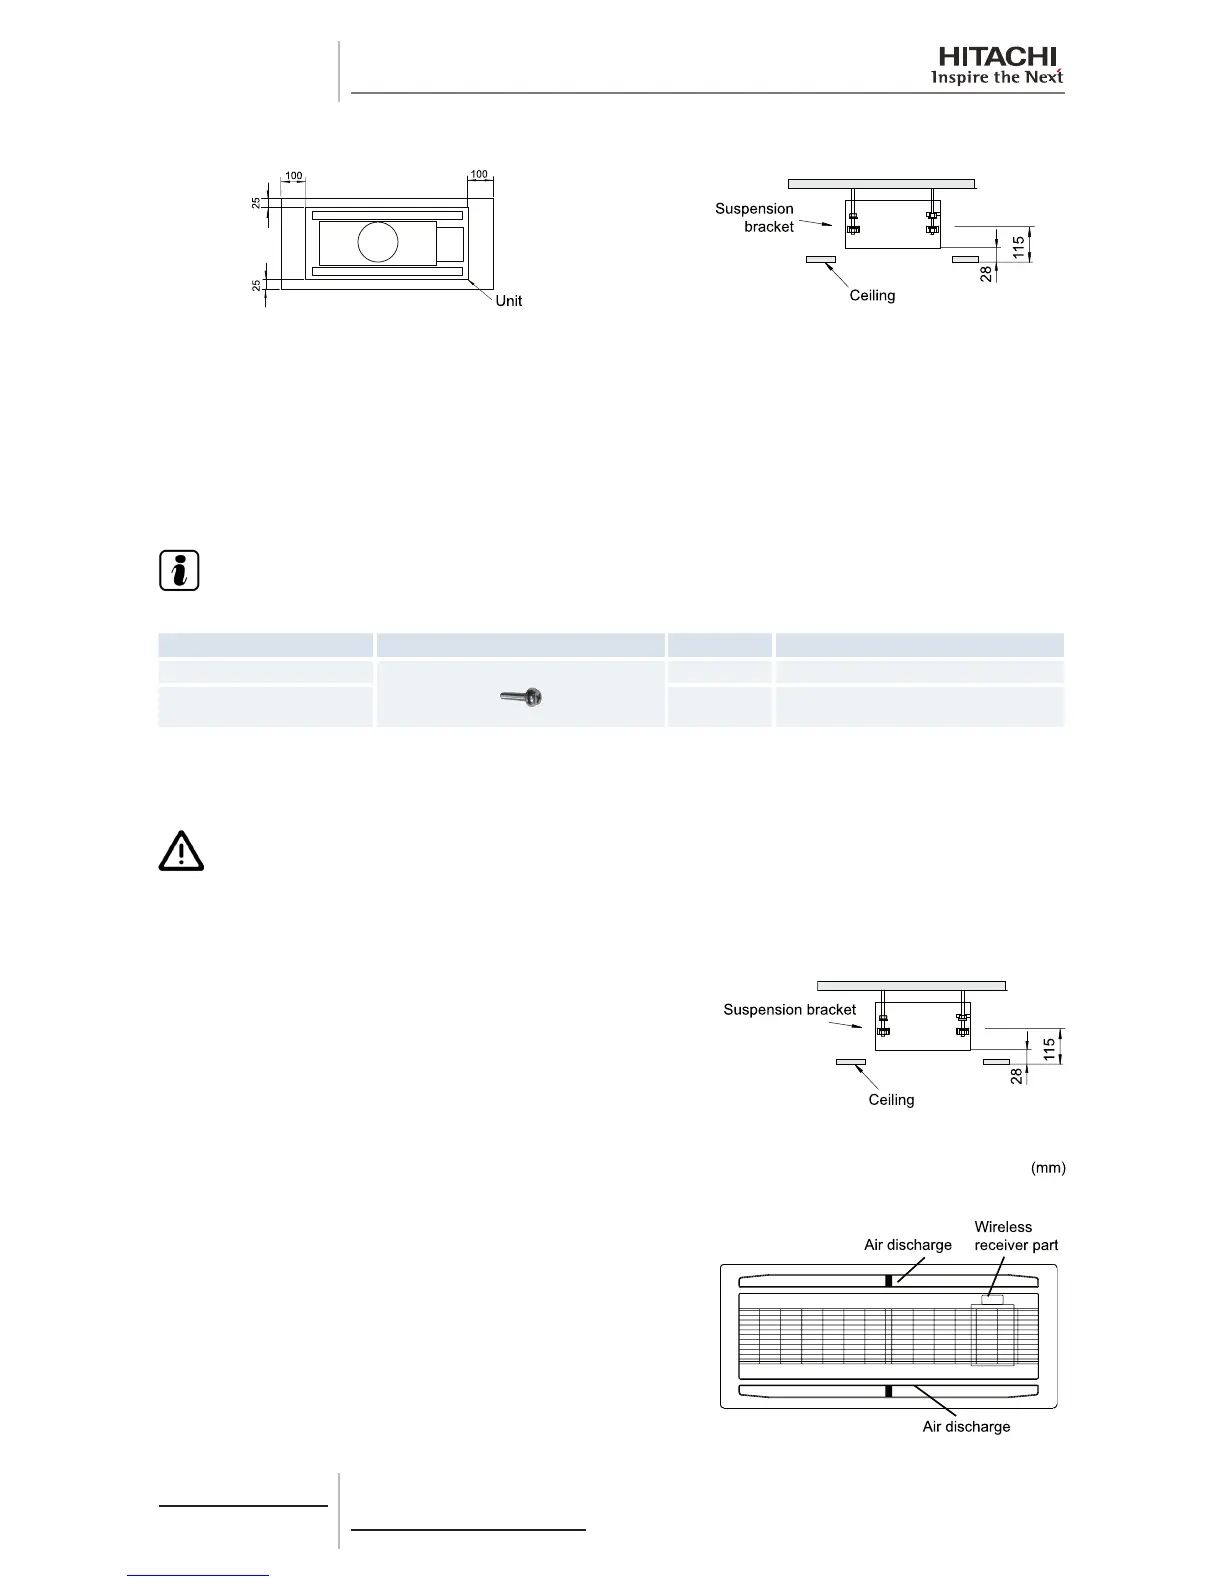
Location of the suspension brackets
Make sure the suspension brackets on the indoor unit are
approximately 115 mm in height above the false ceiling.
 Loading...