10 Servicing
367
10
SMGB0077 rev.0 - 01/2013
N O T E
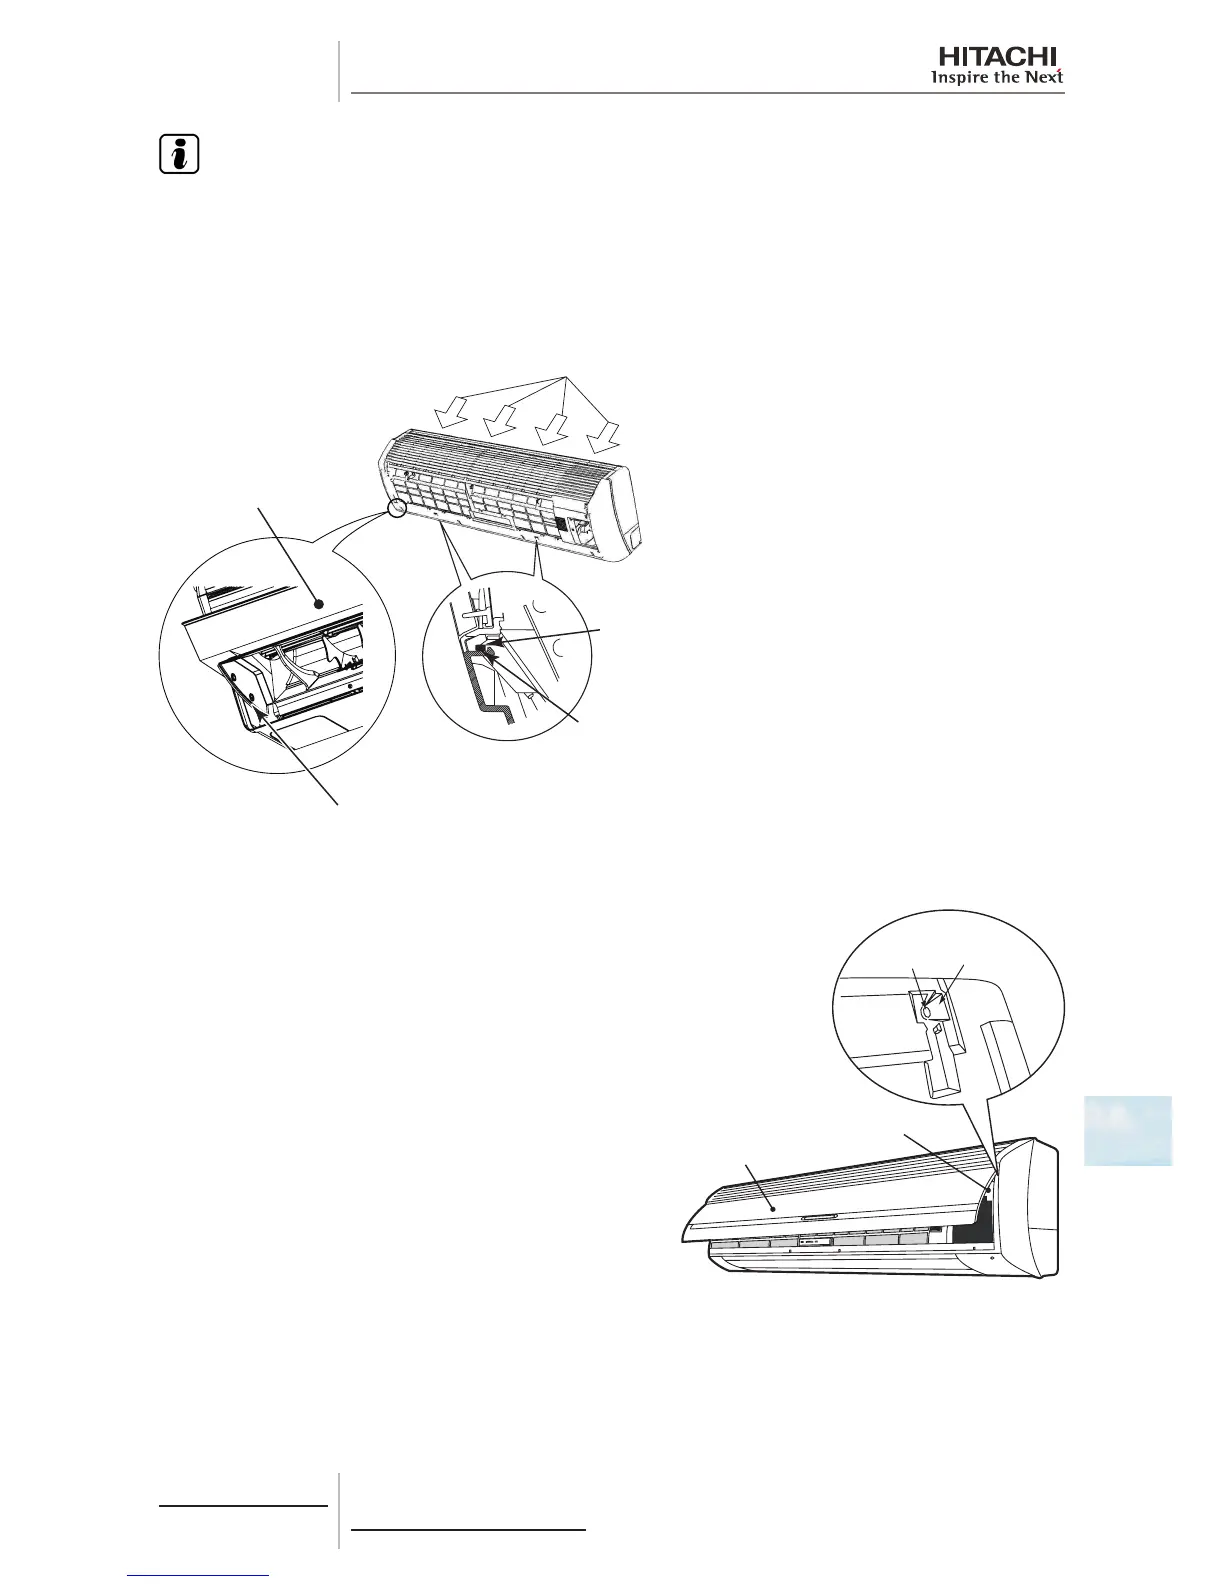
Make sure that there is no gap nor lap between the front panel and the left side of the drain pan. If there is a gap there, an
air leakage and dew condensation may occur and the dew may drop on the front panel.
6 Tighten 3 screws and attach 3 bushes. And then mount the air lter.
7 Insert completely the arm shafts of left and right side of the panel into the holes along the guide of the front panel. After
the at panel is attached properly, close the at panel.
ᄩῪ ࡨᚲ
Catches on Lower Side
of Front Panel
Make sure there is no lap between the
front panel and the left side of the
drain pan.
Drain Pan Projection
Portion for Catches
side of the unit into the holes
on the front panel.
Drain Pan
Attaching at panel
Insert completely the left and right arm shafts of at panel into
the holes along the guide at the front panel. After the at panel is
attached completely, insert the catches for air lter to x.
Flat panel
Front panel
Hole
Guide at
front panel
 Loading...