10 Servicing
376
SMGB0077 rev.0 - 01/2013
For RPK-(2.0-4.0)FSN(H)3M
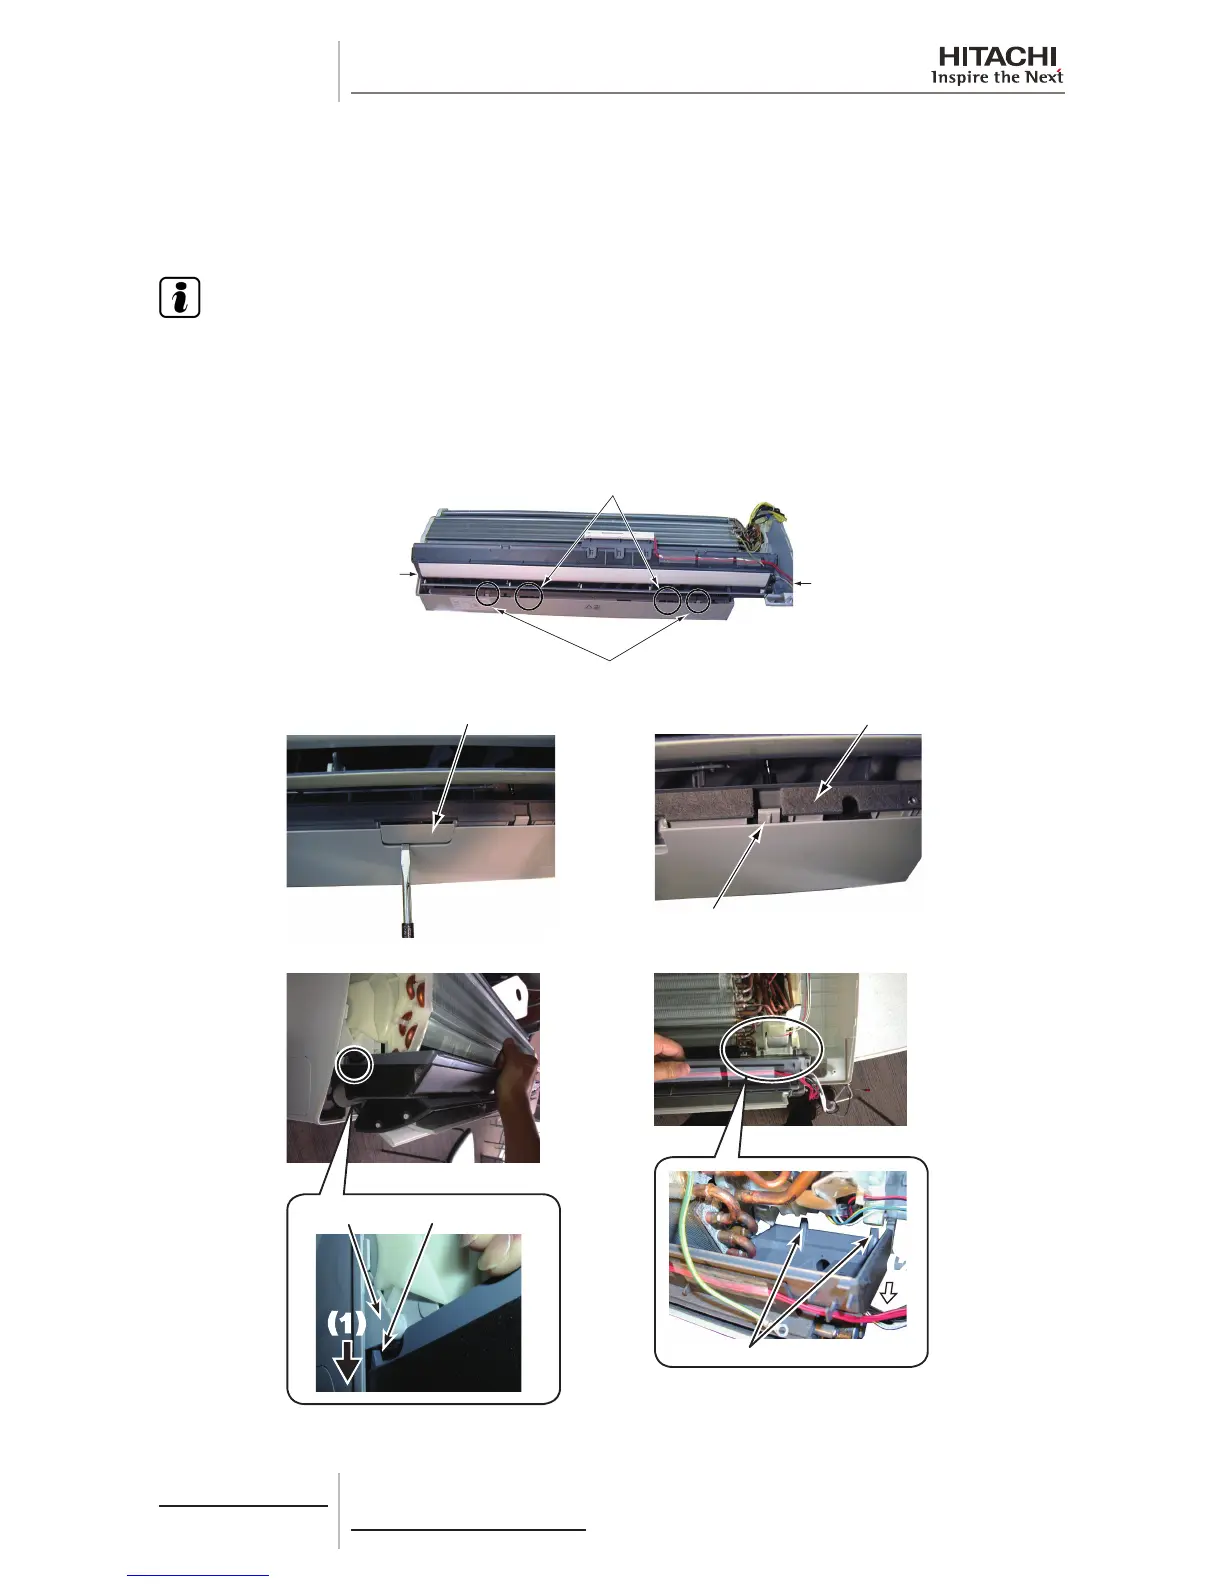
1 Remove the front panel according to the “Removing Front Panel” chapter.
2 Remove the electrical box according to the “Removing Electrical Box” chapter.
3 Remove the louver cover (A) (2 portions) attached to the lower part of the cabinet with a slotted screwdriver.
4 Remove 2 hooks (B) for the drain pan.
N O T E :
Beforeremovingthedrainpan,checkthatthedrainhoseisnotxed.Ifthedrainhoseisrmlyxed,thedrainpancannot
be removed.
5 Remove 3 catches at (C) and (D) in the following procedure. Apply a force in the direction of the arrow (1) and release
1 catch (C) xing the drain pan to the cabinet. Then apply a force in the direction of the arrow (2) and release 2 catches
(D). Remove the drain pan.
6 When mounting the drain pan, mount it in the reverse procedure.
(C) (D)
᳓ฃ࿕ቯῪ
Catches for Drain Pan
Note:
The catches are hidden from view by
the fan motor. The figure above shows
an example with the fan motor removed.
Cabinet
Catches for Drain Pan
1
( )
2
( )
 Loading...