18
Installing the Pan and Tilt Camera Assembly and Lower Dome
Installing the Pan and Tilt Camera Assembly
1. Set the switches on the printed circuit board as required for your system
configuration. See Chapter 2, Switch Settings.
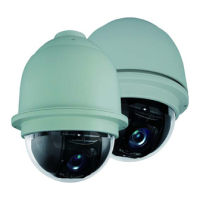
Figure 1-1 ACUIX Pan and Tilt Camera Assembly
2. Line up the alignment label (yellow label with black dot) below the locking guide in
the housing with the alignment label (yellow label with black dot) on the locking rail
on the pan and tilt camera assembly.
HDCFP0000 ACUIX Pan and Tilt with 26X WDR & TDN, PAL Camera
HDCGN0000 ACUIX Pan and Tilt with 35X WDR & TDN w/ EIS, NTSC Camera
HDCGP0000 ACUIX Pan and Tilt with 35X WDR & TDN w/ EIS, PAL Camera
Table 1-1 ACUIX Pan and Tilt Camera Assembly Model Numbers
Model Number Description
Printed Circuit Board (Set Switches)
Camera
 Loading...