When replacing screws on any plastic part, always begin
by gently twisting the screw in anticlockwise with your hand, until the
screw finds the thread path and clicks, and then twisting the screw in
clockwise with your hand, before using a screwdriver. This is to avoid
crossĆthreading. Do not overĆtighten the screws.
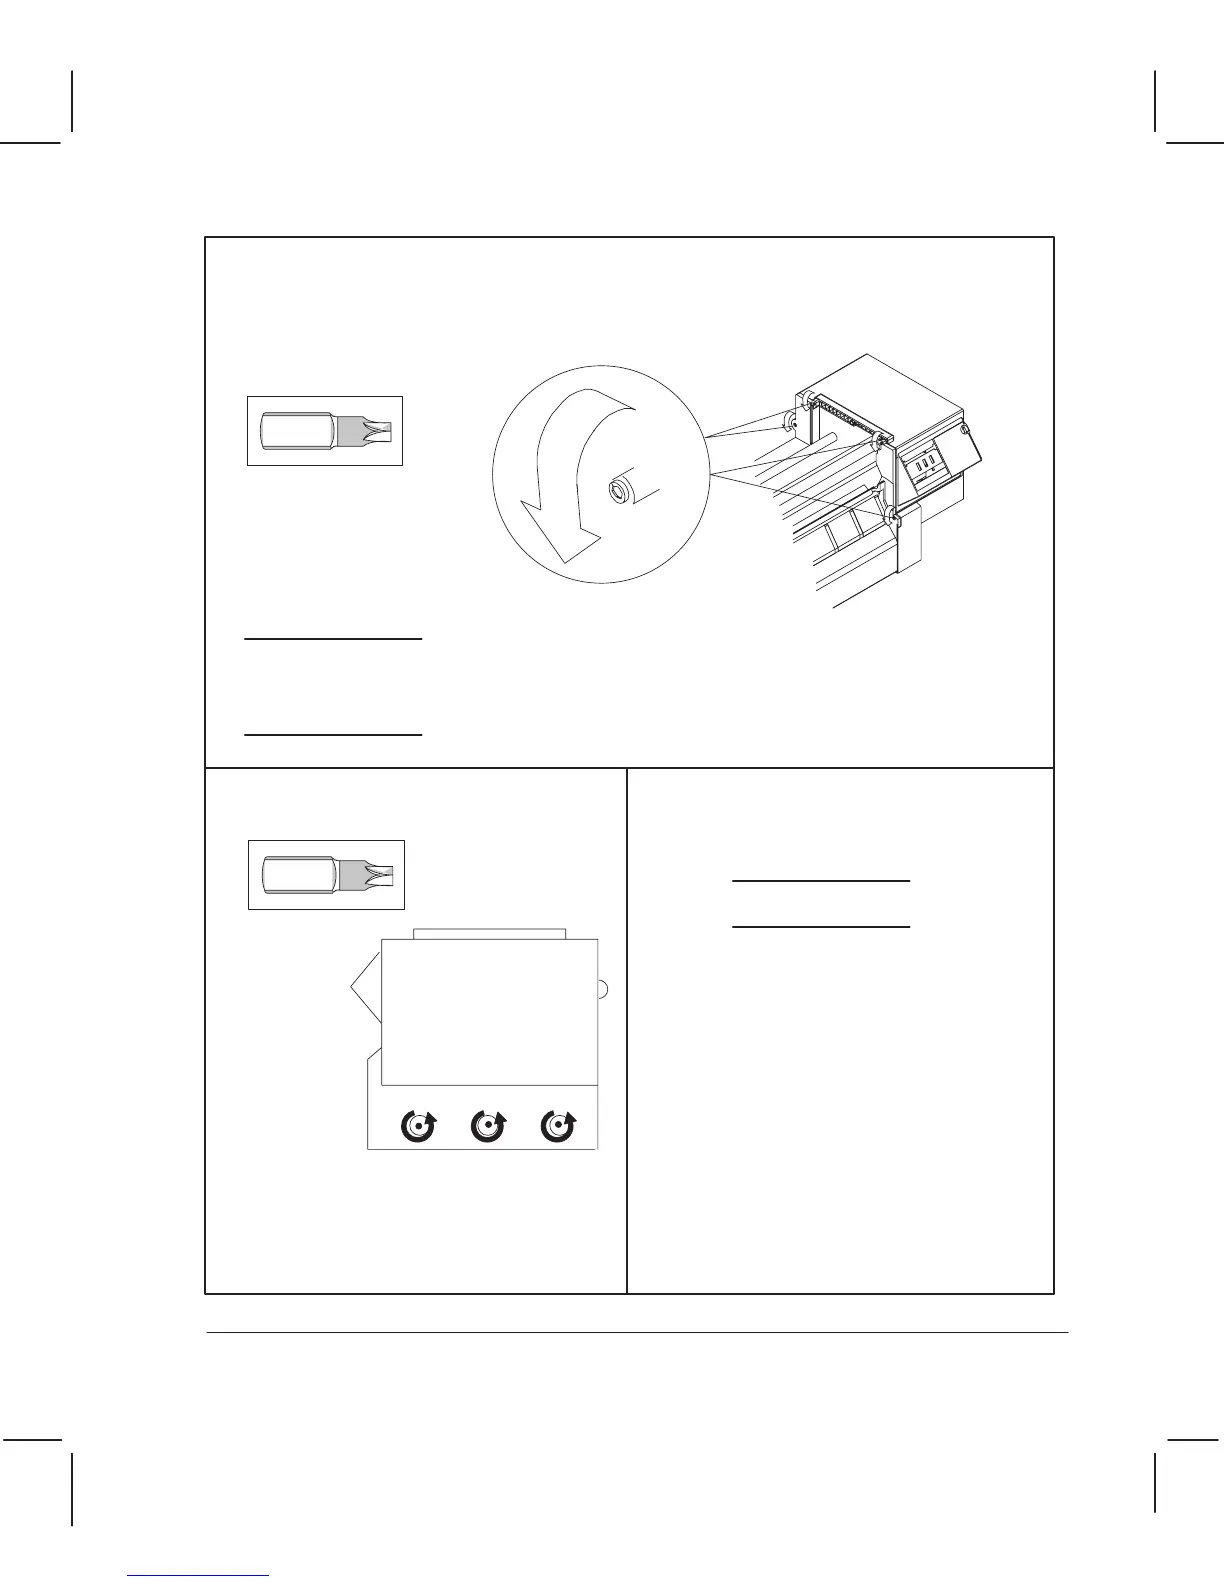
Remove the three screws from the right
side of the right endcover.
Remove the window page 6Ć15, and the center cover page 6Ć16.
Remove the two screws on the right front trim and the two screws on the right back trim.
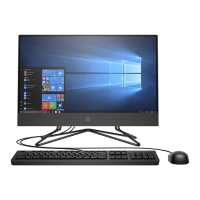
CAUTION
Torx-15
Torx-15
If the plotter is attached to a plotter
stand, the two rightĆhand screws
that attach the plotter to the stand.
Maintaining an even pressure on the top
and bottom of the endcover, pull it to the
right, away from the plotter.
CAUTION
Do not stress or apply pressure to the
frontĆpanel assembly.
6Ć19 Removal and ReplacementC3187Ć90000