Remove the window page 6Ć15.
Remove the center cover page 6Ć16.
Remove the left endcover page 6Ć18.
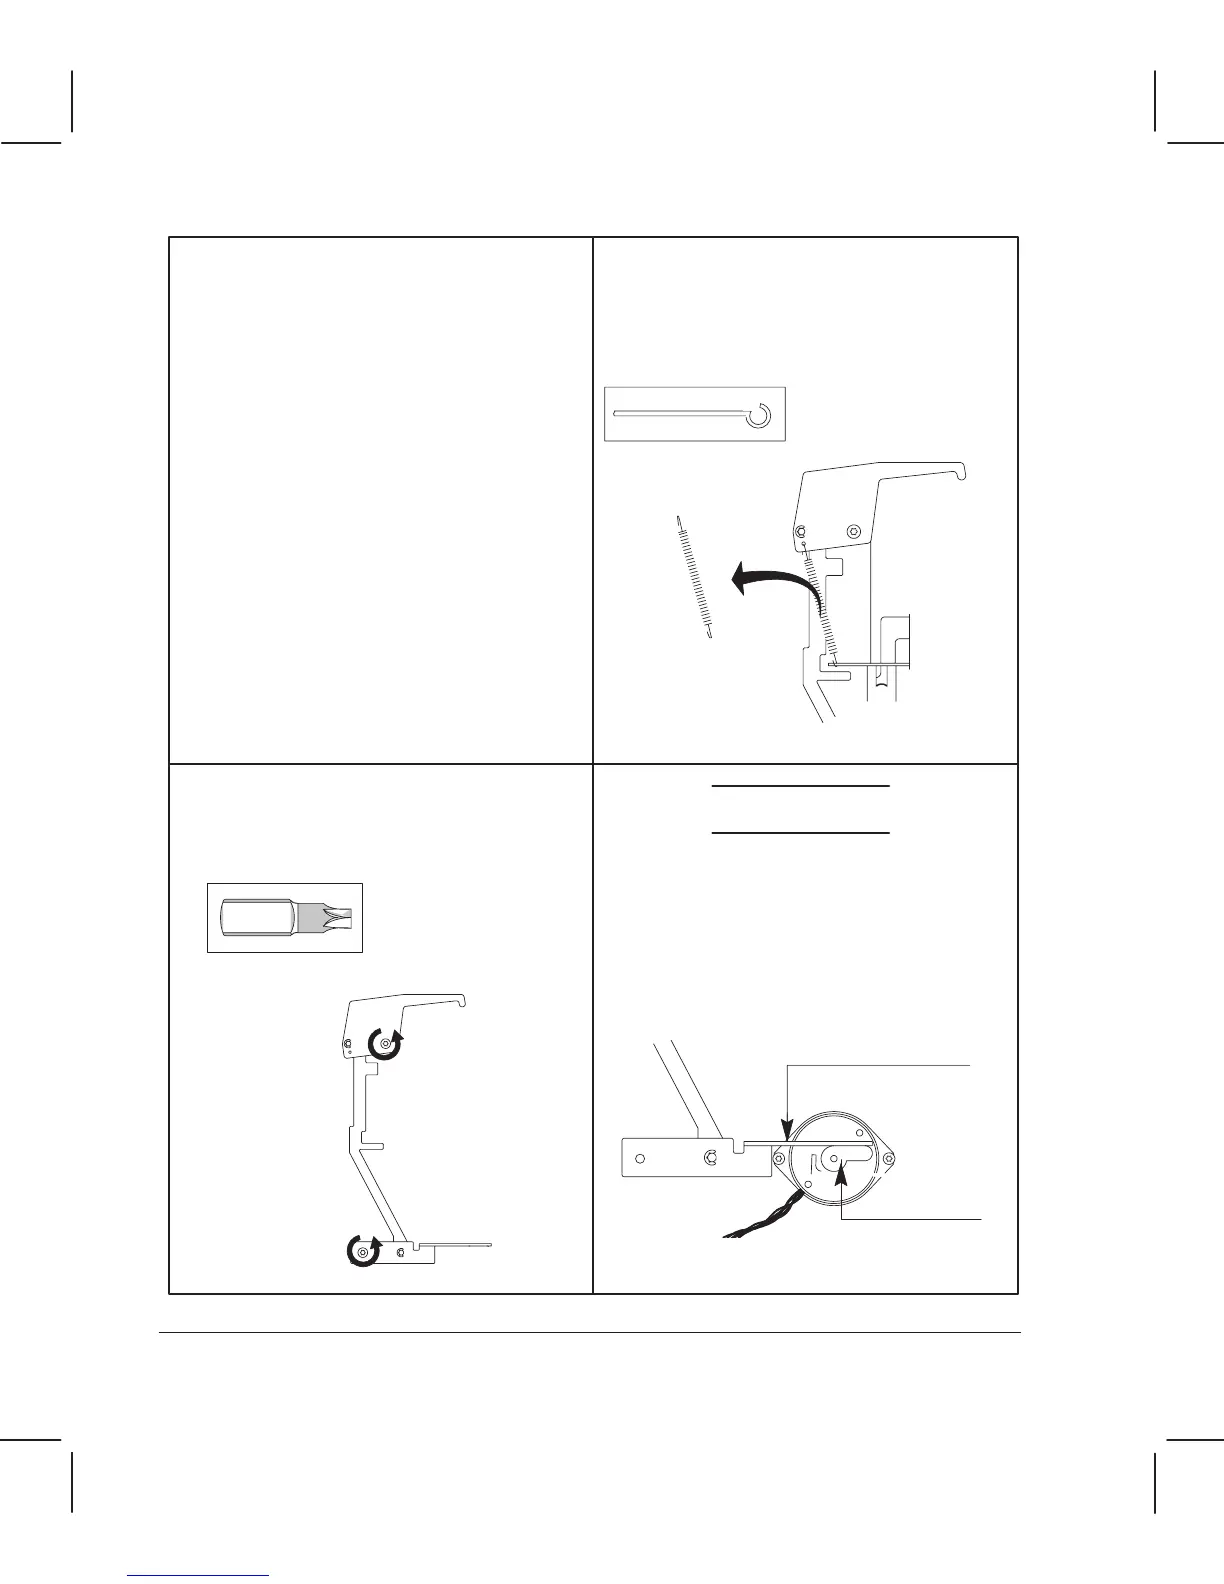
Detach the linkage spring from the
YĆtensioner bracket.
Reassembling:
Remove the two shoulder screws that
attach the automatic cartridgeĆadjust
linkage to the left sideplate and lift the
linkage clear of the plotter.
CAUTION
Do not crossĆthread or
overĆtighten the screws.
Reassembling:
Stepper-motor
shaft
Bottom arm
of linkage
Torx-15
6Ć20 Removal and Replacement
C3187Ć90000