The order in which you replace the screws on the entry platen is important.
If the plotter is attached to a support, detach it.
Turn the plotter on its back.
Reconnect the media sensor to the entry platen (see also page 6Ć26).
Position the entry platen between the two sideplates.
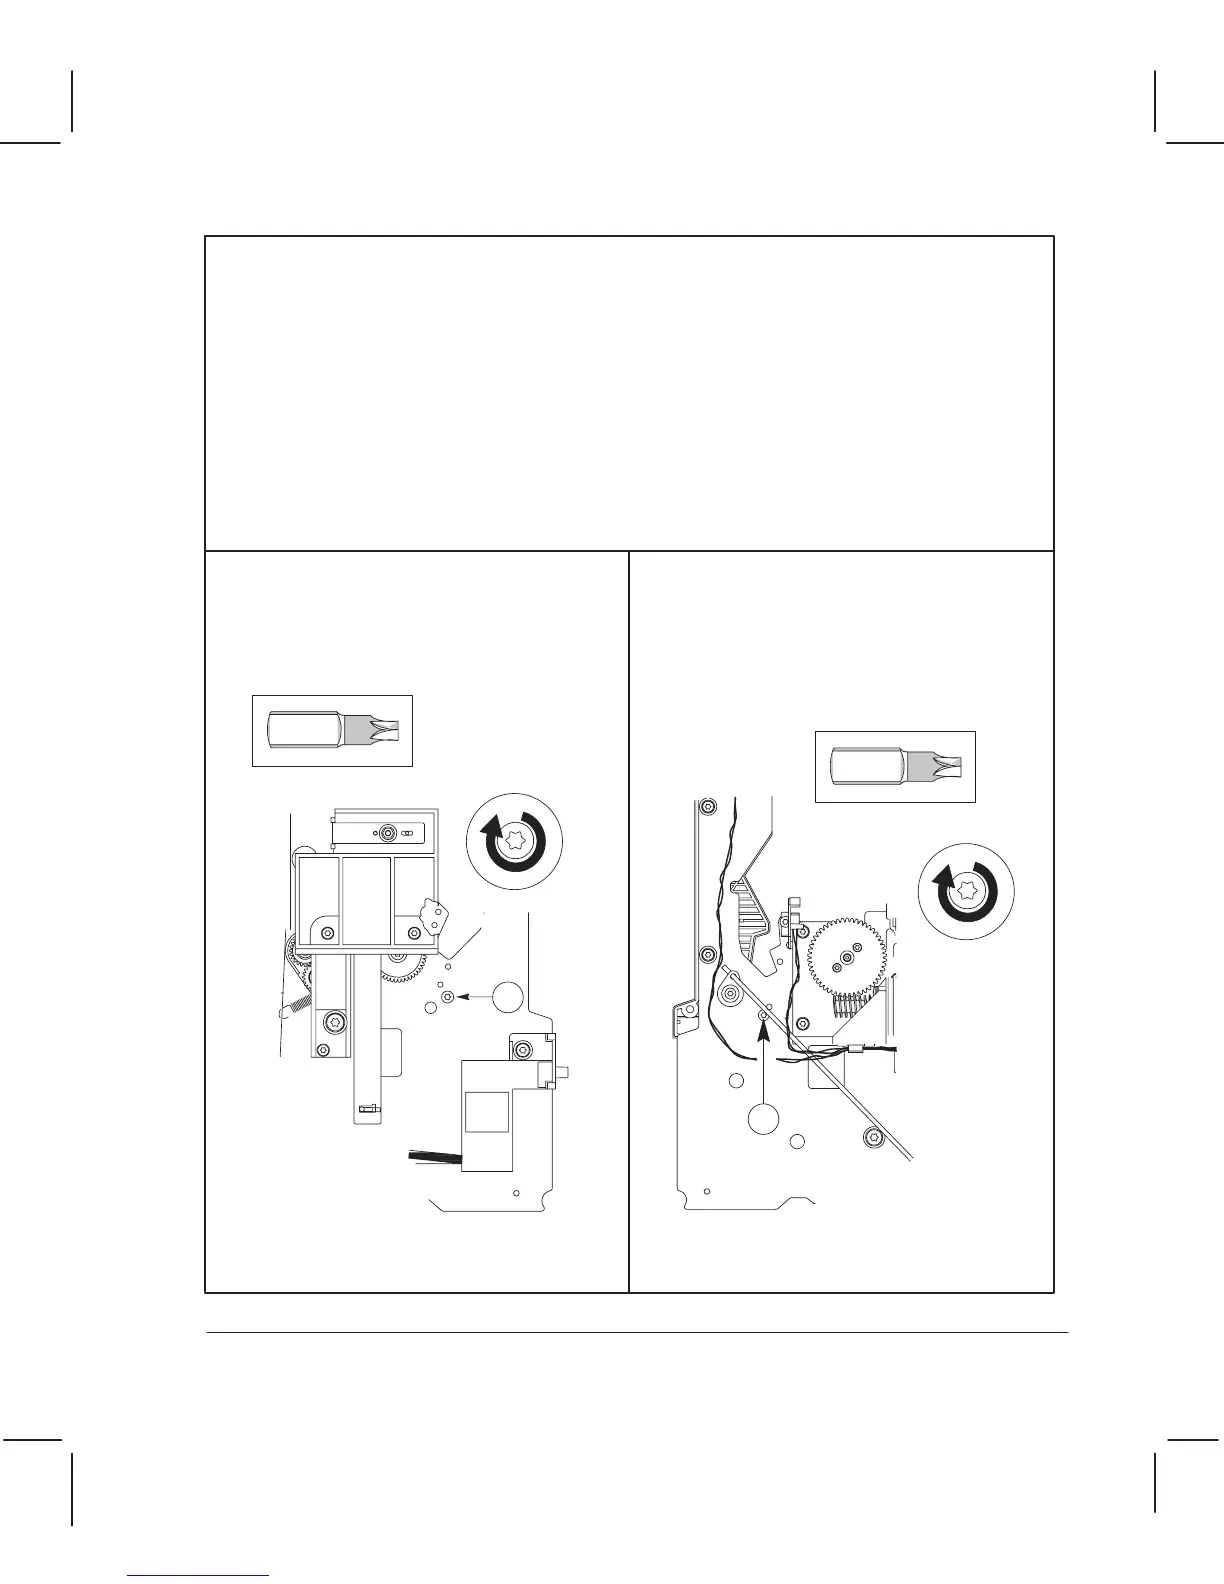
Replace the indicated screw on the
leftĆhand side. ( dogĆpoint screw.)
Tighten this screw, making sure that the
entry platen is aligned tight against the
sideplate.
1
Torx-15
Replace the indicated screw on the
rightĆhand side. ( dogĆpoint screw.)
There must be no space between the entry
platen and the sideplate. It doesn't
matter if there is a small space between
the entry platen and the sideplate.
2
Torx-15
Position the top of the entry platen under all of the small pivots on the inside
of both sideplates, except the back pivot. Rest the entry platen against the back pivot.
Position the bottom of the entry platen above the bottom cover of the plotter.
6Ć67 Removal and ReplacementC3187Ć90000