2. Grasp the fan with thumb and forefinger while depressing the locking tab.
NOTE: The two right side fans, as viewed from the front, are located very close to the
chassis. It might be necessary to use a tool, such as a flatblade screwdriver, to assist in
removing them.
3. Slide the fan upward from the chassis.
Replacing a PCI Smart Fan Assembly
1. Carefully position the fan assembly in the chassis.
2. The fan easily slides into the chassis. Use a slow firm pressure to properly seat the connection.
3. Replace the top cover.
NOTE: A green fan LED indicates the fan is operational.
Removing and Replacing a PCI-X Power Supply
The PCI-X power supply is located in the front of the chassis. The PCI-X power supply is N+1
and a hot-swap unit.
CAUTION: Observe all ESD safety precautions before attempting this procedure. Failure to
follow ESD safety precautions could result in damage to the server.
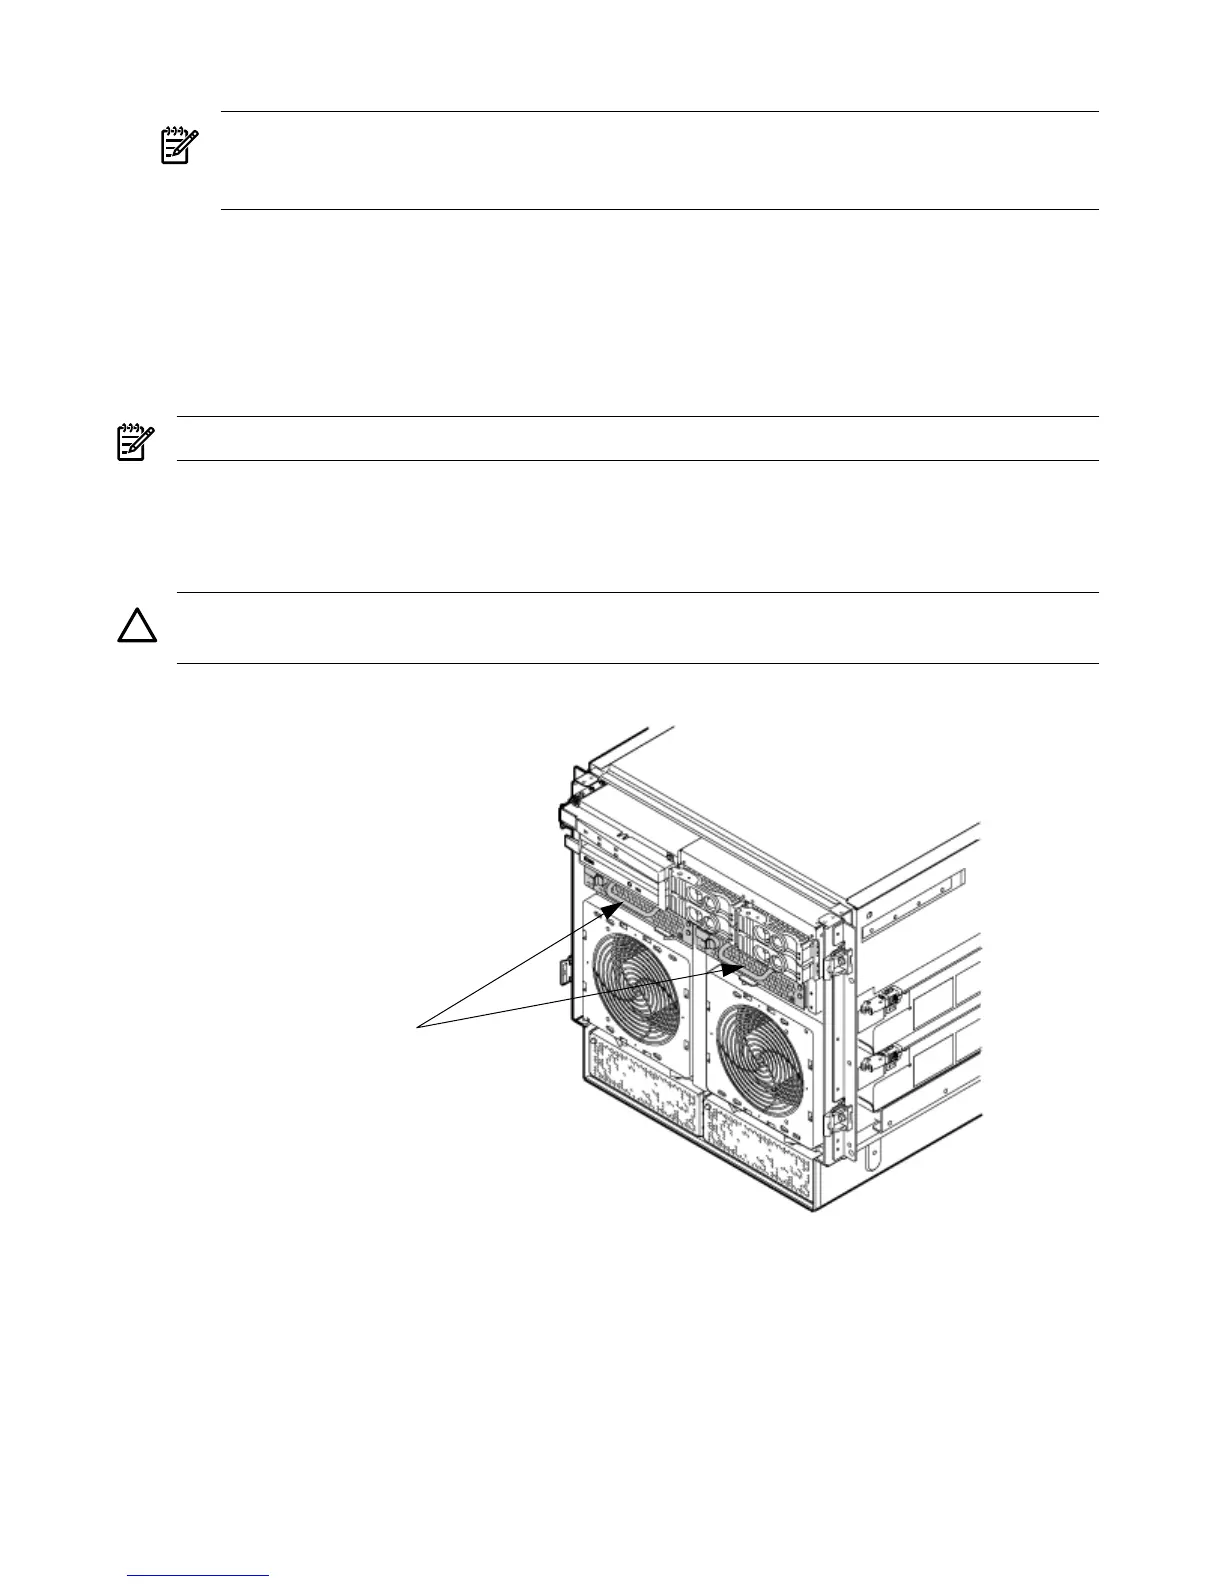
Figure 6-32 PCI-X Power Supply Location
Preliminary Procedures
1. Remove the front bezel.
2. Identify the failed power supply. Table 6-5 identifies the meaning of the PCI-X Power Supply
LED state.
3. Connect to ground with a wrist strap and grounded mat.
4. Visually inspect the replacement part for proper number and revision.
170 Removing and Replacing Components