9-44 TS3400 Tape Library Maintenance Information
Replacing the Library Chassis
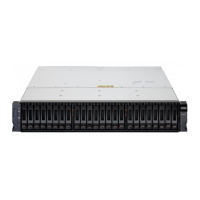
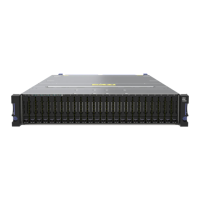
This FRU is a replacement for the library chassis. It comprises a library housing
without a tape drive, and has one cartridge magazine and one power supply unit. For
detailed instructions on each step in the procedure, refer to the relevant sections in
this chapter.
Removal Procedure
1. Remove and clearly label the cartridge magazines from the library.
Note: If the cartridge magazines fail to unlock in response to the Unlock
Magazine command from the Operator Panel, you can unlock the
magazines manually. See “Unlocking Cartridge Magazines Manually” on
page 9-4.
2. Power OFF the library by toggling the power supply switch on both supplies to
the OFF (O) position.
3. Disconnect all cables from the rear panel.
4. Remove the tape drive(s). See “Replacing a Tape Drive Canister or FC 1663 Tape
Drive Removal” on page 9-11.
5. Remove the Library Control Blade. See “Replacing the Library Control Blade
(LCB)” on page 9-8.
6. Remove the power supply units. See “Replacing a Power Supply Unit” on
page 9-7.
7. Remove the drive docking card cover plate. See “Replacing the Drive Docking
Card” on page 9-19.
8. Remove the library from its installation location.
Replacement Procedure
1. Install the new TS3400 Tape Library. See Chapter 6, “Installing the Library,” on
page 6-1.
2. Insert the tape drives from your old library into the new library. See “Replacing a
Tape Drive Canister or FC 1663 Tape Drive Removal” on page 9-11.
3. Insert the Library Control Blade from your old library into the new library. See
“Replacing the Library Control Blade (LCB)” on page 9-8. The Library Control
Blade is required to copy drive configuration data into the drive docking card.
4. Install the drive docking card cover plate from your old library into the new
library. See “Replacing the Drive Docking Card” on page 9-19. The drive docking
card that comes with the new library is a generic cover and does not have the
requisite warning labels relevant to your installation.
5. Copy the serial number on the label in the lower left corner of the old bezel onto
the blank label supplied with the new library, and attach the serial number label
in the recess in the lower left corner on the front bezel of the new library. This
step is necessary to maintain a valid warranty. See “Applying a RID Tag to a
Library” on page 7-26.
6. Confirm that the library firmware installed is the latest version. Note the
firmware revision number using the System Summary window of the Web User
Interface and check against the latest firmware version at
http://www-03.ibm.com/servers/storage/support. To update the library
firmware, if necessary, see “Methods of Updating Firmware” on page 7-20.
7. Go to “End of Call” on page 7-26.

 Loading...


