68
CONNECTIONS AND INSTALLATION
8
8
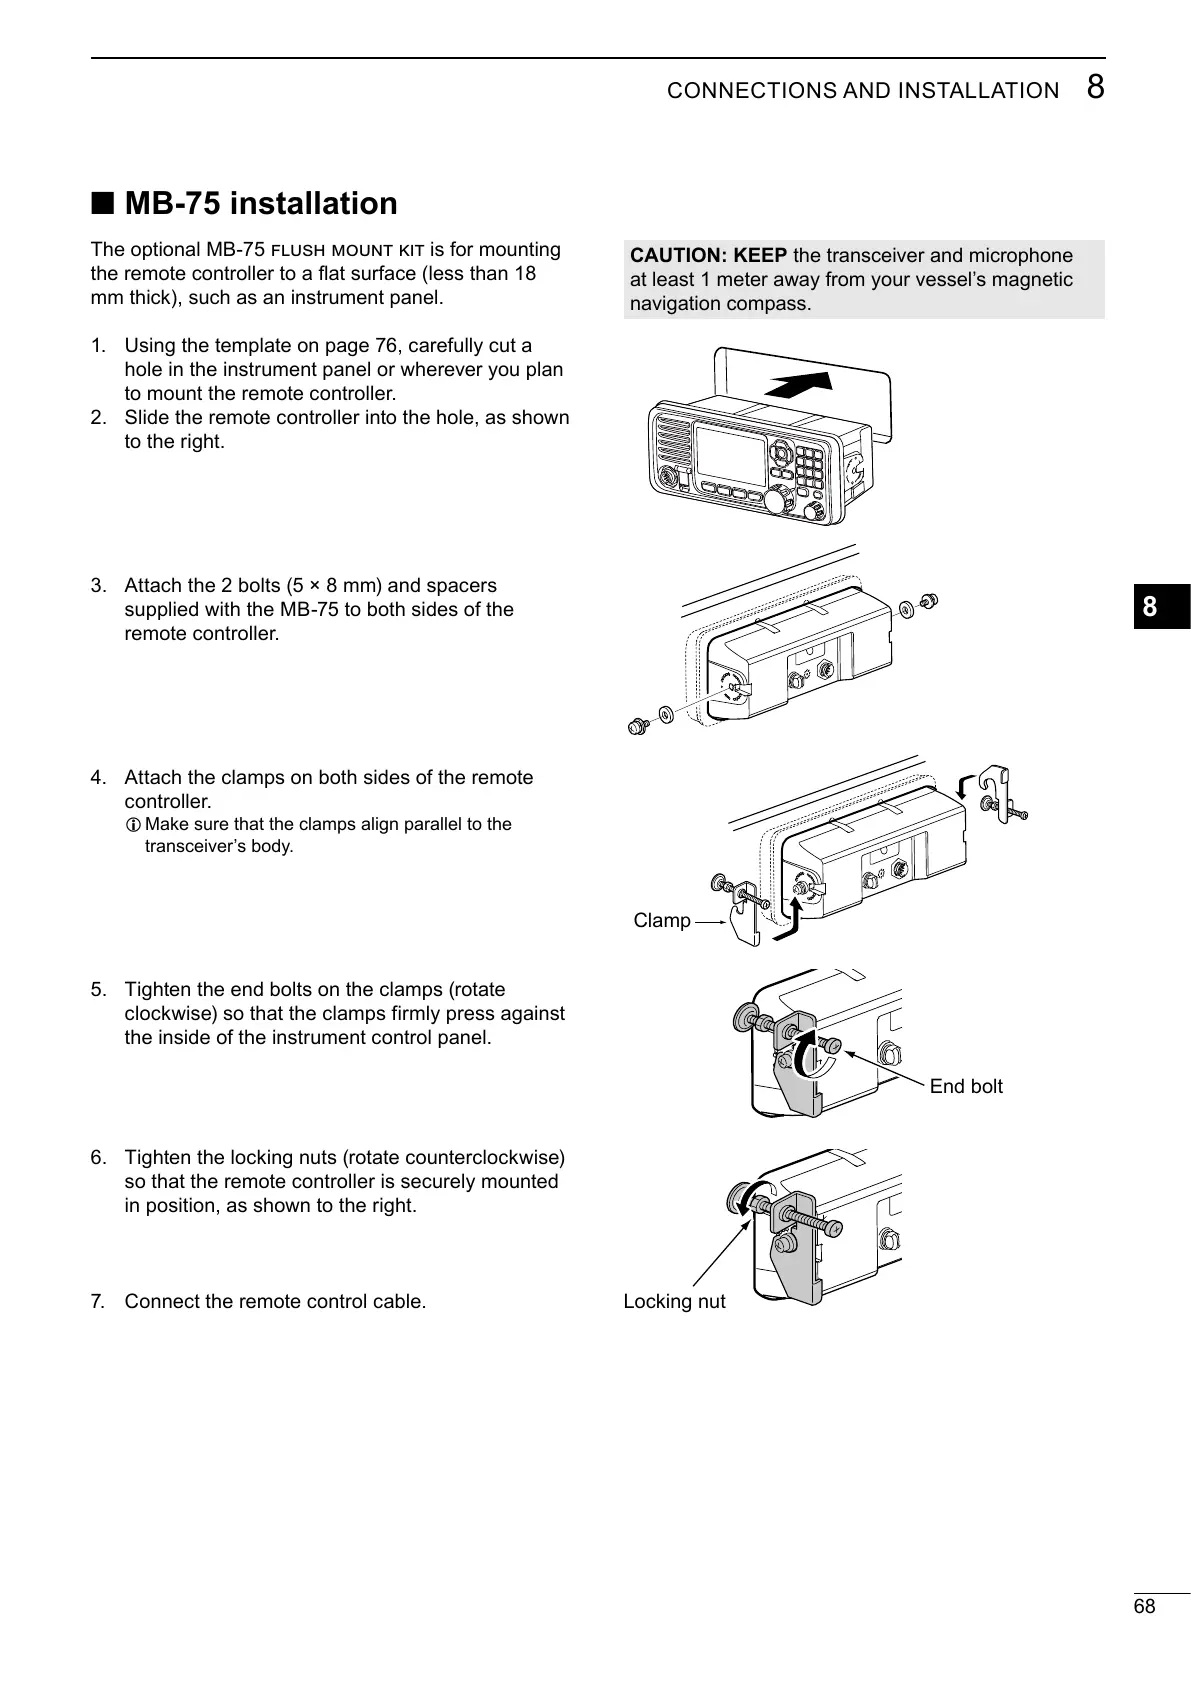
■ MB-75 installation
The optional MB-75 is for mounting
Using the template on page 76, carefully cut a
Slide the remote controller into the hole, as shown
Attach the 2 bolts (5 × 8 mm) and spacers
supplied with the MB-75 to both sides of the
Attach the clamps on both sides of the remote
L Make sure that the clamps align parallel to the
Tighten the end bolts on the clamps (rotate
clockwise) so that the clamps firmly press against
Tighten the locking nuts (rotate counterclockwise)
so that the remote controller is securely mounted
CAUTION: KEEP
End bolt
Clamp
Locking nut