Communication and Keypad Installation Tunnel Master
Jr. User Manual—Version 3.0
80 January 2016
SECOND ENTRANCE KEYPAD MOUNTING AND INSTALLATION
The following instructions will provide detailed information on proper
mounting and installation of the optional second Entrance Keypad.
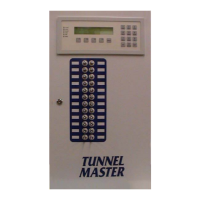
Second Entrance Keypad Mounting
The second Entrance Keypad should be mounted securely to the wall of
the car wash, directly next to the first Entrance Keypad in the entrance
to
the tunnel.
The keypad is a Type 3 enclosure, which means it is a watertight
enclosure, but should not be mounted where it is constantly inundated
with water.
The keypad should be mounted away from corrosive chemicals.
Second Entrance Keypad Wiring
One approved 3/4” conduit
must be run between the first and second
Keypads. Conduit should originate from the bottom of the first keypad
enclosure to the bottom of the second keypad enclosure. All conduits
shall be properly connected and securely fastened to the boxes with
Listed conduit hubs,
and should be tightened to the torque specs of the
manufacturer.
The conduit shall be secured with a Listed watertight conduit hub, and
should be tightened to the torque specs of the manufacturer. Over
torquing may cause enclosure breakage.
The conduit will contain
the 12 VAC and Communications cable and
should enter the opening in the bottom of the keypad enclosure.
Electrician must run 3 - 18 AWG wires, or cable (supplied by customer)
through the 3/4” conduit above from the first Entrance Keypad to the
second
Entrance Keypad.
There are terminal blocks (POWER), located on each of the keypad circuit
boards labeled with ACH, ACN and GND, for Load, Neutral and Ground,
respectfully. Terminations for the 3 – 16AWG wires should be torqued to
20 inch pounds (in-lb) (
2.3 n-m.) Over torquing may cause enclosure
breakage.
Table 22: 120 VAC Terminations
First Entrance Keypad Second Entrance Keypad
ACH ACH
ACN ACN
GND GND
 Loading...