Part 2 - Conguration
100
VIN
If the camera is networked but not scanned, use this
setup. This setup allows you to change the network
setting of the NVR’s VIDEO IN port which is camera’s
network environment. Check the camera’s network
setting rst before you use this setup.
•
Check the camera’s network setting rst
before you use this setup.
•
Make sure that this setting does not
conict with the WAN setting.
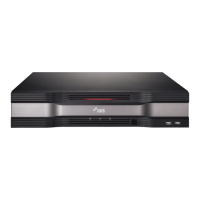
● Link-local address: Indicates the default IP address of
VIDEO IN port.
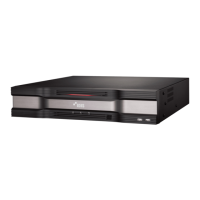
● Manual: Allows you to enter the IP address and other
network settings manually.
– Use NAT(ROUTER/VPN/ETC): Allows access to
specic subnets. (It is not recommended unless you
are a network expert)
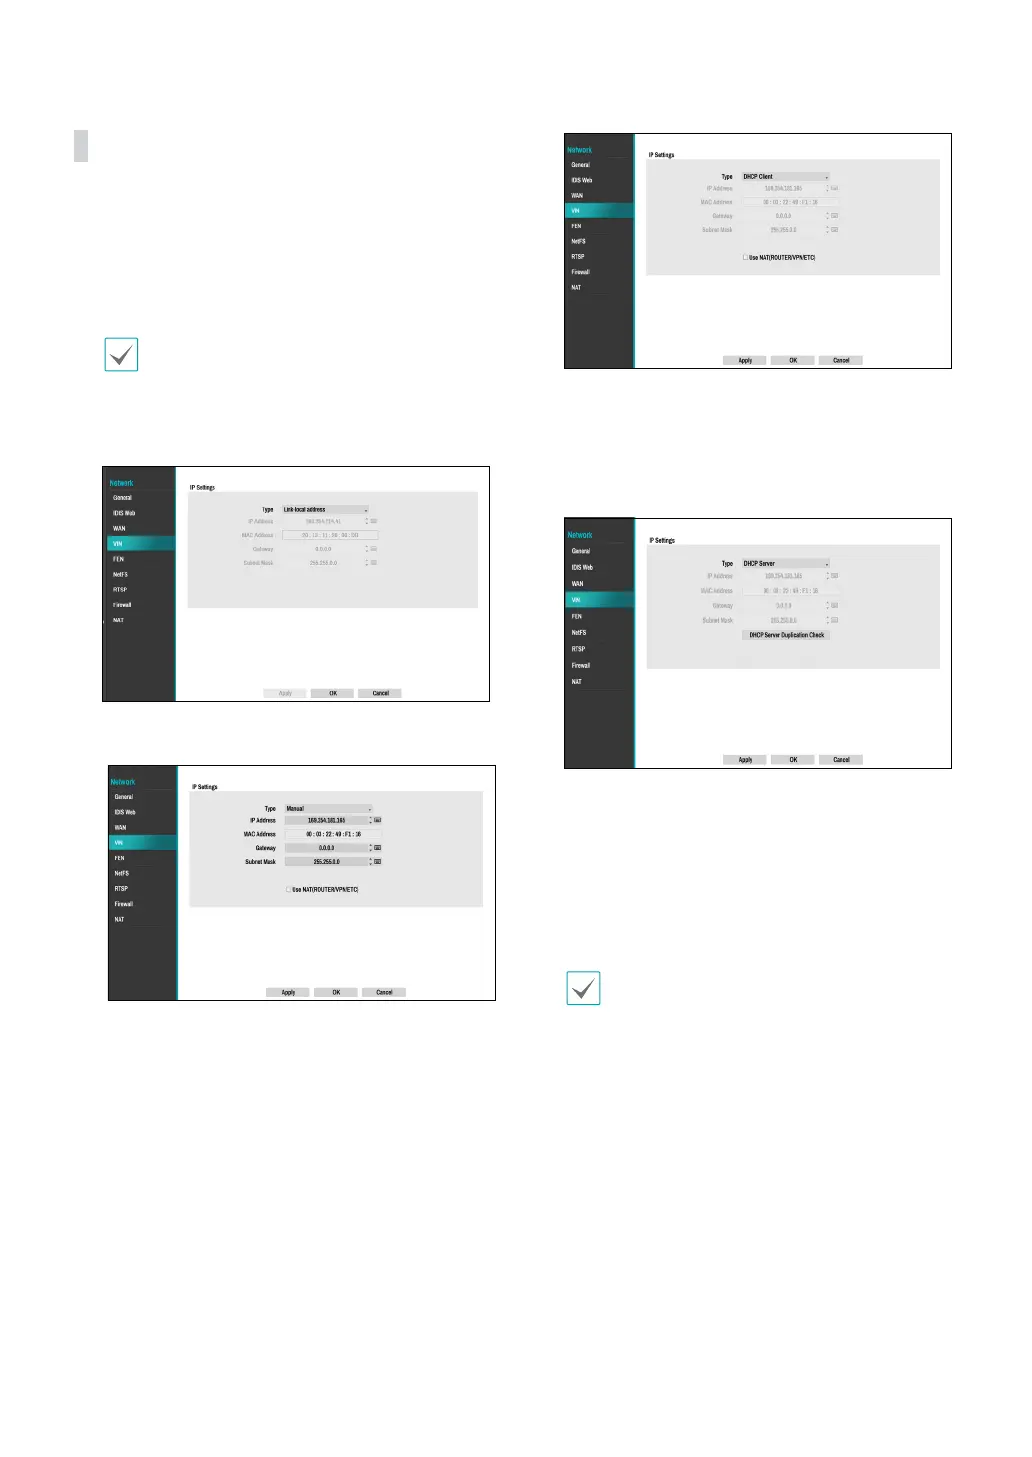
● DHCP Client: Retrieves an IP address and other
network settings automatically from a DHCP server.
– Use NAT(ROUTER/VPN/ETC): Allows access to
specic subnets. (It is not recommended unless you
are a network expert)
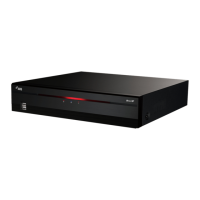
● DHCP Server: It makes the NVR run as a DHCP
server. Check if there is another DHCP server on
the same network. If there is no DHCP server,
this option is enabled. The NVR allocates an IP
address automatically in the range of 10.10.0.128
to 10.10.254.254 by using DHCP to the camera
connected to the NVR’s VIDEO IN port.
When several NVRs exist in the same network,
only one of NVRs has to be run as a DHCP server. If
several DHCP servers are running, the redundant
IP may be allocated to the camera.