Part 1 - Getting Started
14
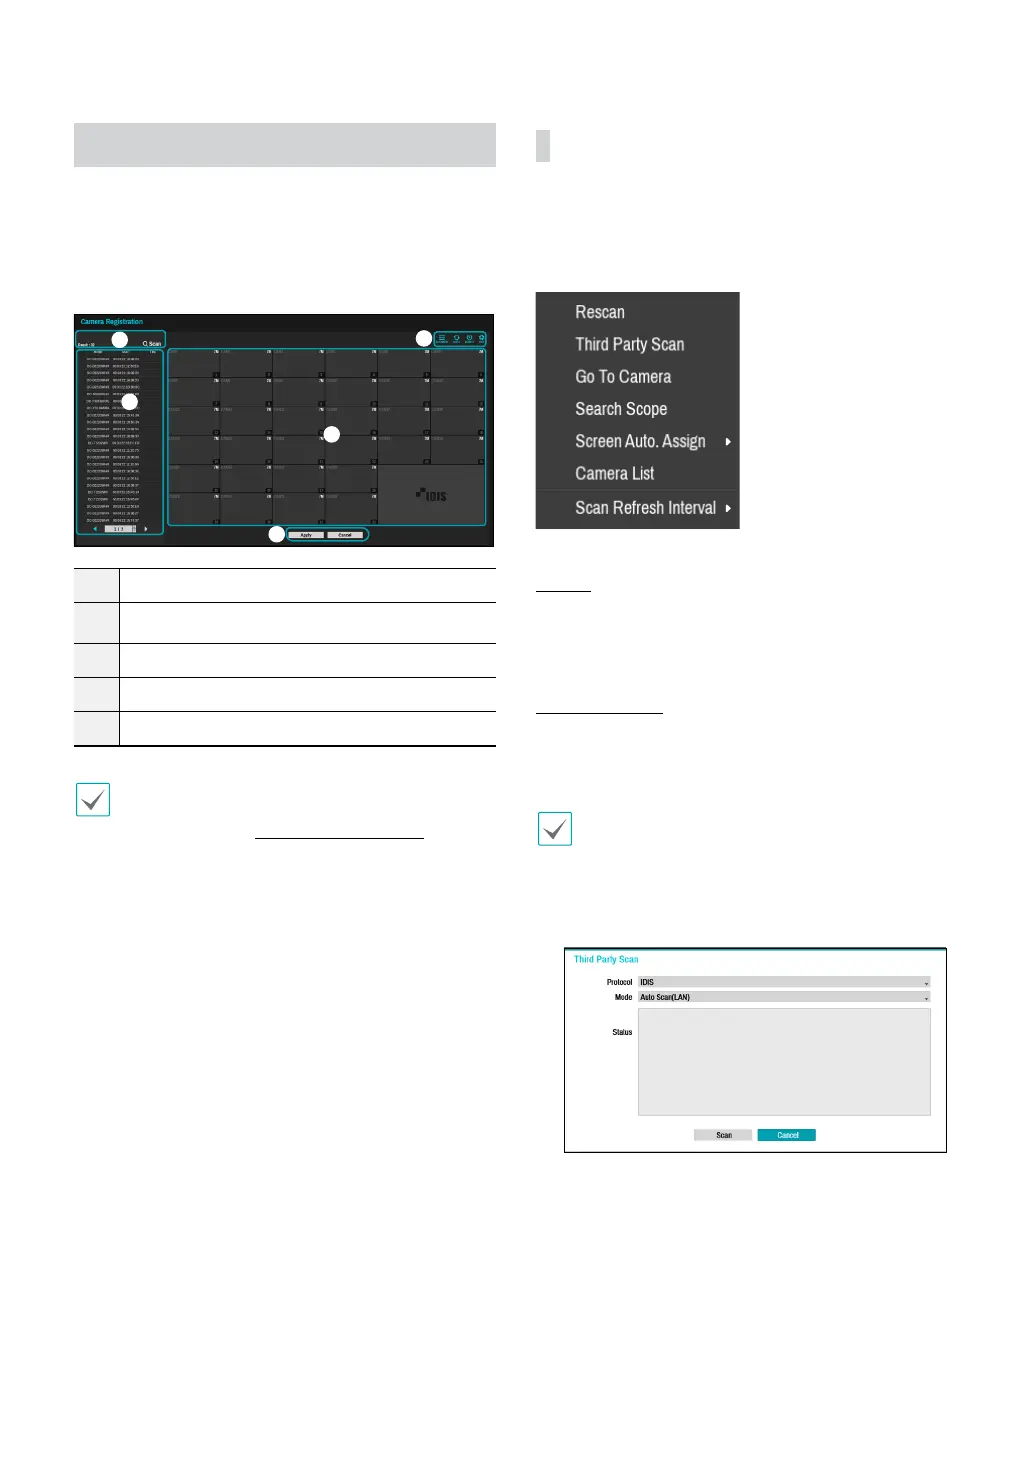
Camera Registration
Once Network Setup Wizard is complete, live mode
screen appears. While in live mode, right-click on the
mouse and select Camera Registration to run the
Camera Registration mode. It allows you to scan for the
cameras connected to the NVR.
1
2
3
4
5
1
Camera Scan Button
2
Camera View Menus
3
Camera List Area
4
Video Display Area
5
Apply/Cancel Buttons
You can also register cameras on the remote
program. For more information on the remote camera
registration, refer to Registration on page 13.
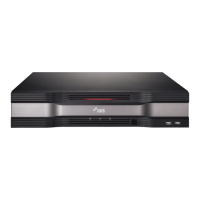
Camera Scan Button
You can scan and search and register cameras that were
not detected automatically or third party cameras.
Pressing the Scan button displays the following sub-
menu.
Rescan
Scans for DirectIP™ cameras that were not scanned
automatically.
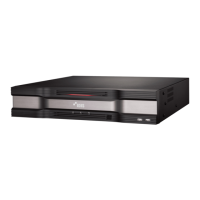
Third Party Scan
Used to manually scan for third-party cameras that
cannot be recognized by the auto scan feature.
• Some functions may not be supported for the
third-party cameras depending on their protocol
and model.
• The device to be registered must have dierent IP
addresses. Otherwise, the connection may fail.
● Protocol: Select the protocol used by the camera (or
video encoder) you wish to search for.