Part 1 - Getting Started
15
• Some functions may not be supported for the
third-party cameras depending on their protocol
and model.
• This system is optimized for combination with IDIS
cameras. When registering other cameras, recording
performance cannot be guaranteed and it can
be restricted from several functions if the related
video settings exceed the system performance. In
this case, please make adjustments to optimize the
performance.
● Mode: Select the scan mode.
– Auto Scan (LAN): Lists cameras in a LAN
environment. If Auto Scan (LAN) fails to recognize
a camera, try using IP Address Scan instead.
– IP Address Scan: Enter the IP address of a
camera. The NVR scans for the camera matching
the specied address. If you enter IP address’s
range, the NVR scans for cameras falling under
the specied address’s range. By specifying an IP
address, you can also specify which port to use with
the Remote Admin feature. It is recommended that
the camera not be networked via DHCP (Dynamic
Host Conguration Protocol). If the camera is
networked via DHCP, connection to the camera may
not be made properly depending on changes in the
external network environment.
1
Select Scan to commence scanning.
Only cameras that are connected to the NVR via VIDEO
IN ports can be scanned and registered.
2
Select a camera from the scan list and then select
Add Camera. The device login window will appear.
3
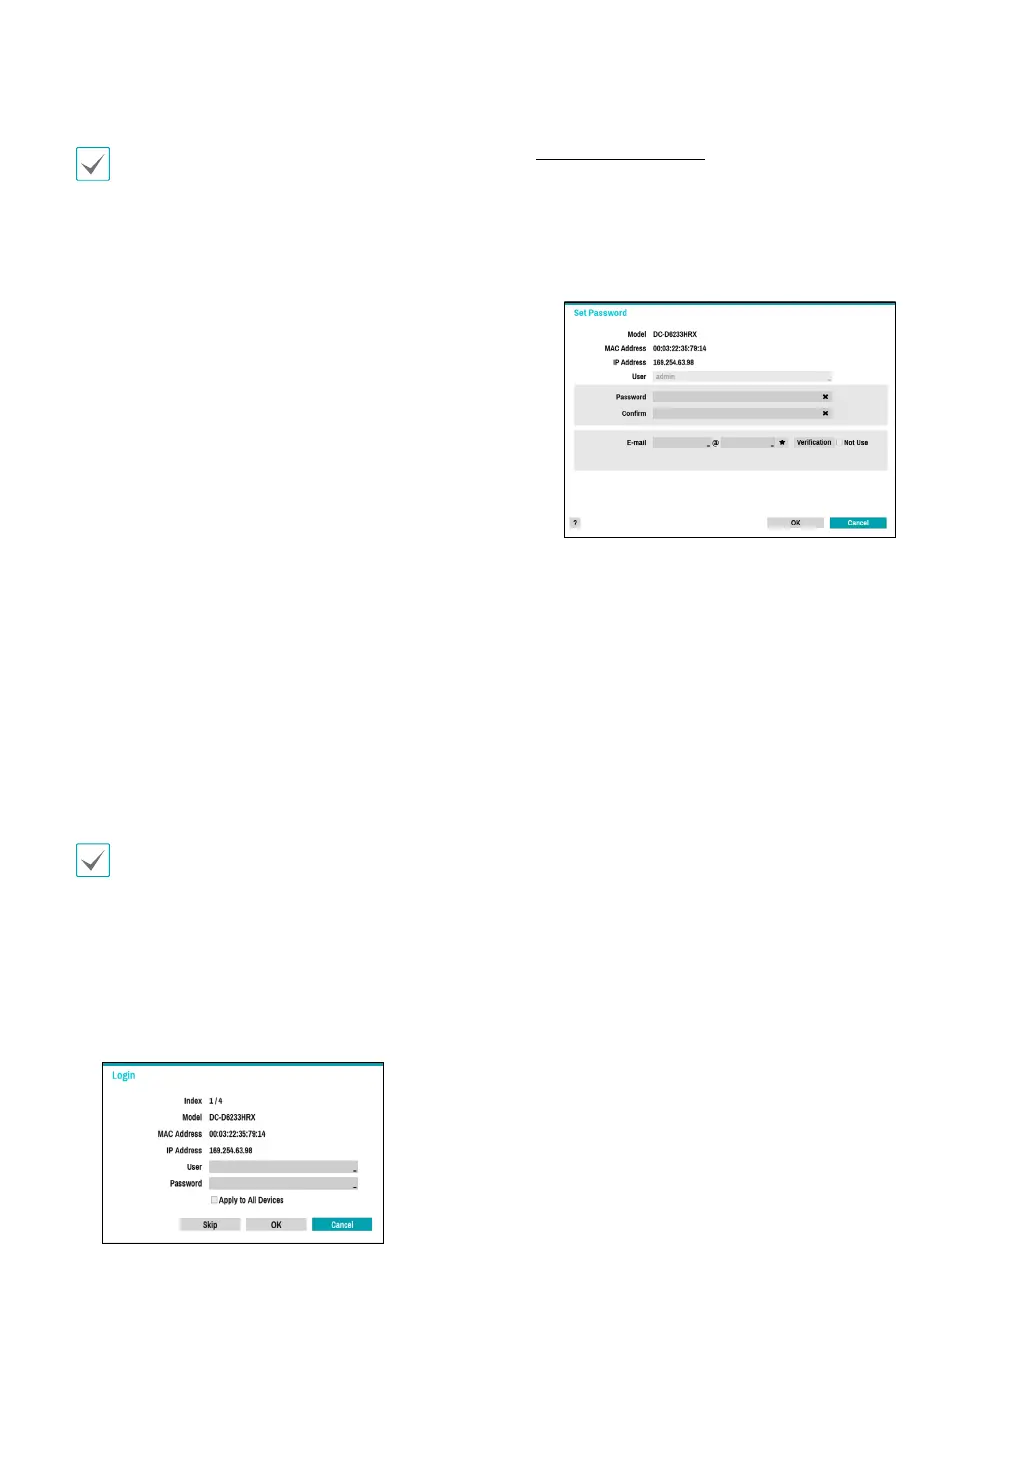
Enter a User ID and a Password for the selected
camera.
Set Camera Password
For IDIS protocol cameras that support changing and
nding the camera password, you must set the camera
password at the time of initial camera registration. The
email information is used to change and nd the camera
password.
 Loading...