Part 2 - Conguration
98
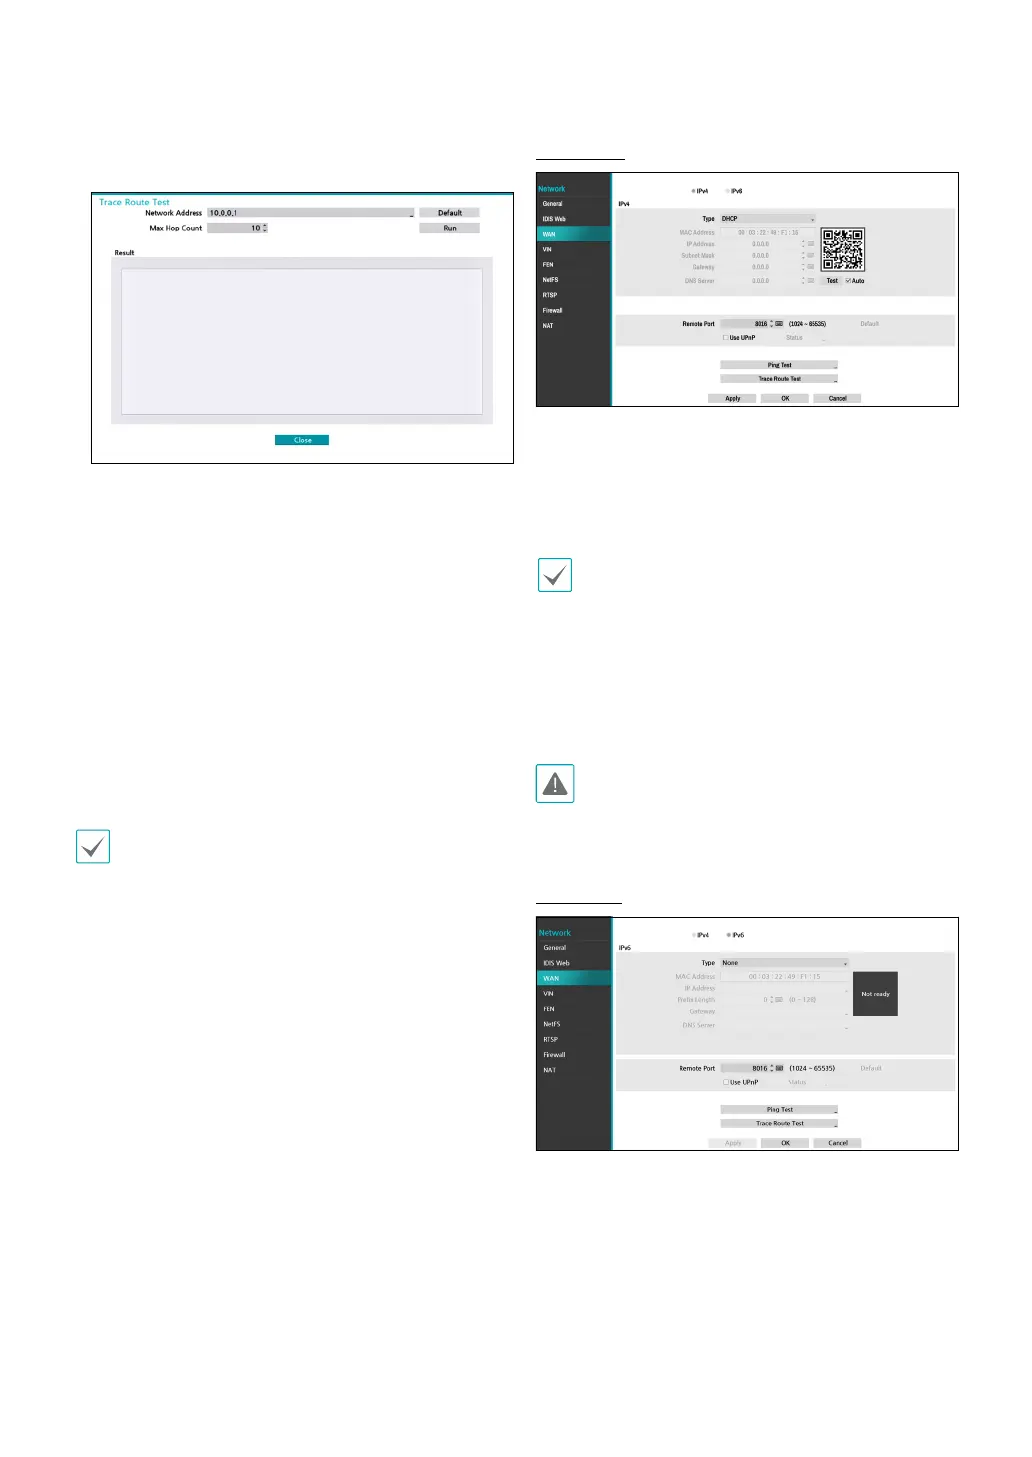
● Trace Route Test: The NVR tries to trace a network
path to its destination.
1
Set the network address of the destination.
2
Set the maximum number of hops.
3
Select Run to do the test. The test result is displayed.
4
Select Close to exit.
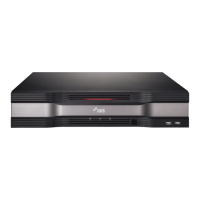
● To use the UPnP (Universal Plug and Play) feature,
select Use UPnP. If using an IP router (or NAT), UPnP
service allows the device to automatically forward the
port to the NVR.
• This port is used to access a port that has a private
IP address.
• In order to use the UPnP service, the IP router (or
NAT) must support UPnP port forwarding and have
the relevant options enabled.
• Port number cannot be changed with Use UPnP
selected.
● Status: Indicates the number of the port forwarded
by the IP router (or NAT) to the NVR via UPnP service.
IPv4_DHCP
Select DHCP and then Save to retrieve IP address and
other network settings automatically from the DHCP
server. Once the networrk settings have been retrieved,
the NVR’s current IP address is displayed in the IP
Address eld.
• It may not be possible to retrieve the IP address if
there is no DHCP server. If this is the case, contact
your network administrator.
• With DHCP, the NVR's IP address might change with
each startup.
• When registering NVR with the IDIS mobile
application, you can easily enter the IP address
using the QR code.
There is a limit to the number of users allowed to
connect remotely at the same time. Contact the
service center for more information.
IPv6_None
Select None and then save to disable IPv6 mode.