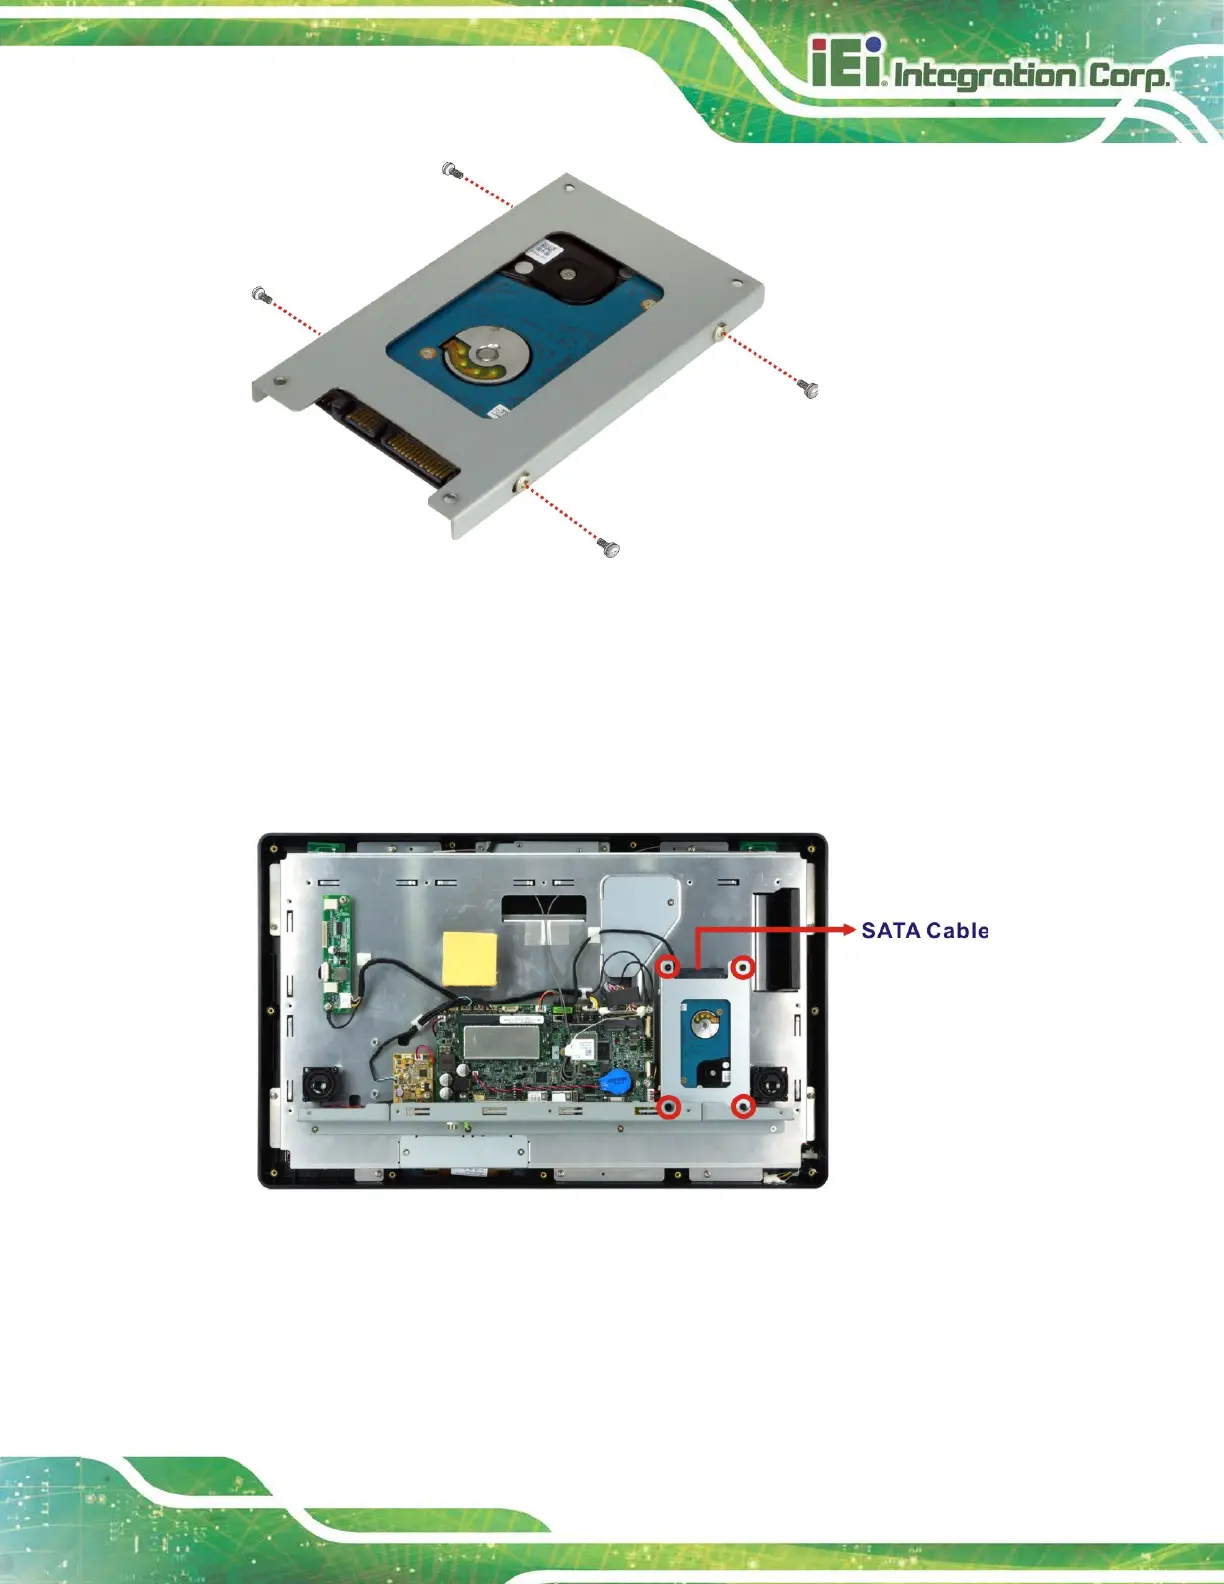
Figure 3-8: HDD Retention Screws
Step 4: Connect the SATA cable to the rear of HDD from the motherboard.
Step 5: Install the HDD into the AFL3-W19A-AL by aligning the retention screw holes in
the HDD brackets with the retention screw holes on the chassis. Insert the four
retention screws.
Figure 3-9: HDD Installation
Step 6: Take the thermal pad included in the package. Peel off the plastic sheet from the
thermal pad, and remove the blue sheet from the adhesive side of the thermal
pad.

 Loading...