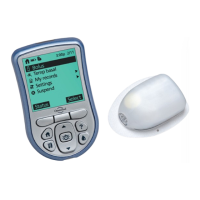
Home Food Library Power/Backlight
2
Getting Started
12
3. Press Done to confirm the basal program shown on the
screen. To add more basal segments to the program, or to
change the rate shown, see Chapter 3, Understanding and
Adjusting Basal Rates.
4. To see the basal program as a list, press List. To return to the
graphic view, press Graph.
5. Press Save to accept the basal program you have set.
6. Choose a temporary basal feature, then press Next. Choose Off
to turn off the temporary basal feature. Choose % to show
temporary basal rates as a percent increase or decrease of your
current basal rate. Or choose U/hr to show temporary basal
rates in units per hour. For details about setting temporary
basals, see Chapter 3, Understanding and Adjusting Basal Rates.
Enter blood glucose sound setting and BG goal
1. To set the sound for the blood glucose meter, choose Off or
On, then press Next.
2. Use the Up/Down Controller button to enter the lower limit
for your blood glucose (BG) goal, then press Next.
3. Enter the upper limit for your BG goal, then press Next.
4. Press Save to accept the BG goal.
Set the suggested bolus calculator
1. To set the suggested bolus calculator feature, choose On or
Off, then press Next.
Enter target blood glucose value
1. Use the Up/Down Controller button to enter a target blood
glucose (BG) value, then press Next.
2. Use the Up/Down Controller button to enter the “correct
above” value or correction threshold (the BG value above
which you want the PDM to suggest a correction bolus), then
press Next.
You can add up to 7 basal programs and set 24
segments per program
The lower and upper BG limits are only used when
viewing BG History (see Chapter 8, Record Keeping).
Check with your healthcare provider before adjusting
these settings.
If the suggested bolus calculator is set to On, perform
the following steps. If set to Off, you will be prompted
to “Select bolus increment” and “Enter maximum
bolus.”