Getting Started
20 Development Kit User’s Manual
2.6 System Setup and Power-Up
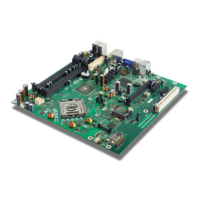
Complete the following steps to operate the reference board.
These steps should already be completed in the kit. Check these items to ensure
that nothing came loose during shipment.
• Place one or more DDR3 SO-DIMMs in the memory sockets, populating J5N1
and/or J5P1. The memory sockets are on the bottom side of the development
board.
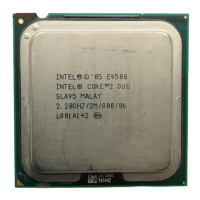
• Place the Intel® Core™ 2 Duo processor T9400 in socket U2E1 and lock in place
(make sure to align the chip to the pin 1 marking).
• Attach the heatsink for the processor U2E1.
• Install the configuration jumpers as shown in Section 4.3.1 of this document.
(Repl
acing detached 1-x jumpers is not required for proper board operation.)
• Attach hard drive data cable from development board SATA Connector J6J3 to the
drive with the supplied SATA data cable.
• Attach hard drive power from the ATX power supply to the drive.
• Attach optical drive data cable from development board SATA Connector J6J2 to
the drive with the supplied SATA data cable.
• Attach optical drive power from the ATX power supply to the drive.
• Connect the ATX power supply to the board at connector J4J1.
The following steps need to be completed by the user:
1. Attach the included CPU heatsink fan to the top of the CPU heatsink using the four
screws provided. Plug the fan power in at the CPU Fan connector J2B3.
2. Connect a PS/2 keyboard at connector J1A1 (bottom) or connect a USB keyboard
in one of the USB connectors.
3. Connect a PS/2 mouse at connector J1A1 (top) or a connect a USB mouse in one
of the USB connectors.
4. If using the chipset’s integrated graphics, connect a monitor to the VGA Video
output connector J2A2 with a VGA cable.
5. If using an external graphics card, plug a PCIe graphics card in the PCIe x1 slot
J8B3 or a PCI Express Graphics card in the PCIE x16 slot J6B2. Connect a monitor
to the card.
6. For mobile power configuration, unplug the ATX power supply from J4J1. Plug a
mobile Intel
®
AMPS AC to DC power adapter into J1G9. Optionally plug in a
battery pack into J1H1 or J1H2. Do not mix mobile and desktop power
configurations.
7. Plug in the power cord of the ATX power supply or the Intel AMPS AC brick into a
standard 120 V or 240 V AC power outlet.
 Loading...


