Intel® Server System M50CYP1UR Family System Integration and Service Guide
70
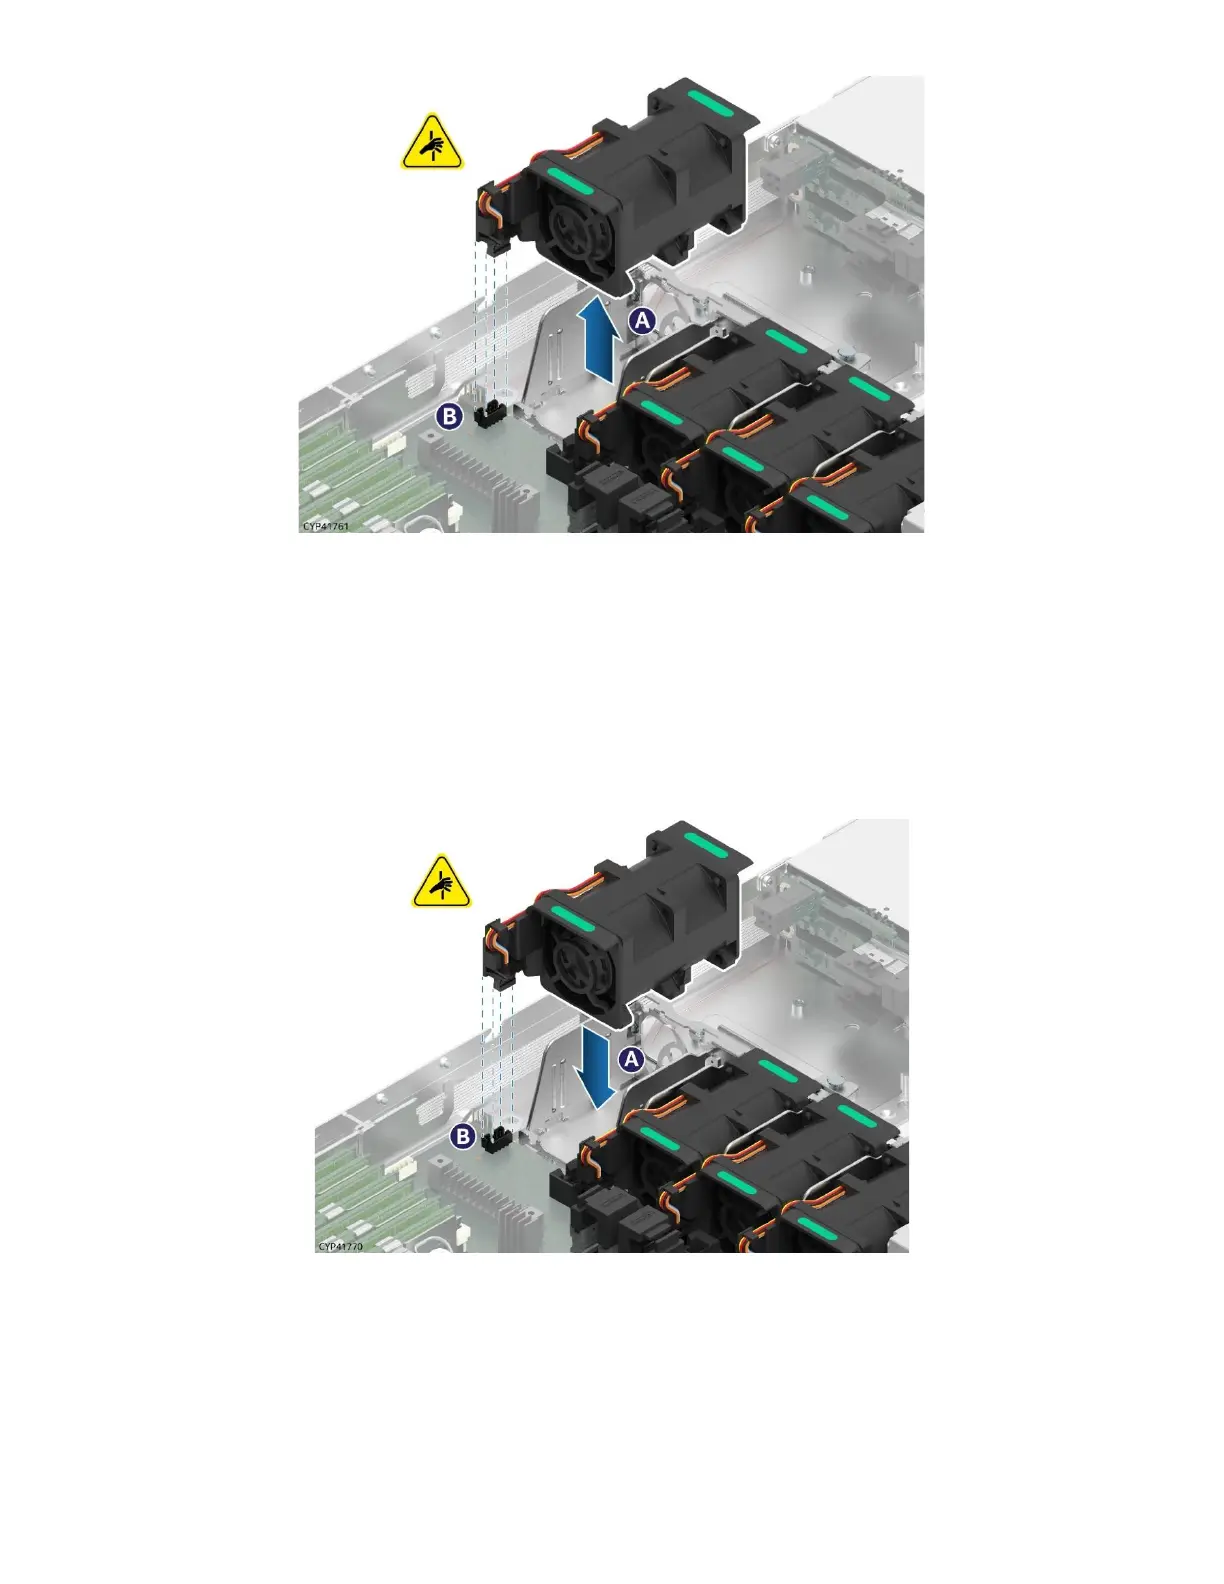
Figure 77. Individual Fan Removal
1. Remove the front top cover panel (see Section 6.1.1).
2. Locate the faulty fan. The LED on the faulty fan should be illuminated amber and rotor should NOT be
turning.
3. Grasp the faulty system fan on both green marked ends and pull it up and away from the chassis (see
Letter B). This step also disconnects the fan cable from the onboard 8-pin fan connector (see Letter A).
4. Carefully place the individual fan onto a flat surface.
Figure 78. Individual Fan Installation
5. Locate and unwrap the replacement fan.
6. Ensure that no cable(s) are within the replacement fan mounting zone within the fan assembly housing.
7. Align the fan connector with the matching server board connector and carefully lower the fan into the
fan assembly housing. Gently push down until fully seated (see Letter A).
8. Ensure the individual fan module connector is fully connected with baseboard fan connector
(see Letter B).
9. Reinstall the system top cover (see Section 6.1.2).
 Loading...


