Intel® Server System M50CYP1UR Family System Integration and Service Guide
93
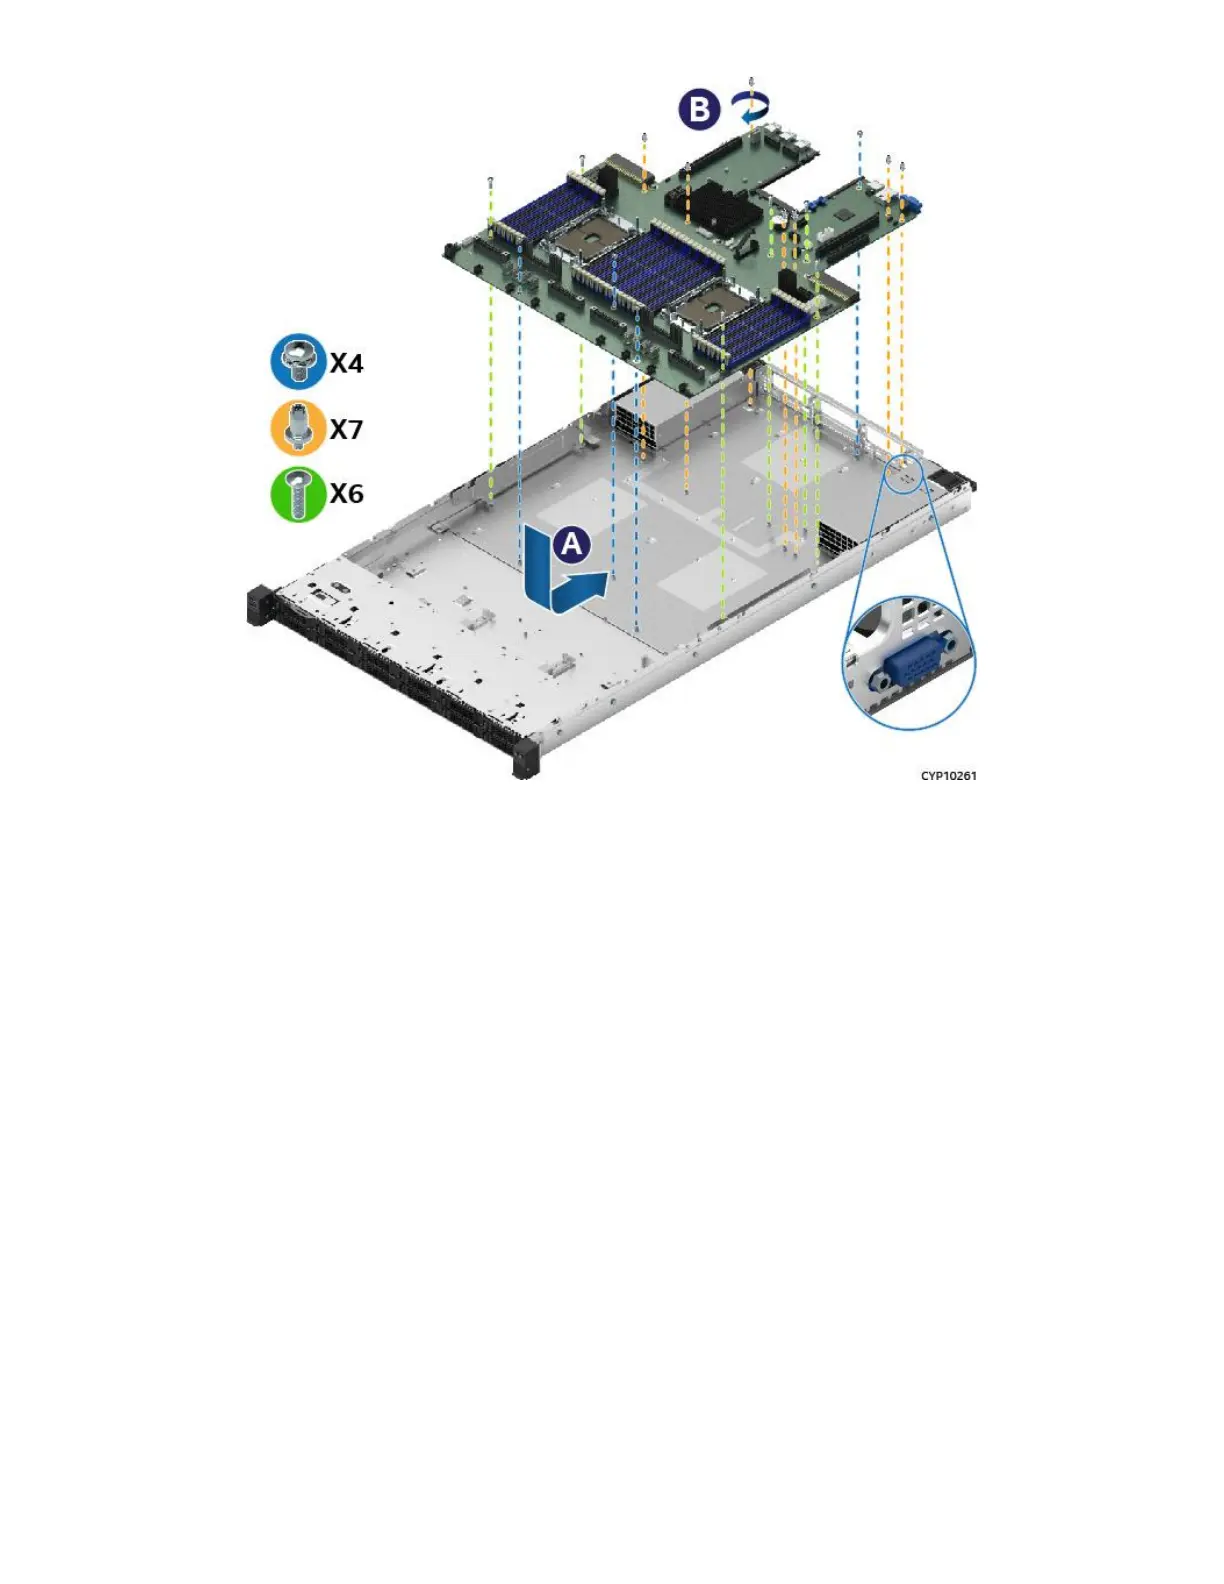
Figure 112. Server Board Installation
15. Verify that all cables are clear of the area in which the server board will be installed.
16. Remove the server board from its anti-static bag.
17. Carefully lower the server board into the chassis. Then slide the server board slightly towards the back of
the chassis until the VGA port goes through the cut-out on the rear panel and the screw holes align with
the chassis standoffs (see Letter A).
18. Fasten the server board to the chassis using all the screws (see Letter B), including the DIMM guard
brackets and the riser 2 guiding bracket (colored green in the above figure). Tighten to 5 in-lb.
19. Re-attach all cables previously removed from the server board.
20. Install processors (see Section 6.5).
21. Install DIMMs (see Section 6.3).
22. Reinstall all options previously removed from the server board.
23. Reinstall riser card assemblies (see Section 3.2.4).
24. Re-attach all internal cables previously detached from add-in cards and I/O modules.
25. Reinstall individual system fan (see Section 6.2).
26. Install power supply modules (see Section 6.4).
27. Reinstall the system top cover (see Section 6.1.2).
 Loading...


