Intel® Server System M50CYP1UR Family System Integration and Service Guide
50
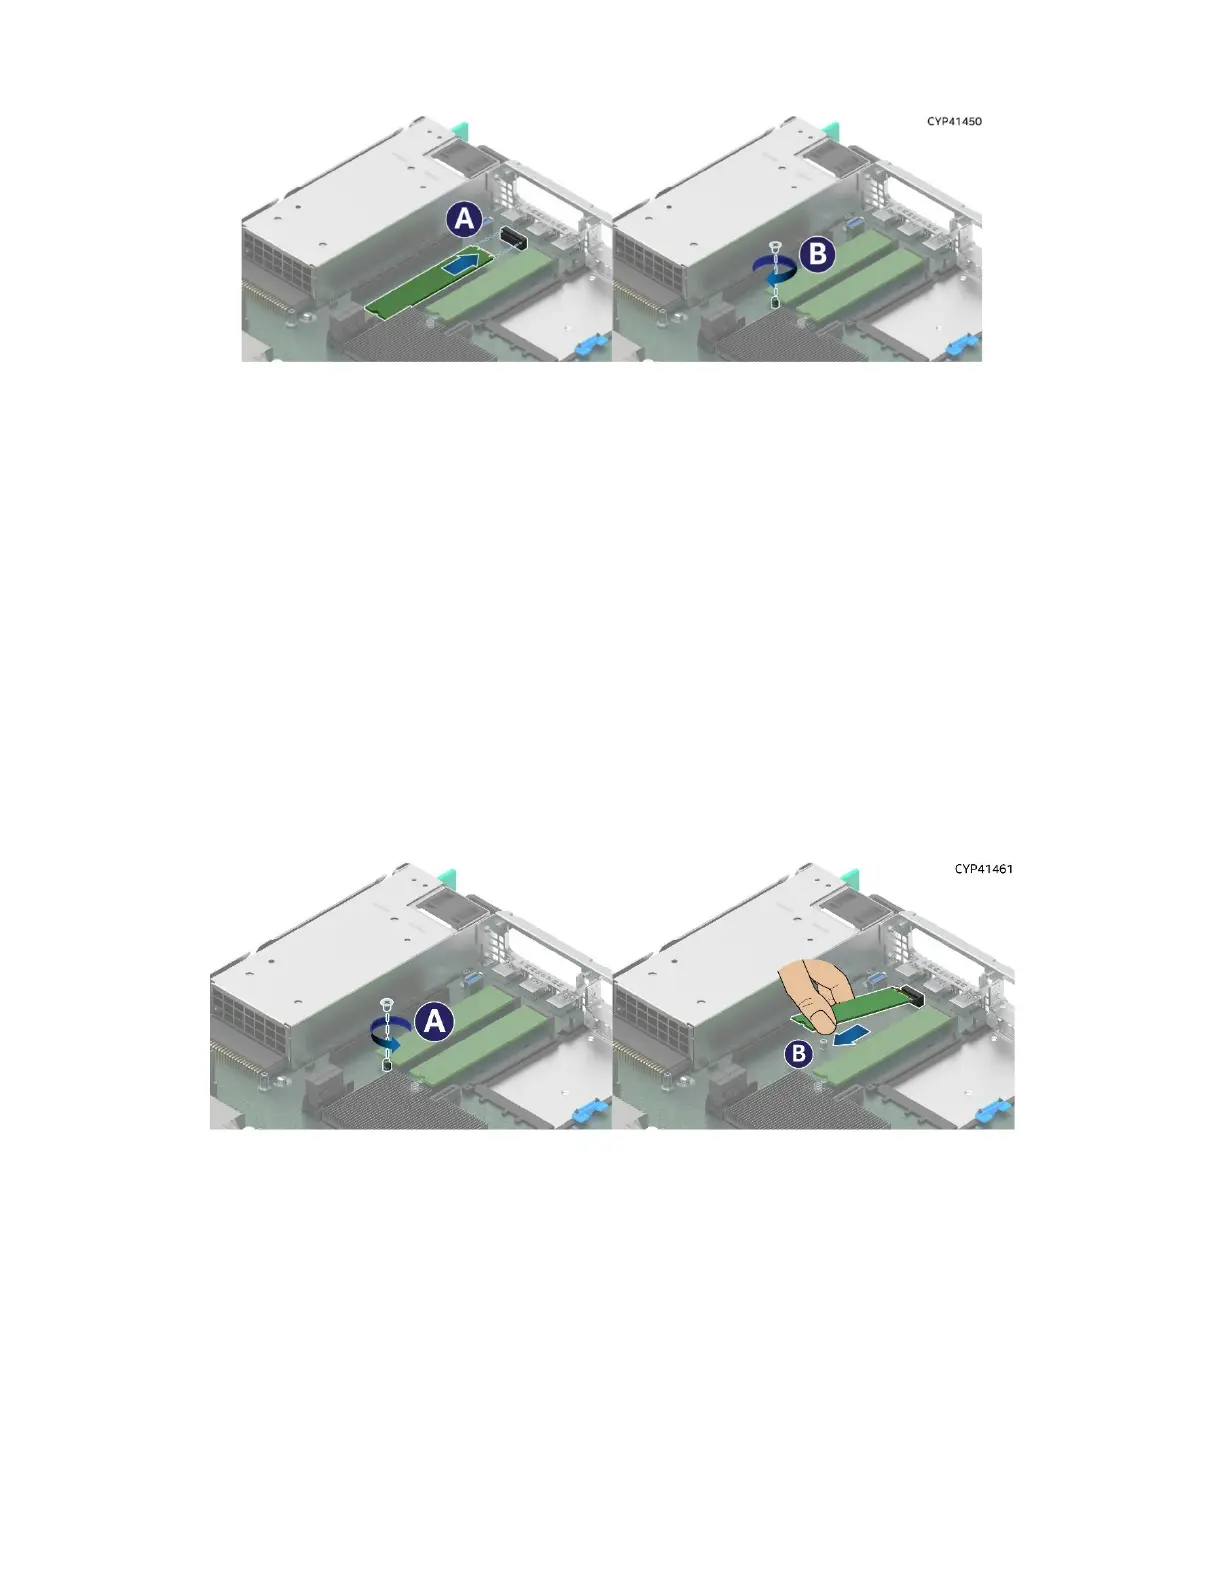
3.5.1 M.2 SSD Installation
Figure 50. M.2 SSD Installation
1. Power off the system and disconnect the power cable(s).
2. Remove the system top cover (see Section 3.1.1).
3. If installed, remove the Riser card assembly to the left of the system (see Section 3.2.1).
4. Locate the M.2 port 0 connector towards the back of the board. Refer to Figure 49 for the location.
5. Depending on the length of the M.2 SSD, use the onboard M.2 mounting stand-off at the appropriate
location.
6. Align the notch within the SSD edge with the key in the server board M.2 connector and insert the SSD
into the connector (see Letter A).
7. Using the fastener screw, secure the SSD to the M.2 mounting stand-off on the server board
(see Letter B). Tighten to 1.5 in-lb.
8. Repeat the steps 4–7 for M.2 port 1 if needed.
9. Reinstall the riser card assembly if needed (see Section 3.2.2).
10. Reinstall the system top cover (see Section 3.1.2).
3.5.2 M.2 SSD Removal
Figure 51. M.2 SSD Removal
1. Power off the system and disconnect the power cable(s).
2. Remove the system top cover (see Section 3.1.1).
3. If installed, remove the Riser card assembly to the left of the system (see Section 3.2.1).
4. Locate the M.2 port 0 SSD. Refer to Figure 49 for the location.
5. Remove the screw to free up one end of the M.2 SSD (see Letter A).
6. Carefully lift the free end of the M.2 SSD and gently remove it from the connector in the direction shown
(see Letter B).
7. Repeat the steps 4–6 for M.2 port 1, if needed.
8. Reinstall the riser card assembly, if needed (see Section 3.2.2).
9. Reinstall the system top cover (see Section 3.1.2).
 Loading...


