4
export and local upgrading by USB mobile device
Support auto recognition of the displayer’s resolution
You can click the right mouse button at any interface to go back to the upper interface
You can click the middle mouse button at any interface to go to the live view interface
The display language and video format of the DVR will not be changed and the system
logs will be reserved if you reset the DVR to factory default
Press and hold the right mouse button for 5 seconds in any interface to switch the output to
VGA and the DVR will display the video at the lowest resolution which the DVR supports
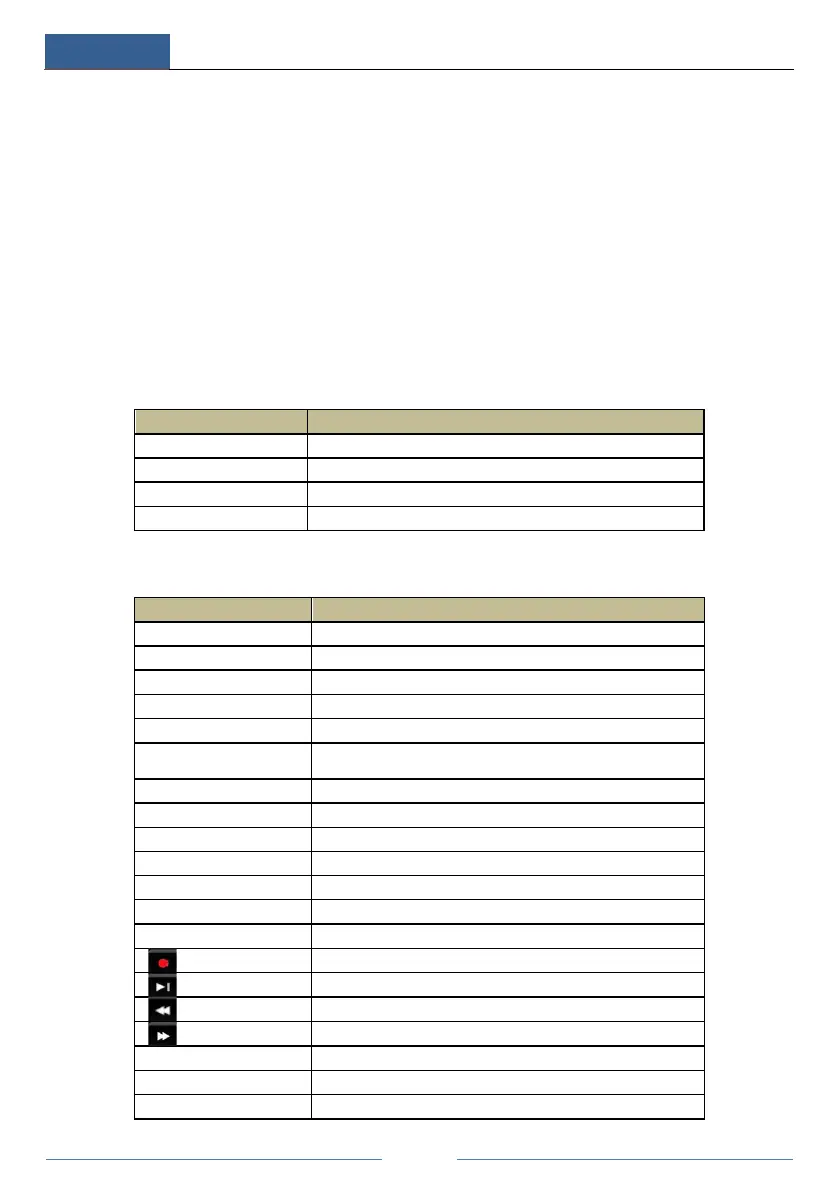
1.3 Front Panel Descriptions
The following descriptions are for reference only.
Type I:
Name Descriptions
When recording, the light is blue
When access to network , the light is blue
Power indicator, when the device is powered , the light is blue
Type II:
Name Descriptions
Power Power Indicator, when connected, the light is blue
The light turns blue when reading/writing HDD
The light turns blue when it is able to access the network
The light turns blue when backing up files and data
The light turns blue when playing video
REC
Power Indicator, when the device is connected, the light is
blue
1. Adjust audio 2. Increase the value in setup
1. Enter PTZ mode 2. Decrease the value in setup
INFO Check the information of the device
BACKUP Enter backup mode in live
SEARCH Enter search mode in live
Exit the current interface
Speed down
Speed up
Input digital number and select camera
Input number 0, the number above 10