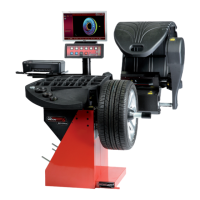
Эксплуатация – АВТОМАТИЧЕСКИЙ РЕЖИМ OPTIMA
Operation - AUTOMATIC “OPTIMA”
7.10.5.2 Геометрическая подгонка по диску
(Рис. 7-65)
F6
OPTIMA.
START:
. (Рис.
7-66).
F6 .
(Рис. 7-67).
F6
.
START:
.
7.10.5.3 Диагностика диска
Optima
( )
.
.
:
"1" RIM ONLY
OPTIMA (m, 10).
.
(Рис. 7-68).
16 , рис. 7-69.
(Рис. 7-70).
7.10.5.2 Geometric matching with only the rim
(Fig. 7-65)
After having clamped the rim to analyse on the balancer,
press F6 on the OPTIMA MATCHING screen.
Lower the wheel guard and press the START key: the
laser scanners carry out the runout measurement in the
bead seats. At the end of the measurement the control
software prompts the alignment of the rim valve at 12
k (Fig. 7-66).
Press F6 to confirm.
Release the rim and move it to the tire changer to fit the
tire (Fig. 7-67).
After the tire changer, clamp the wheel (rim + tire) on
the balancer and confirm with F6.
Lower the wheel guard and press START: the balancer
will proceed with the runout calculation with the tire fitted.
To carry out the geometric matching of the complete wheel
proceed as indicated in the c matching section.
7.10.5.3 Rim Only Diagnosis
Optima can be used to perform an analysis of the rim
only and to process its structural parameters,
independently of the tire.
If only the rim is clamped, the machine always
automatically recognises the presence of a rim without
the tire.
To activate the "Rim only diagnosis" function:
enable "1" in the "Optima Parameters" screen at the
"RIM ONLY" item (m, Section 10).
start the run.
During the run measurements are taken on the lateral
internal profiles and on the bead recesses (Fig. 7-68).
The laser reading positions on the rim are the same as
the contact points obtained with a circle with 16mm
diameter, as shown in figure 7-69.
When the run is complete, the graph showing the curves
for the radial Run-out of the right and left bead recesses
appears (Fig. 7-70).