DCE80-100E
Technical Handbook
Hydraulic cylinders
Service
38
P.Group 70
TDCE01
04GB
Repairs to leaking hydraulic cylinders – replacing
the seal
Se also separate information
Supplement Technical Handbook, Hydraulic cylinders
Publ. No. 920937-9279
General instruction applicable to all cylinders
If necessary, see Group 80 for instructions on the dismantling of
the fork carraige and mast.
1. Remove the relevant hydraulic cylinder. Fit immediately pro-
tective caps or plugs to the hydraulic cylinder and hose con-
nections.
2. Take the cylinder to the workshop, drain any oil remaining in
it and carefully wash the outside of the cylinder.
3. Dismantle and assemble the cylinder in accordance with the
instructions for that particular cylinder type.
4. Removing the seals:
– Whenever repair work is carried out on hydraulic cylin-
ders, all seals, scraper rings, etc. must be replaced.
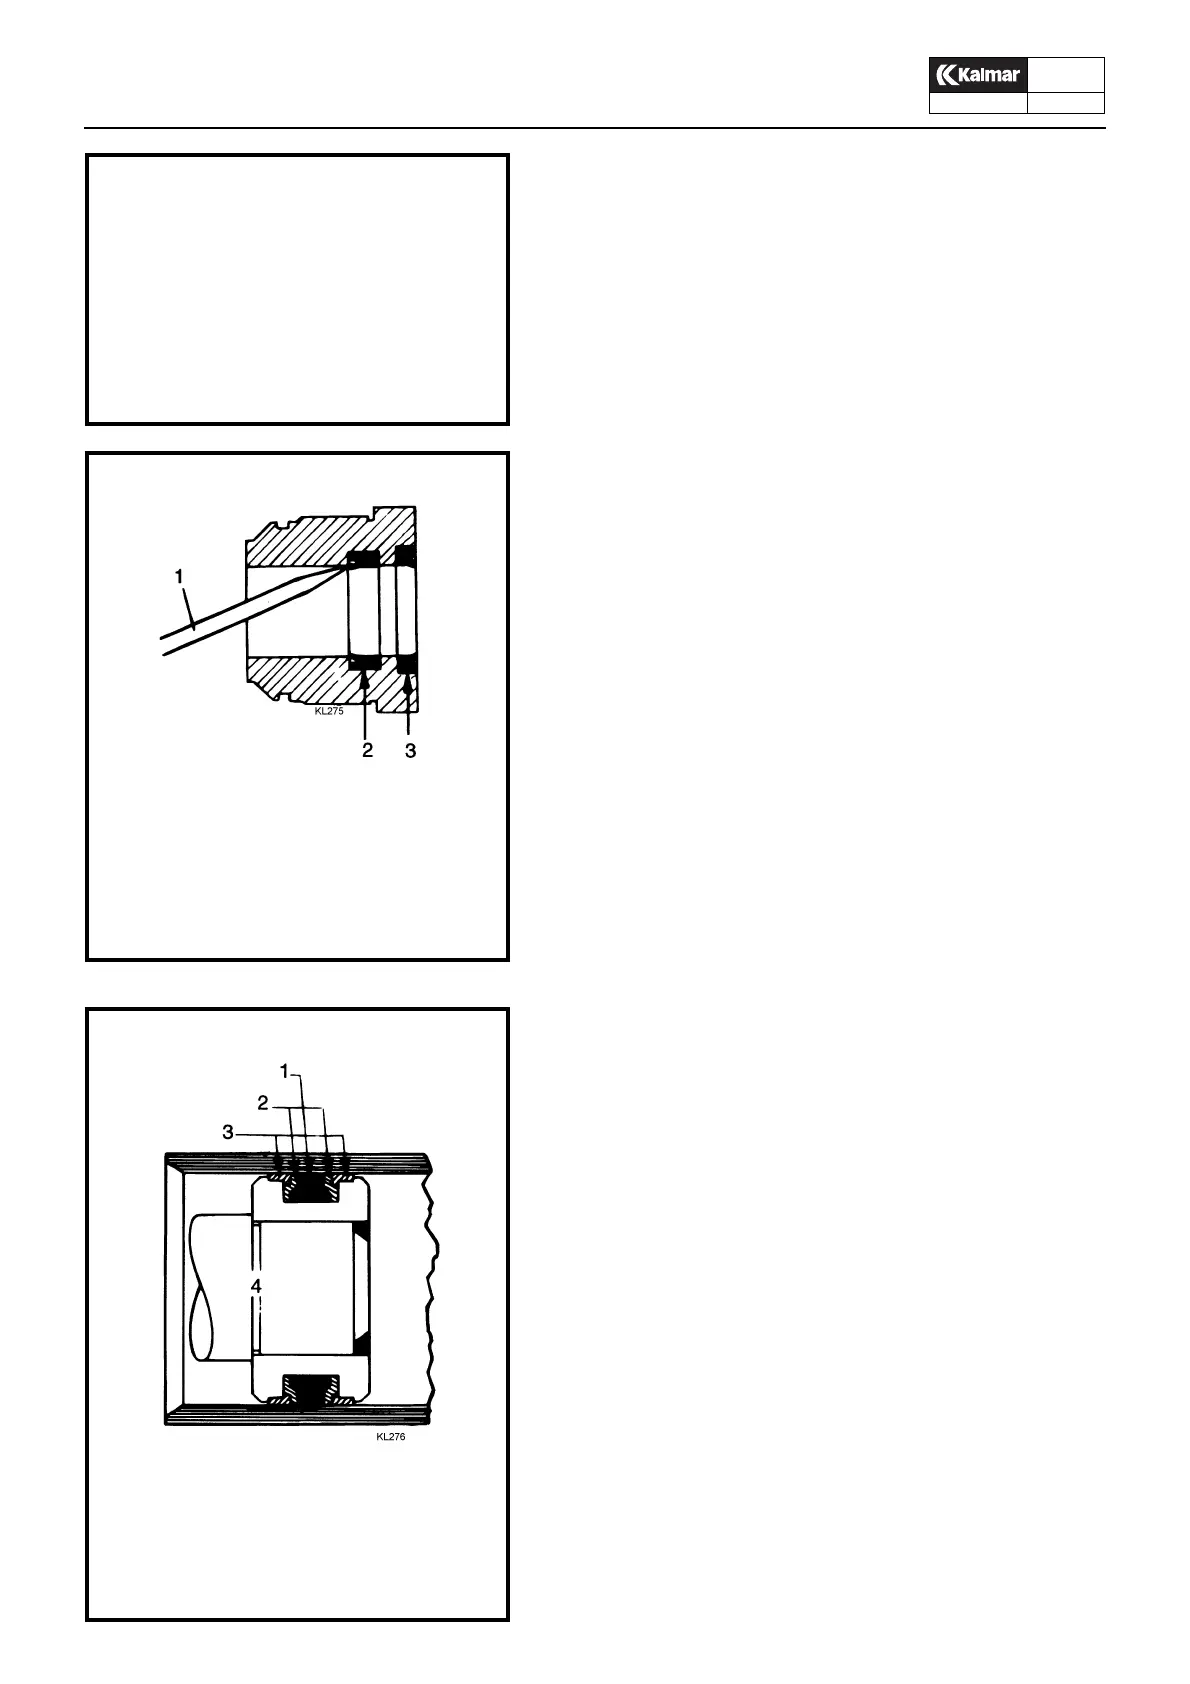
– Take extreme care when removing the seal in the cylinder
head, to avoid scratching the bottom of the groove, since
oil leakage will otherwise occur in the future. Use a screw-
driver as shown in the figure.
– Clean all components very throughly.
5. Fitting of lip seals:
– Fit the seal in the cylinder head with the lip facing inwards
towards the piston. Oil the seal and press it in by hand.
N.B. Don’t use any tools, since the seal may otherwise be
scratched. Even a minute scratch may cause the seal to
leak.
6. Fitting the piston seal:
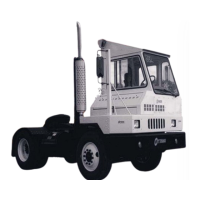
– All piston seals are of the same design and consist of five
components, i.e. a centre sealing ring, two backing rings
and two guide rings.
– Dismantle the piston seal and start by fitting the sealing
ring onto the piston, and then fit the backing rings and the
guide rings. All of this must be done by hand.
IMPORTANT!
Never use compressed air for re-
moving the piston from the cylinder.
You could sustain serious injuries.
1. Screw driver
2. Lip seal
3. Scraper ring
1. Sealing ring
2. Backing rings
3. Guide rings
4. Piston head