Service Manual
Operating Lights marLED® E3, E9, E9i, E15, battery and
marLED® E3 on ceiling tube Ø 110 mm
Revision 2 155
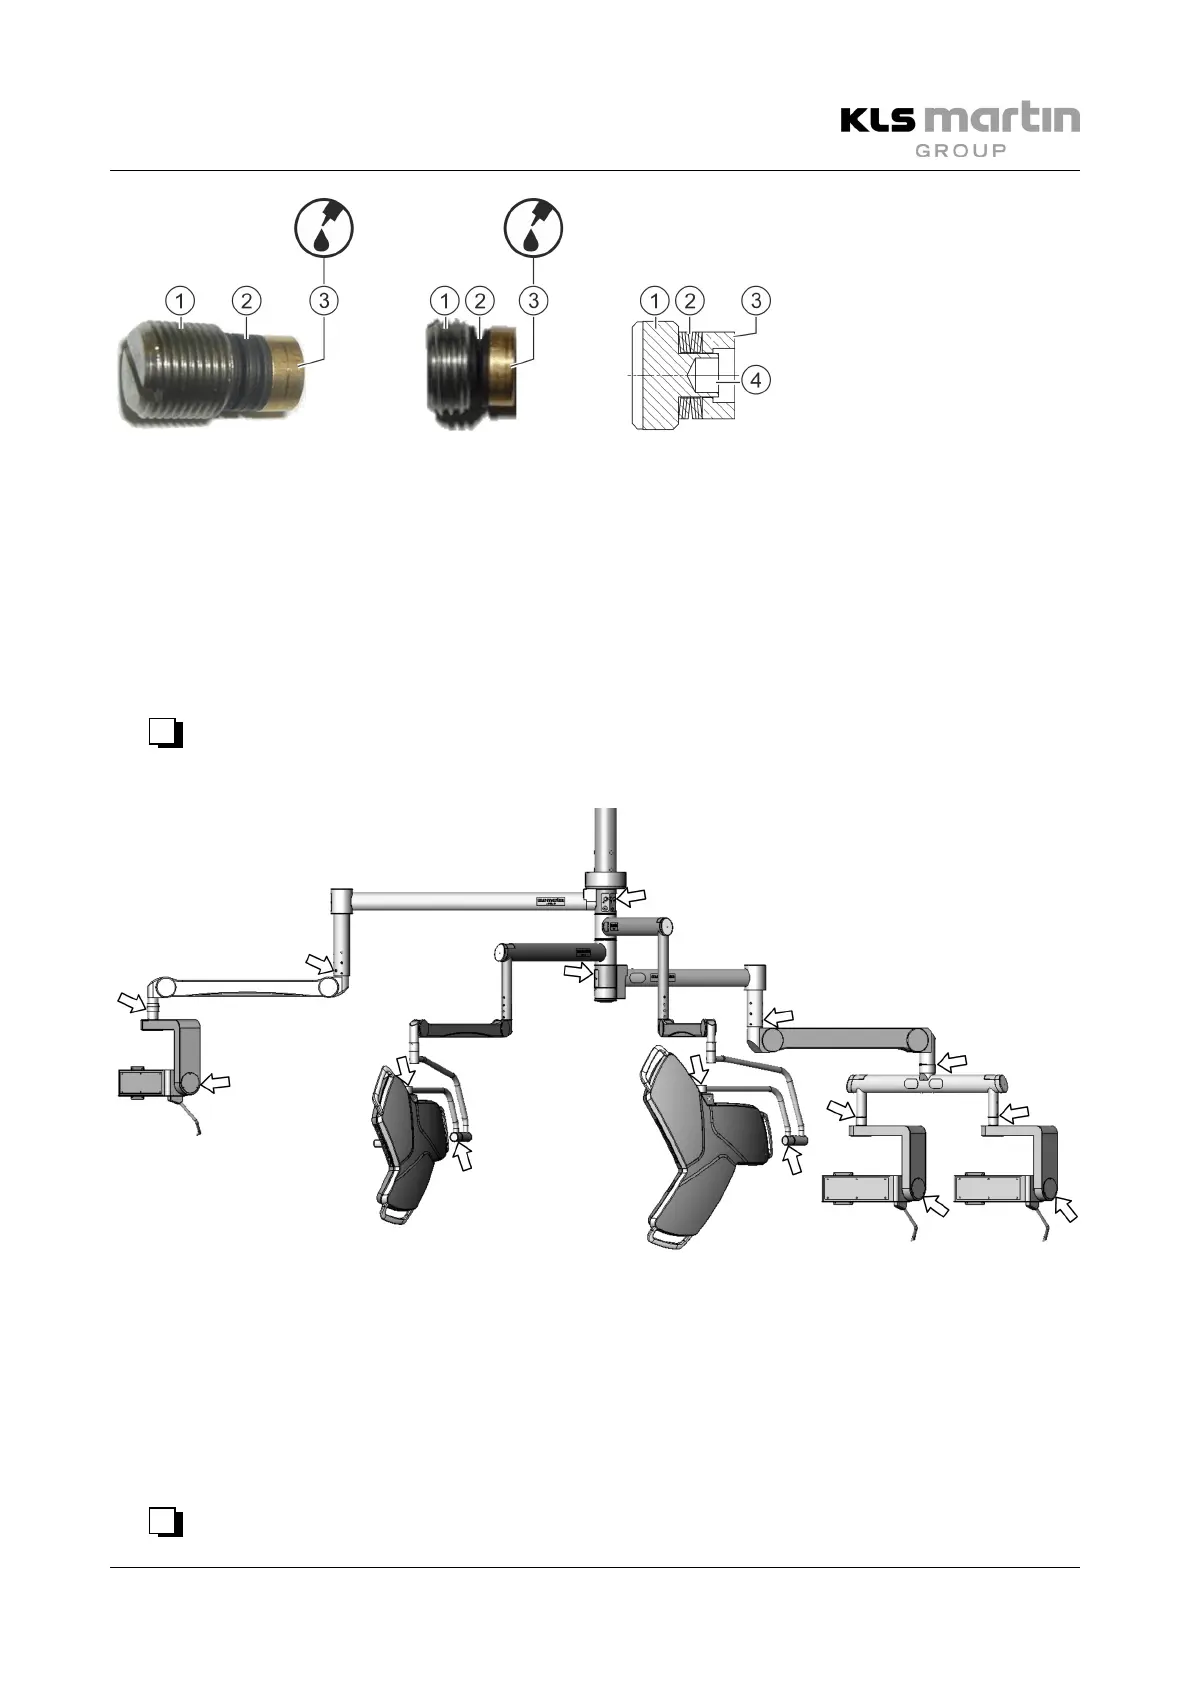
Check the cylindrical brake pad (3) for wear. If it does not sufficiently project above the center (4) of the
screw (1) while the spring (2) is compressed, so that it can be expected that the pad will be worn before the
next check, the brake screw must be replaced.
• Check the brake screws consecutively:
– Unscrew the brake screw and check the brake pad.
– Replace the brake screw if necessary.
– Slightly grease the brake bad (3) using RENOLIT AS.
– Reattach the brake screw and adjust it.
• √
g) Checking the end stops on spring arms and tracking arms
Fig. 13-7: Positions of the end stops
End stops can be found on all joints through which cables are routed.
• Check the end stops by carefully rotating the joints:
– If the joint can be rotated by more than 360°, no end stop is installed.
– A correctly operating end stop limits the rotational movement without making it stiff.
– Stiff movement of the joint is a sign of a defective end stop.
• Replace defective end stops and adjust the replacements.
• √


 To Next Page