Service Manual
Operating Lights marLED® E3, E9, E9i, E15, battery and
marLED® E3 on ceiling tube Ø 110 mm
Revision 2 45
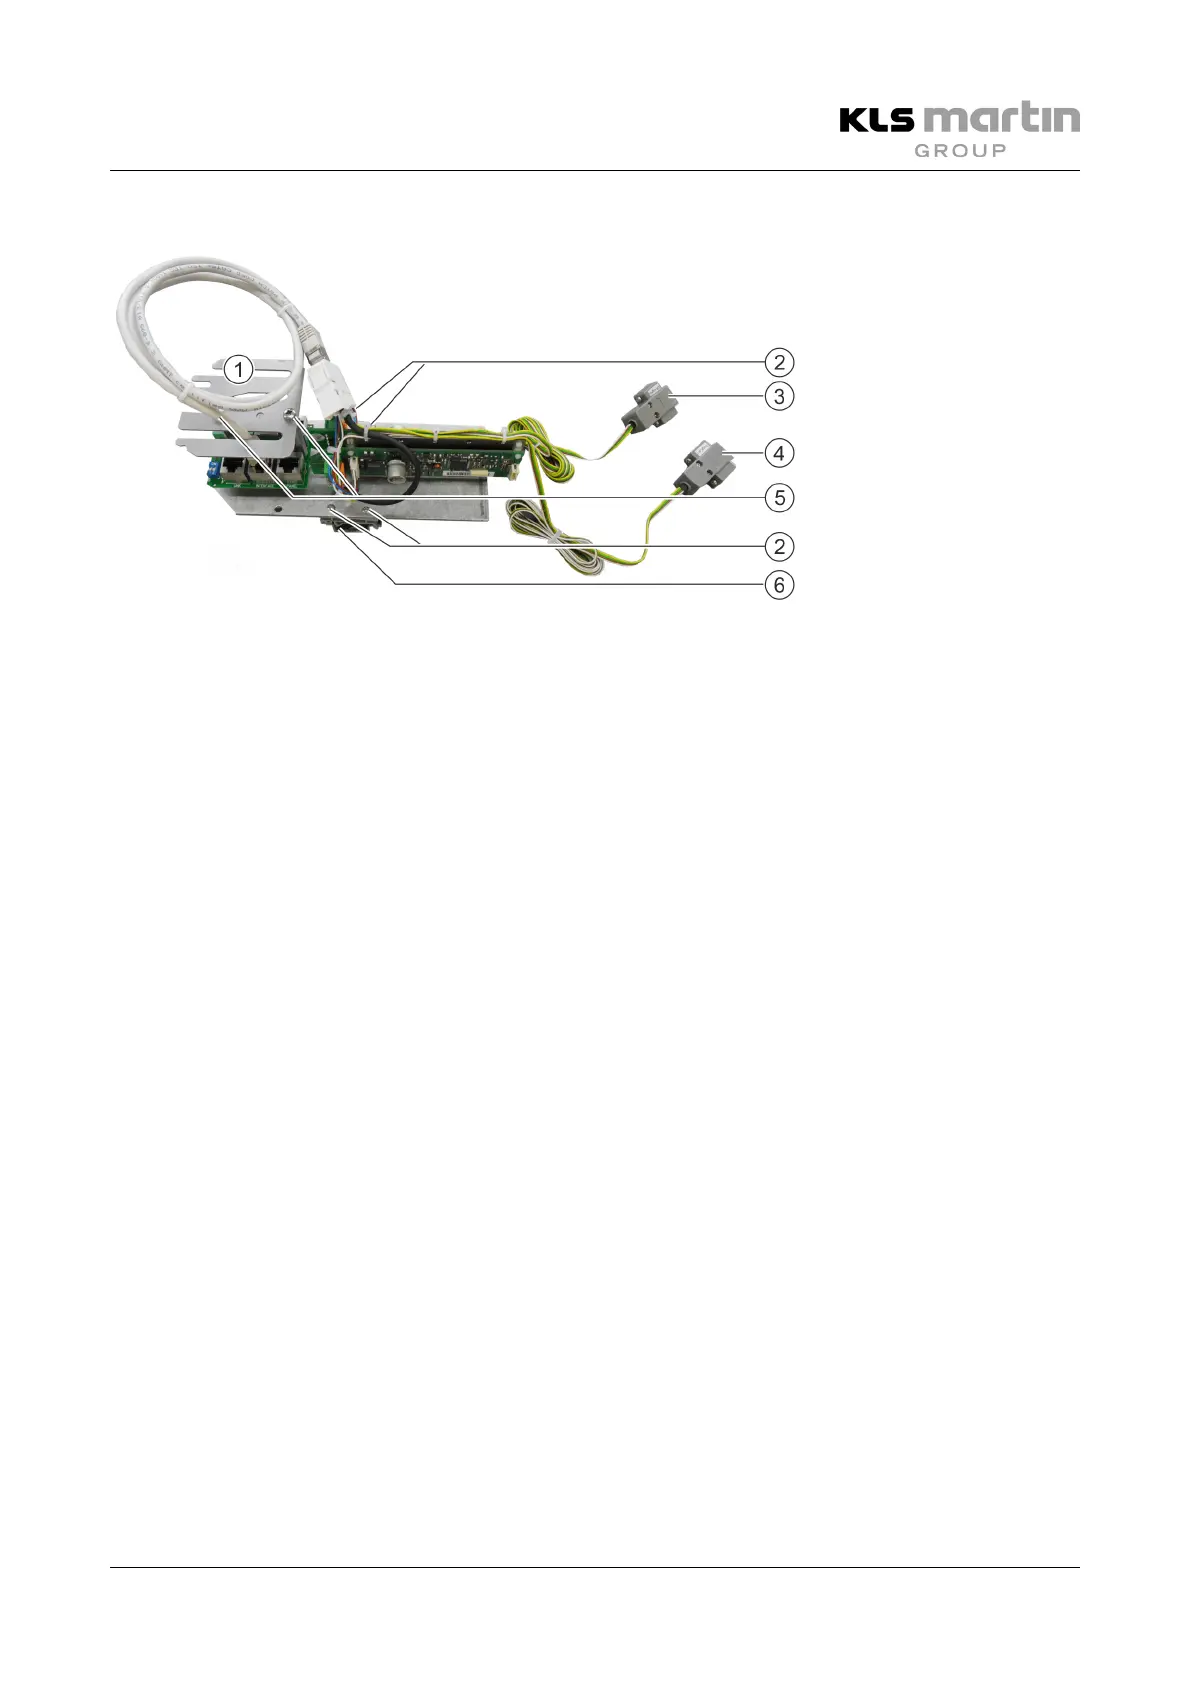
6.2.3 COM Interfaces for Separate Installation HW 30–HW 36
COM interfaces intended for separate installation are shipped completely assembled, with CAN board and
mounting plate, as a kit on 2 top-hat rail mounting adapters (6).
The supplied top-hat rail is used for simple and electrically insulated (via top-hat rail bracket) installation on
a suitable surface.
• Mount the kit on the top-hat rail using the mounting adapters (6).
• If necessary, you can remove the mounting adapters by unscrewing the screws (2) to install the
mounting plate without brackets on a suitable base, using the same screws and boreholes.
• Connect the RS232 plugs (4, 3) to the external control system (e.g. OR1).
• Remove the cover plate (1) fixed with 2 screws (5).
• Connect the plugs of the RJ45 cable(s) coming from the ceiling tube to the socket(s) X1/X2 of the CAN
board, making sure to match plugs and sockets correctly according to marking.
• Put cover plate (1) back in place using the 2 screws (5).
 Loading...