Service Manual
Operating Lights marLED® E3, E9, E9i, E15, battery and
marLED® E3 on ceiling tube Ø 110 mm
Revision 2 87
9.13 Replacing the Control Electronics
Danger of serious injury from electric shock!
There is the risk of coming into contact with live cables
in the opened light head.
Turn off the power supply on site and secure it against reactivation.
• Open the light housing, see section 9.8 “Opening the Light Housing”, page 79.
• Make a note of all plug-in connections of the control electronics board and unplug the cables, see
section 11.2.5 “Cable Harness from Control Electronics Board to Light Engine of marLED® E9(i)”,
page 113.
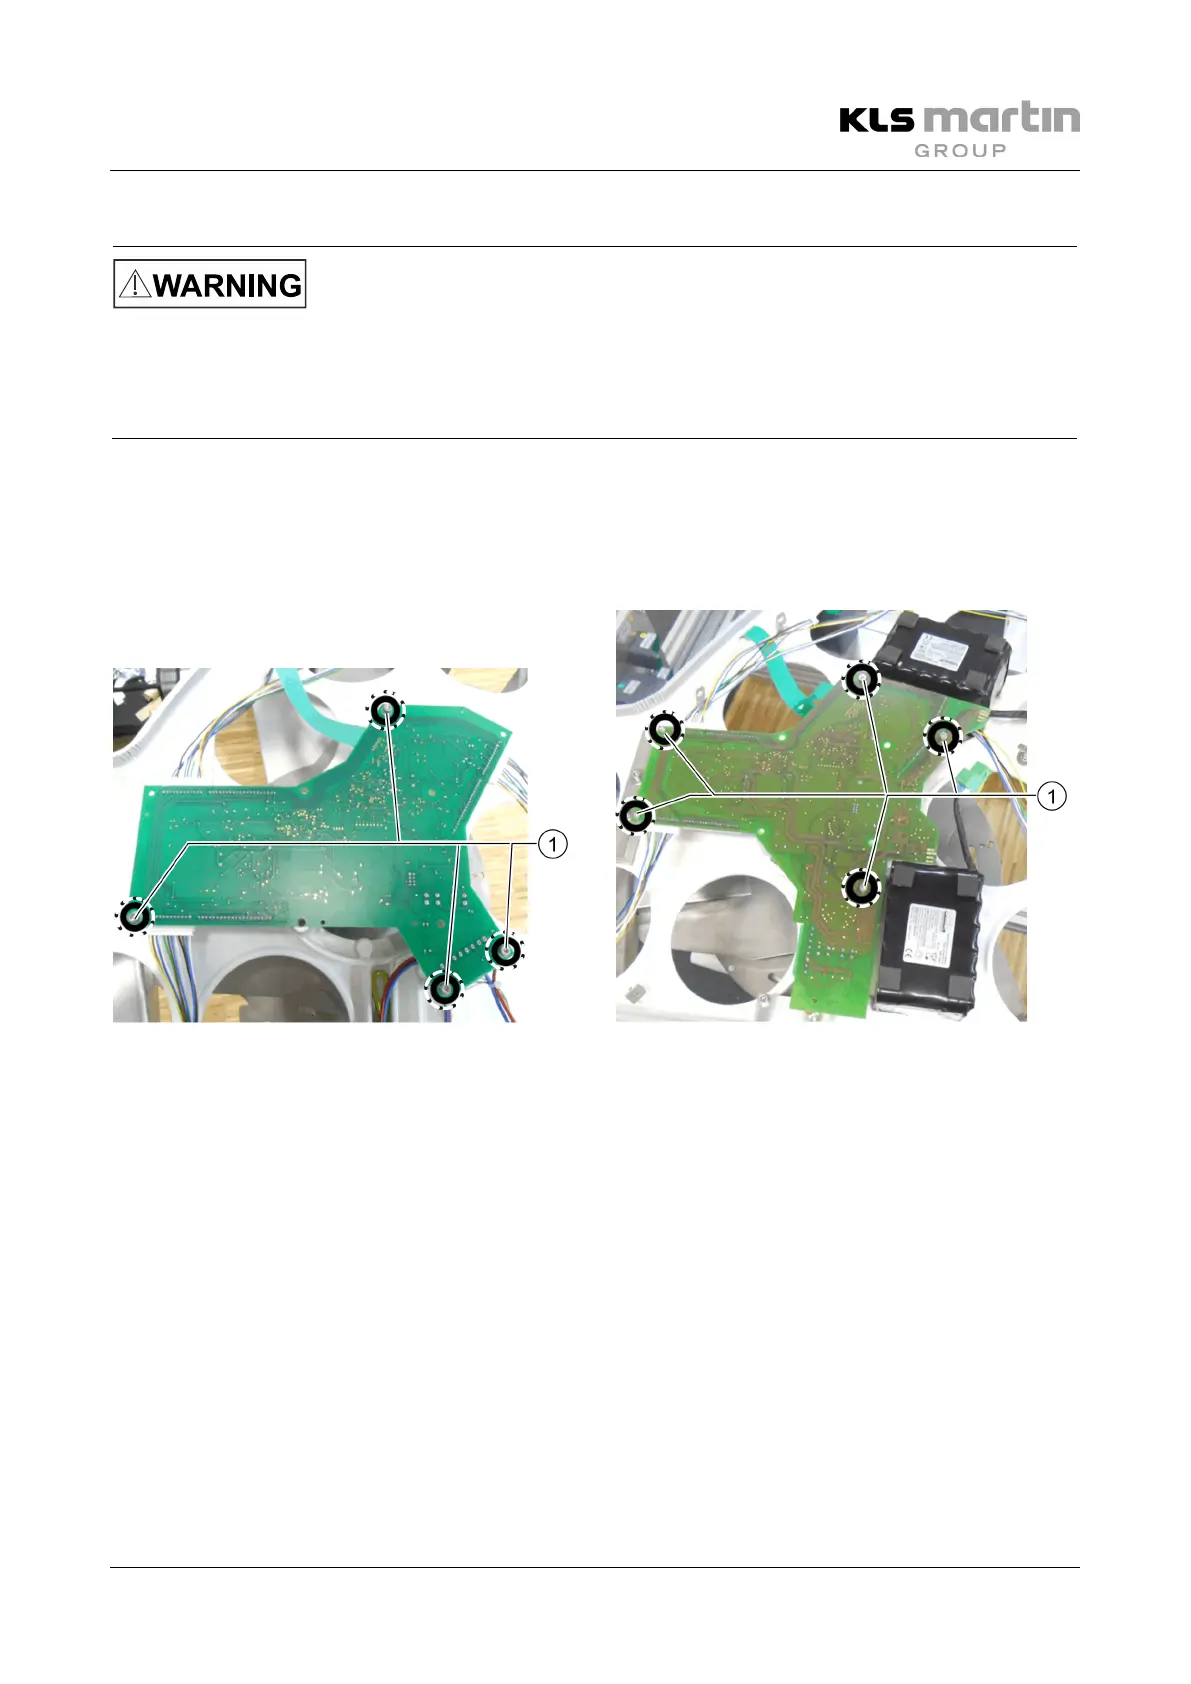
Fig. 9-4: Fixing screws (1) marLED® E up to HW 31
Fig. 9-5: Fixing screws (1) marLED® E and
marLED® E battery from HW 32
• Remove the fixing screws (1) of the control electronics board.
• Mount the new control electronics board using the fixing screws.
• Restore all connections.
 Loading...