Service Manual
Operating Lights marLED® E3, E9, E9i, E15, battery and
marLED® E3 on ceiling tube Ø 110 mm
Revision 2 73
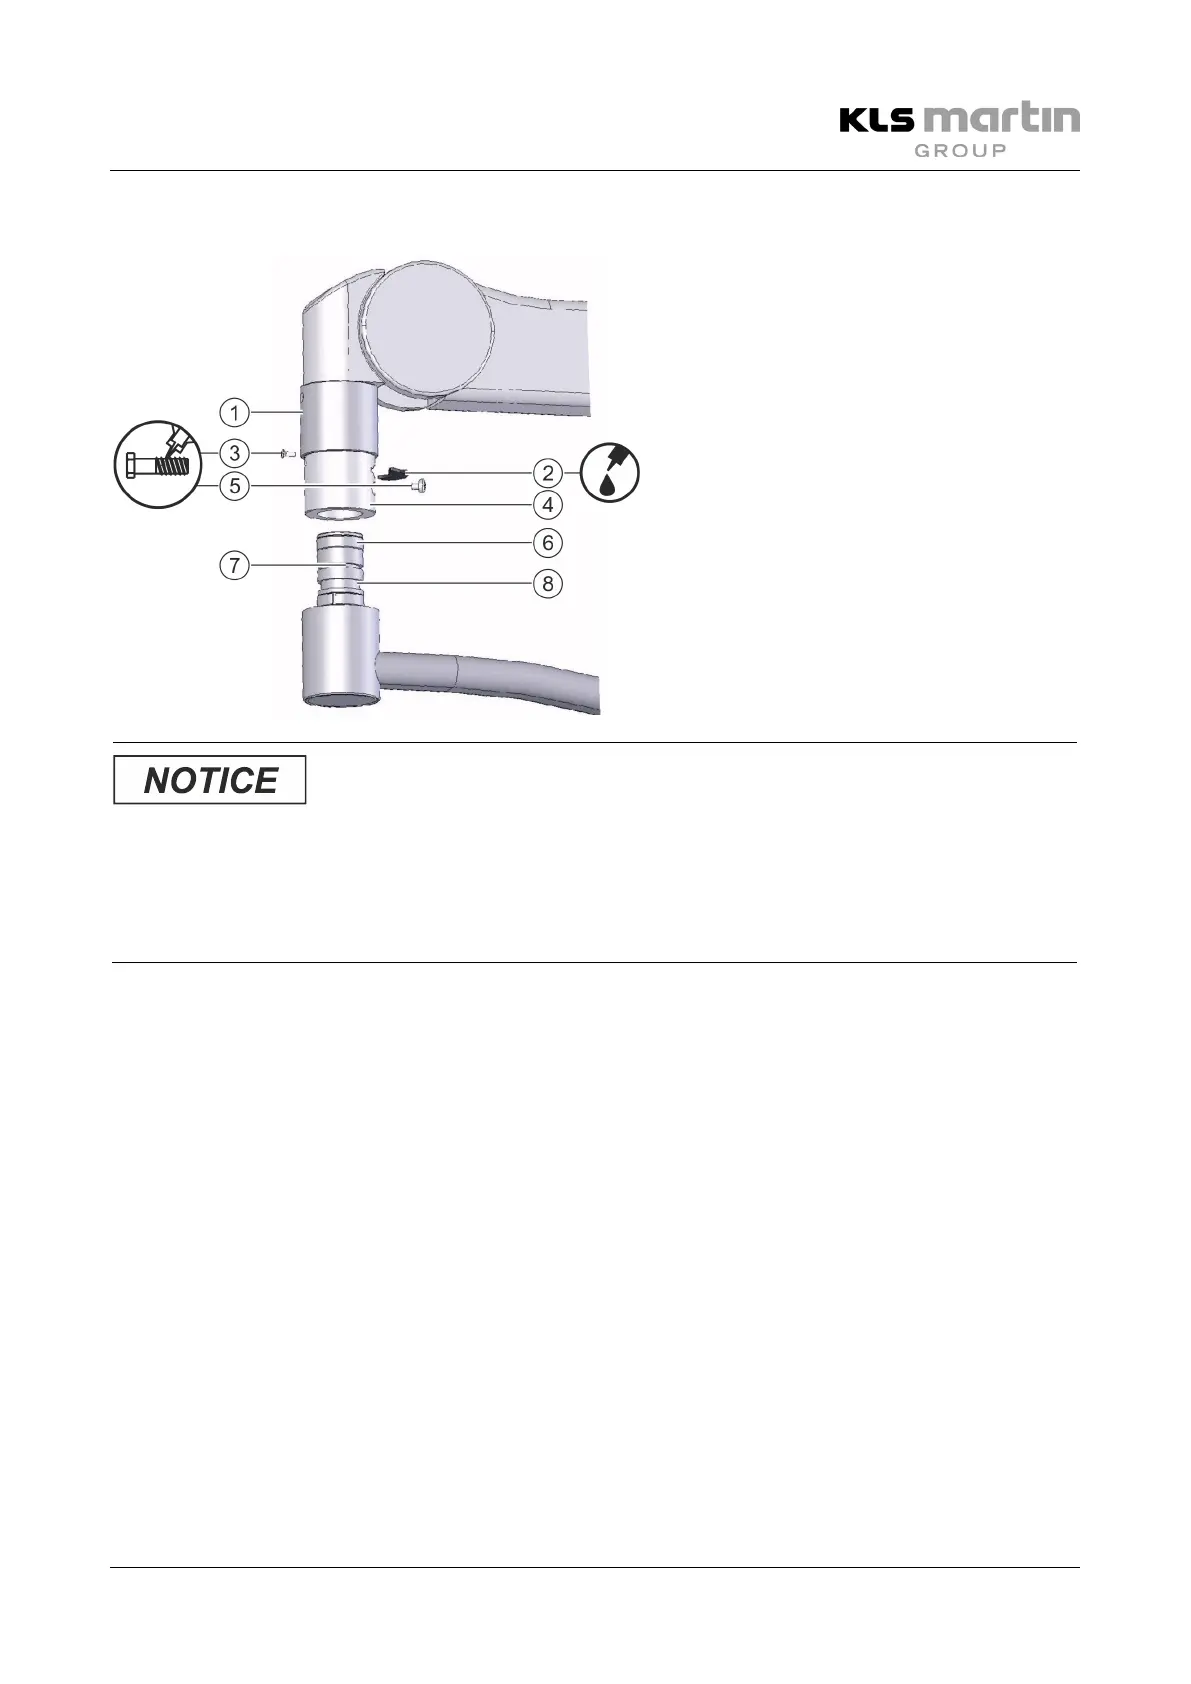
9.1.3 Reinstalling the Light Head on the Spring Arm
Locking segment, grease here, see Final steps,
page 153
Redundant locking screw, M4 x 5 mm oval head
screw without washer (acc. to DIN 7985)
Groove for locking segment
Groove for redundant locking screw (3)
Danger of damage to multi
-pole plug!
When making the connection between the multi
-pole plug located in the neck (6) and its coupler in the
spring arm, take care to prevent damage to the plug.
Insert the plug axially into the respective coupler, not at an angle!
• Take firm hold of the spring arm with one hand at the socket (4), then carefully insert the neck (6) of
the cardan system into socket (4) until the grooves (7, 8) become visible in the slot.
• Re-insert the locking segment (2) through the slot and engage it with groove (7).
• Re-insert the redundant locking screw (3) flush with thread locker, making sure that it engages with
groove (8) of the neck of the cardan system.
• Push the safety sleeve (1) back down, then re-insert the fixing screw (5), securing it with thread locker.
• Adjust the height stop in accordance with room height, see section 9.1.1 “Adjusting the Height Stop on
AC2000”, page 71.
 Loading...