Service Manual
Operating Lights marLED® E3, E9, E9i, E15, battery and
marLED® E3 on ceiling tube Ø 110 mm
Revision 2 85
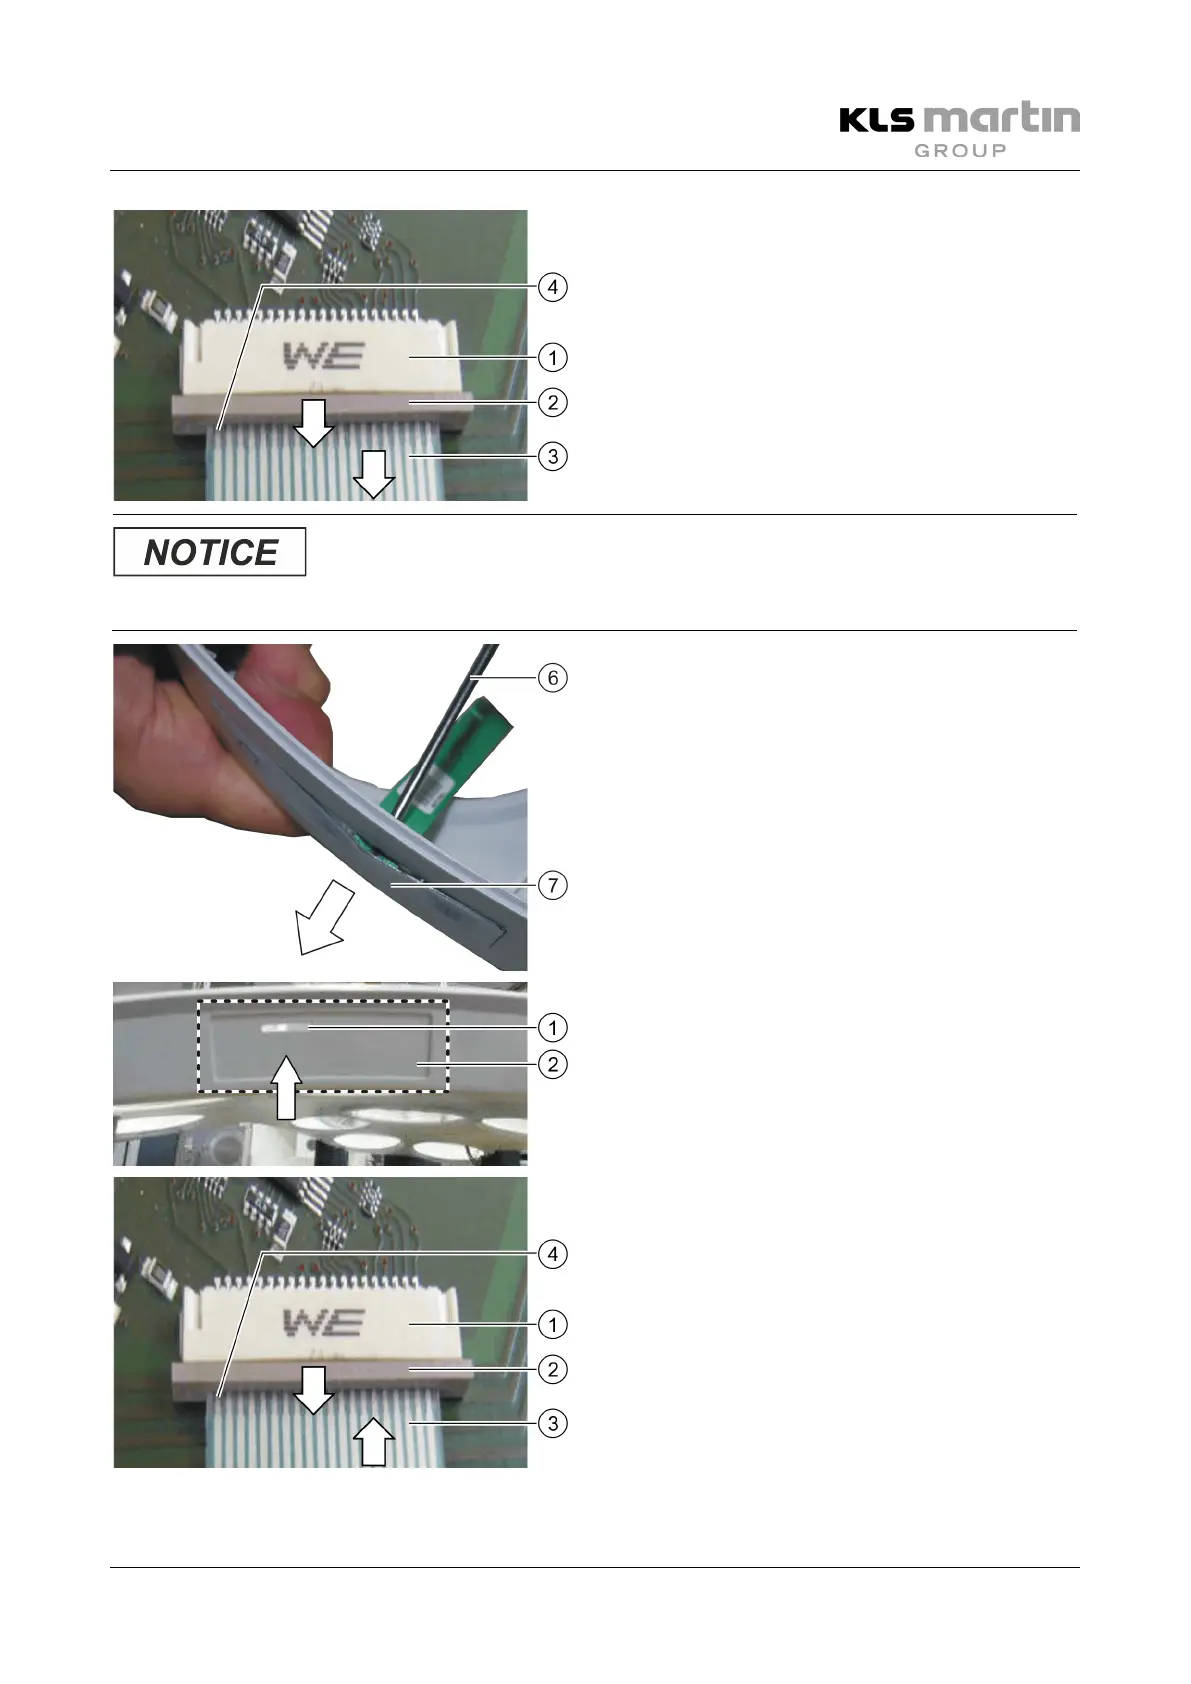
• Pull the locking device (2) carefully
backwards (3).
• Disconnect the flat ribbon cable (3) from the
connector (1).
• For marLED® E battery lights, disconnect the
second flat ribbon cable in the same way.
Pin 1 (4) of the flat ribbon cable is located on the left
side.
control panel foil will be destroyed!
• Press a flat screwdriver (6) through the gap
against the control panel foil (7).
• Press out and remove the control panel foil (7)
and discard it.
• Carefully remove any adhesive residues from
the light housing.
• Make sure that the keypad attachment surface
is totally free from grease and other residues.
• Insert the flat ribbon cable of the new control
panel foil through the gap (1) into the light
housing.
• Position the self-adhesive control panel foil
correctly in the recess (2) and press it into place.
Pin 1 (4) of the flat ribbon cable (3) must be on the
left side.
• For marLED® battery lights, start with mounting
the shorter flat ribbon cable for the buttons, then
the longer one for the LEDs.
• Pull the locking device (2) carefully backwards as
indicated by the arrow.
• Insert the flat ribbon cable (3) into the connector (1).
• Push the locking device (2) back into the
connector (1) and check that the flat ribbon cable
is securely locked in place.
 Loading...