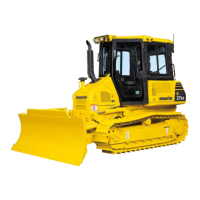
7E - 2
STEERING DRIVE GENERAL
DESCRIPTION
This steering system combines a planetary gear type drive, hydraulically applied clutch and brake discs and a spring applied
hydraulic released brake cylinder - that doubles as a parking brake - all located in the rear main frame. Steering is operated
by the transmission/steering valve. The right brake pedal is used to apply both brake discs simultaneously for stopping or
holding the machine. The planetary gear type drive consists of a bevel gear, bevel gear carrier, to which the bevel gear
mounts, and two planet gear carriers (located within the bevel gear carrier) which supports the planet gear assemblies. A
clutch disc and sun gear assembly is located on each side of the bevel gear carrier. The clutch disc is splined to the sun gear
and held with retainer rings. The sun gear is supported on bushings in the bevel gear carrier bearing cage and meshes with
the planet gears. The brake discs (disc next to each clutch disc) are splined to the sprocket drive pinion shaft.
OPERATION
During normal operation (machine moving in a straight line) power transfer is from the bevel gear and gear carrier assembly
through the planet gears to the planet gear carriers out the sprocket drive pinion shaft to the sprocket drive and tracks.
During this time, the clutch discs are held stationary by the clutch shoes allowing the planet gear to walk around the clutch
disc sun gear carrying the planet gear carriers with them as they rotate on their respective shafts. In a turn, the clutch disc
on the side to which the turn is made is released from the clutch shoe. When the clutch disc is released, the planet gears
rather than turning the planet gear carrier, rotate freely on their respective shafts and transfer motion to the free clutch disc.
At this time, the track on this side of the machine is just being carried along the ground. When the track is held stationary
(as in a pivot turn), the clutch disc is still free and the transfer of motion is to the free clutch disc as before only now the brake
disc is held by the brake shoe preventing the sprocket drive pinion shaft from turning.
Steering Operation
Fluid for the steering system is supplied by the transmission hydraulic system. With the transmission/steering valve in the
centered position, oil enters the valve and is directed to the steering cylinders to apply pressure against the clutch side of
the pistons. The pistons push against the clutch levers which cause the eccentric shafts (13) to rotate, clamping the clutch
discs between the clutch shoes. As the clutch levers rotate, the attached return springs (17) hold the brake levers (6) against
the brake end of the pistons (18) to assure the full release of the brake disc. When either the transmission/steering valve
is moved left or right slightly, the valve spool begins metering pressurized oil to the brake application side of the steering
cylinder while simultaneously metering the oil from the clutch apply side of the cylinder to the return side of the system. This
action releases the clutch disc and “centers” the cylinder so neither the clutch or the brake disc is held. Further movement
of the transmission/steering valve causes the spool to direct full system pressure to the brake side of the cylinder, rotating
the eccentric and clamping the brake disc. At this time the oil from the clutch side of the cylinder is directed to the return
side of the system.
Brake Pedal Linkage
The brake pedal rod (5) enters the frame (4) at the top right hand side and connects to the brake actuator bar (3) under the
frame cover. This bar pivots on a pin in the left side of the frame and connects at the center to the brake equalizer bar (1).
Above both bars is a plate (welded to the frame cover) which acts as a guide. Below both bars on the right side is a guide
plate (welded to the steering cylinder base plate). A plate welded to the steering cylinder base plate on the left side acts
as a guide below the equalizer bar only. The equalizer bar contacts the lower pad on each brake lever (6) located at the front
corners of the frame.
Steering Cylinders
A steering cylinder base plate (7) is bolted and doweled to a pad on each side of the frame. Each base plate has bearings
to support the top of clutch and brake eccentric shafts (13). Each base plate also supports the steering cylinder housing for
the clutch and brake pistons. The clutch end of the piston (16) contacts the clutch lever (15) at the rear of the frame. The
brake end of the piston (18) contacts the upper pad on the brake lever (6) at the front of the frame.
Clutch and Brake Shoe Actuating Linkage
The clutch and brake eccentric shafts (13) are supported in bearings at the bottom of the frame and at the top in the steering
cylinder base plates (7). The clutch and brake shoes (8 and 12) are supported on bearings located on the eccentric shafts.
The shaft bearing surfaces supporting shoes are off center from the shaft bearing surfaces in the frame and the cylinder
base plate which results in eccentricity between the shafts and shoes. The clutch and brake levers (6 and 15) are splined
and indexed to the top of the eccentric shafts. The return spring (17) connected between the clutch and brake levers is used
to assure full release of one disc as the other is held. The brake shoes (8) contact their discs (9) at the front of the frame
while the clutch shoes (12) contact their discs (19) at the rear of the frame. The clutch and brake back-up shoes (10 and
14) are mounted (loose fit) on dowels in the main frame. The clutch adjusting screw is threaded into the frame and secured
with a lock plate. This screw can only be reached when the frame cover is removed or, without rear mounted equipment,
through the power take off opening in the rear of the frame. The brake adjusting screw passes through the side of the frame
and sprocket housing and can be reached externally. Each adjusting screw is used to correctly position its respective backup
shoe in the frame.
 Loading...