Copying Using Memory (continued)
3-35
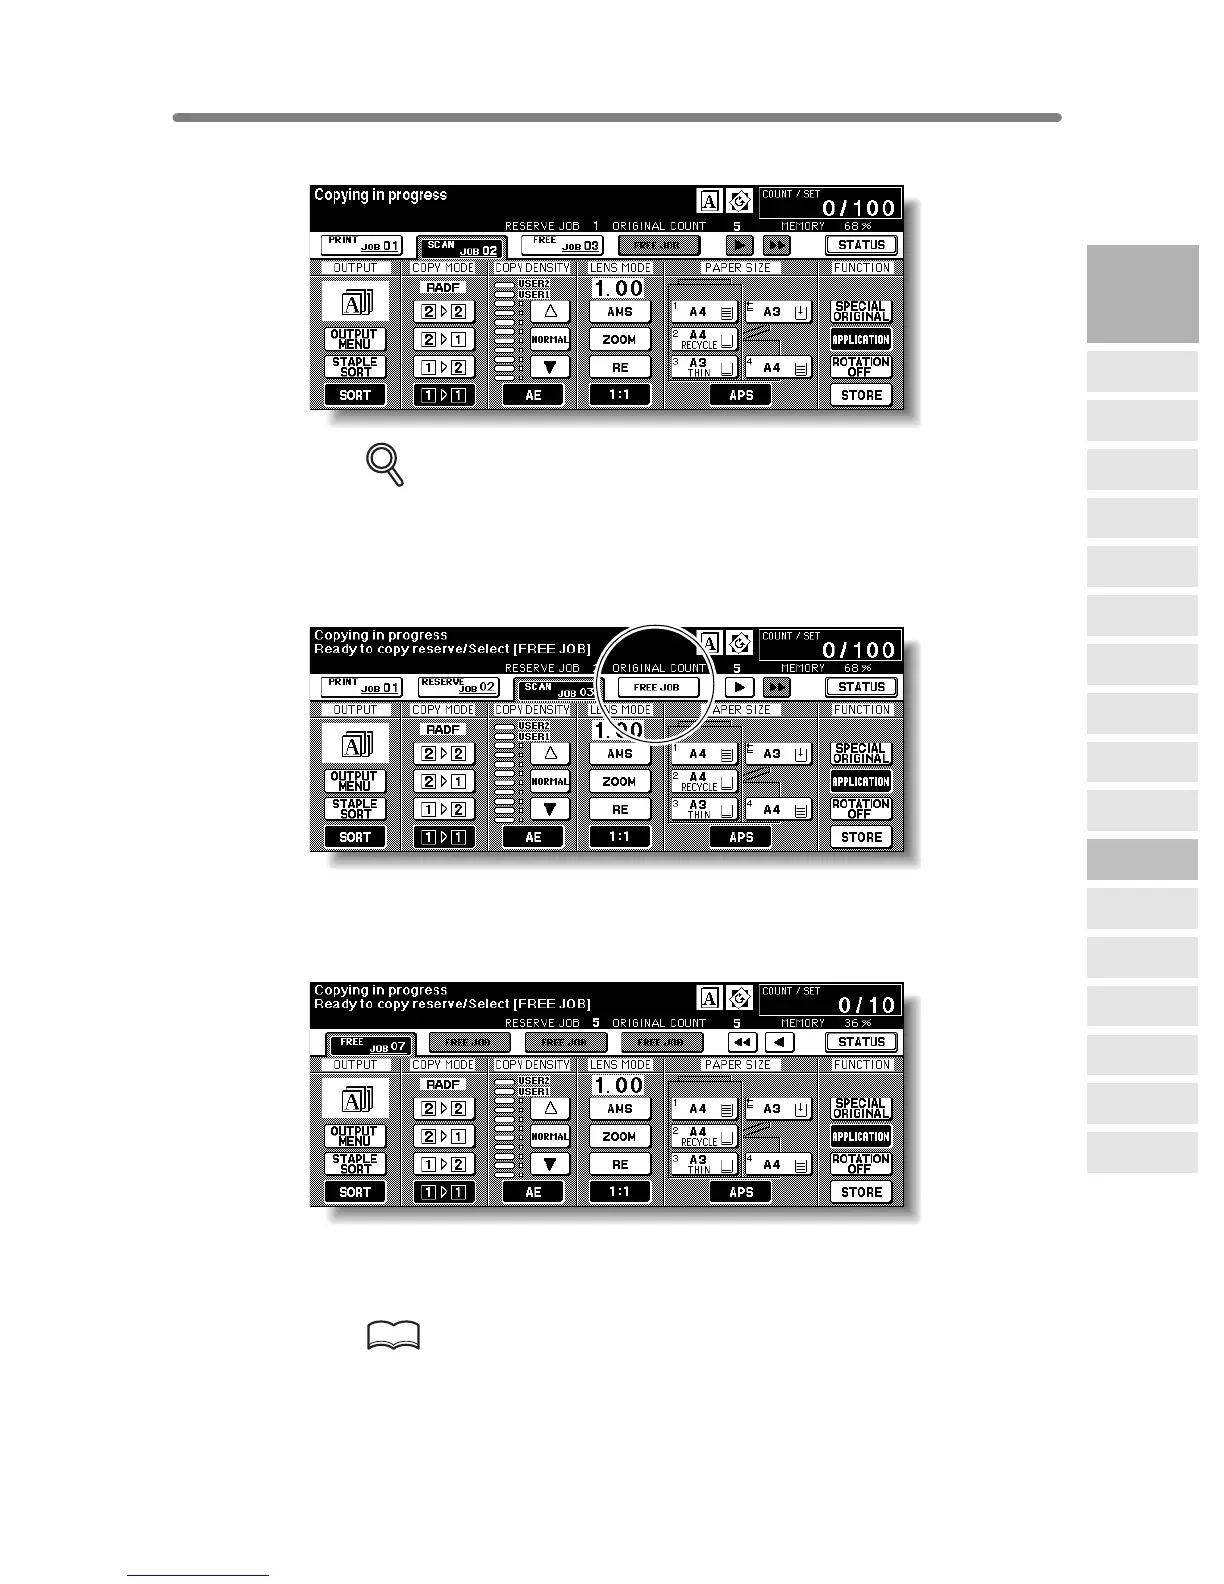
5. Press [START] to start scanning for the reserve job.
DETAILS
When setting more than one reserve job, the next reserve job setting will be
available after the copier starts to scan for the previous reserve job.
When setting the fourth copying job, touch the active
FREE JOB
key at the far right to
scroll to the next reserve setting screen. Another three reserve job settings (04-06) will
be available.
When setting the seventh copying job, touch the active
FREE JOB
key at the far right to
scroll to the next reserve setting screen. Another four reserve job settings (07-10) will
be available.
When completed, the Basic Screen for the current printing job will be restored.
To scroll to the next/previous screen, touch the arrow keys displayed at the right side of
the folder keys.
HINT
When trouble occurs on a reserve job which is not currently displayed on the
screen, the arrow key to scroll to that job will blink. See p. 5-8 to p. 5-10.
3
Copying
Operations
Positioning
Originals
Setting Print
Quantity
Set Job During
Warmup
Stop
Scan/Print
Paper Size
Lens Mode
Density
1-2, 2-2
2-1
Multi-Sheet
Bypass Tray
Using
Memory
Output without
Finisher
FS-111/211
Output Modes
Binding
Mode
Recalling
Previous Job
Check Mode
& Proof Copy
Interrupt
Mode