131
Appendix L: Replacing the Hard Drive
Appendix L: Replacing the Hard Drive
The system comes with a pre-installed 3.5" SATA hard drive. You can expand the 4/
8-channel models with a replacement single hard drive up to 2 terabyte (TB). The
16-channel model has two hard drive bays and can be expanded with a maximum of two 1
terabyte (TB) hard drives (for a maximum storage space of 2TB).
NOTE: It is r
ecommended to use surveillance or security-certified hard drives, which are
designed to be reliable over long periods of time while recording 24/7. Security-certified
hard drives are available at www.lorextechnology.com
Removing the Hard Drive
To remove the hard drive:
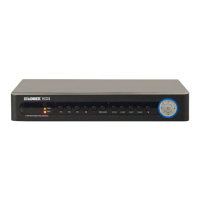
1 Remo
ve the screw from each side panel and rear panel (x3) of the cover.
NOTE: The
16-channel model has 4 rear panel screws and 2 screws on each side panel.
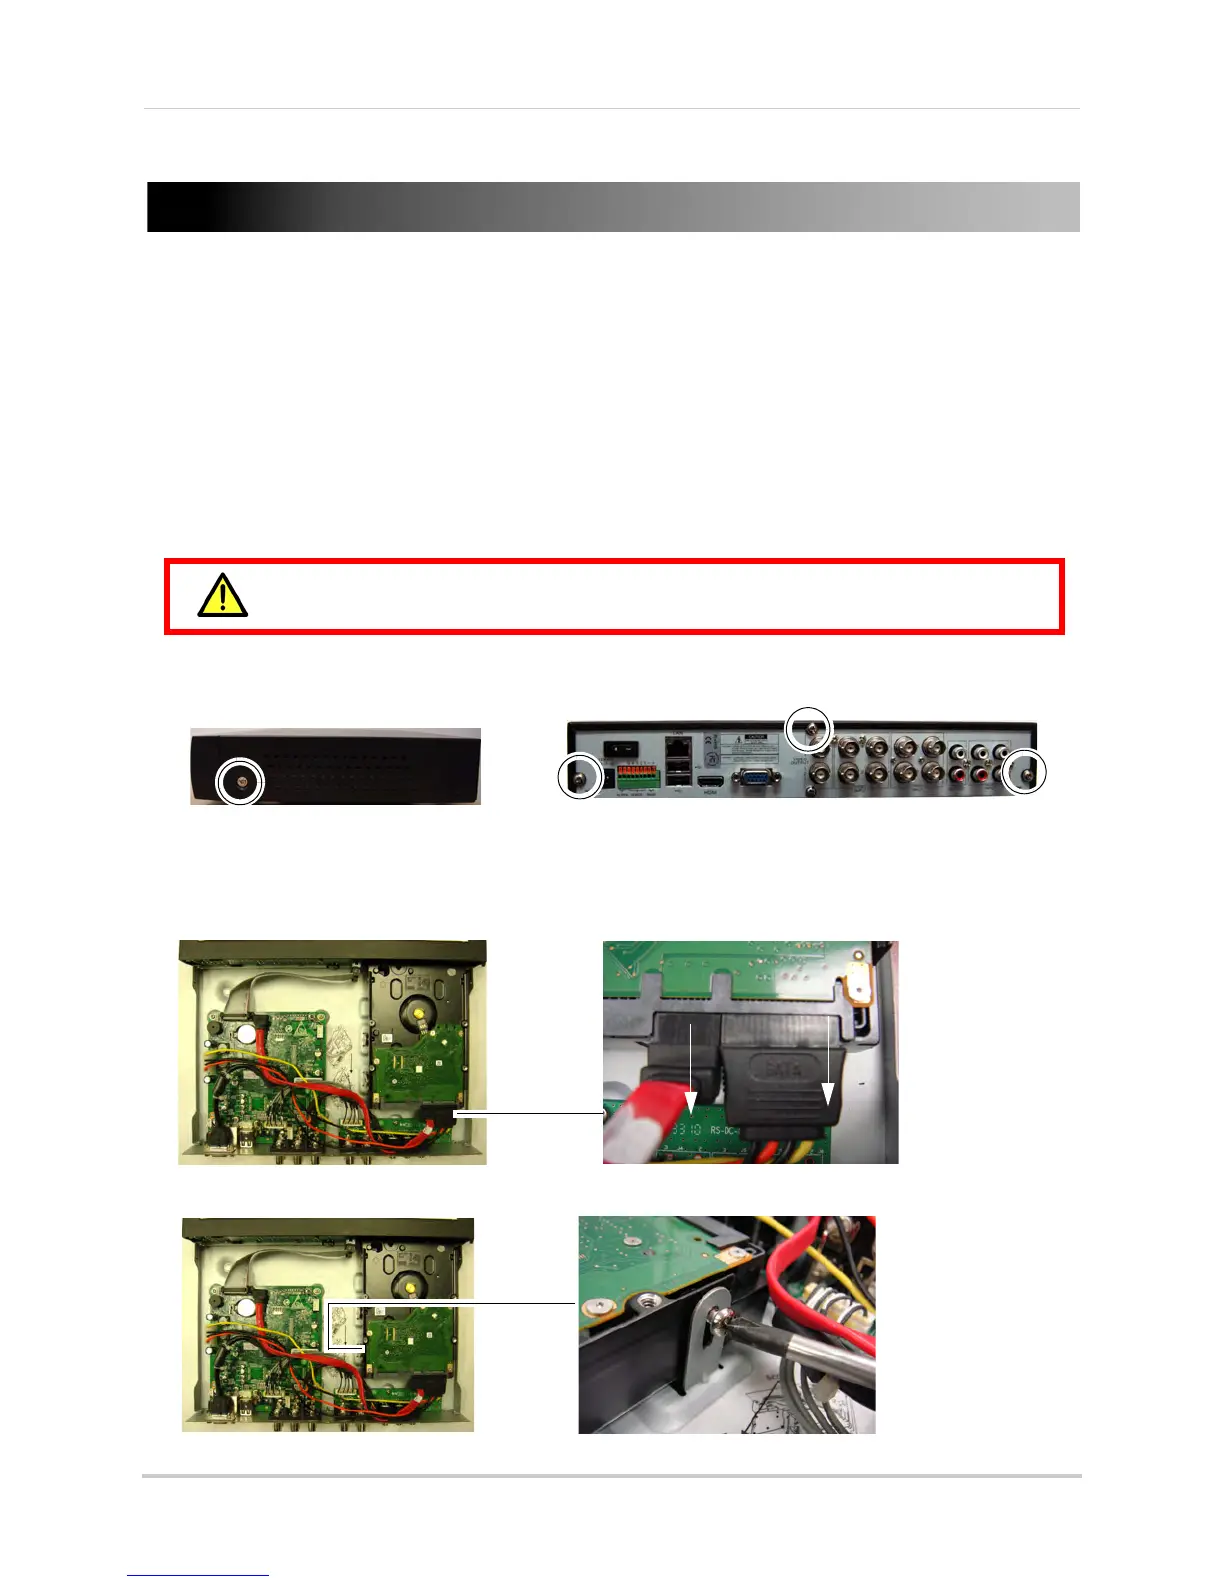
2 Gentl
y slide the cover away from the rear panel and lift off. Be careful of sharp edges.
3 Disc
onnect the power and data cables.
4 Remo
ve the screws from the mounting brackets.
Make sure that the power cable has been disconnected before changing the
hard drive.