128
Appendix J: Recording Audio
Appendix J: Recording Audio
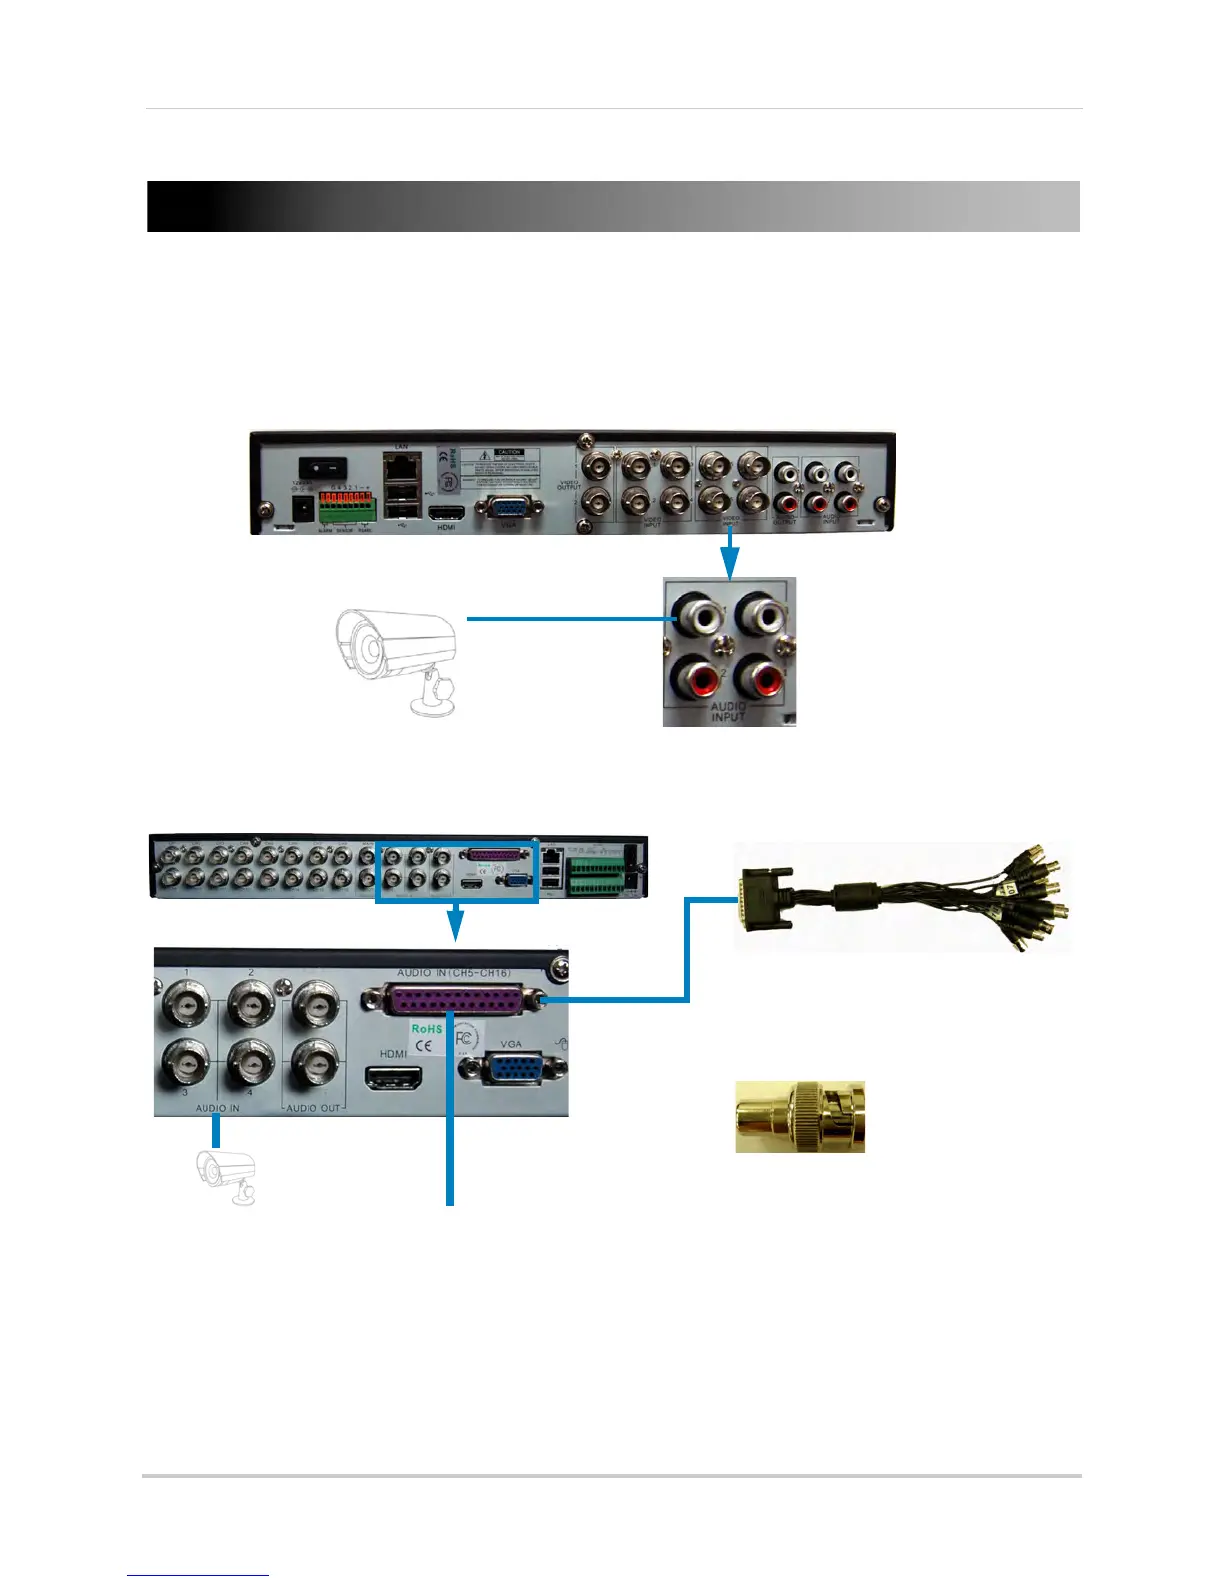
The system can also record audio for up to 4 channels (4/8-channel models) or 16 channels
(16-channel model). You must have audio-capable cameras (not included) or self-powered
microphones (not included) in order to record audio on the system.
To enable audio recording:
1 Co
nnect the BNC video cable from the camera to one of the BNC Video INPUT ports on the
rear panel of the DVR between 1 and 4 (4/8-channel models) or any Video Input port
(16-channel). For example, connect the camera to Video INPUT port 1.
2 Co
nnect the RCA audio cable from the camera to the corresponding Audio INPUT. Following
the example in step 1, you would connect the cable to Audio INPUT port 1.
Connect an RCA audio cable from the camera into the
corresponding Audio INPUT port
8-channel model shown
Connecting Audio Cameras 4/8-Channel Models
Audio IN channels 1~4
Audio IN channels 5~16
Audio harness:
Connect the audio harness into the AUDIO
IN (CH5-CH16) port. The ends of the audio
harness requires a BNC to RCA adapter to
connect RCA audio cameras.
Connect a BNC to RCA connector
(not included) to connect RCA
devices to BNC ports.
Connecting Audio Cameras 16-Channel Models