132
Appendix L: Replacing the Hard Drive
5 Gently remove the hard drive from the housing.
Replacing the Hard Drive
To replace the hard drive:
1 Plac
e the new drive in the housing. Note that the hard drive must be installed upside down on
the 4/8-channel models only.
2 Rec
onnect the power and data cables. Each cable can only be connected one way.
3 Replac
e the cover, tucking the lip of the cover at the front panel.
4 Replac
e the screws on the side and rear panels of the cover.
Formatting the Hard Drive
If you replace the pre-installed hard drive, it
must
be formatted in order to function
properly with the system.
To format the hard disk:
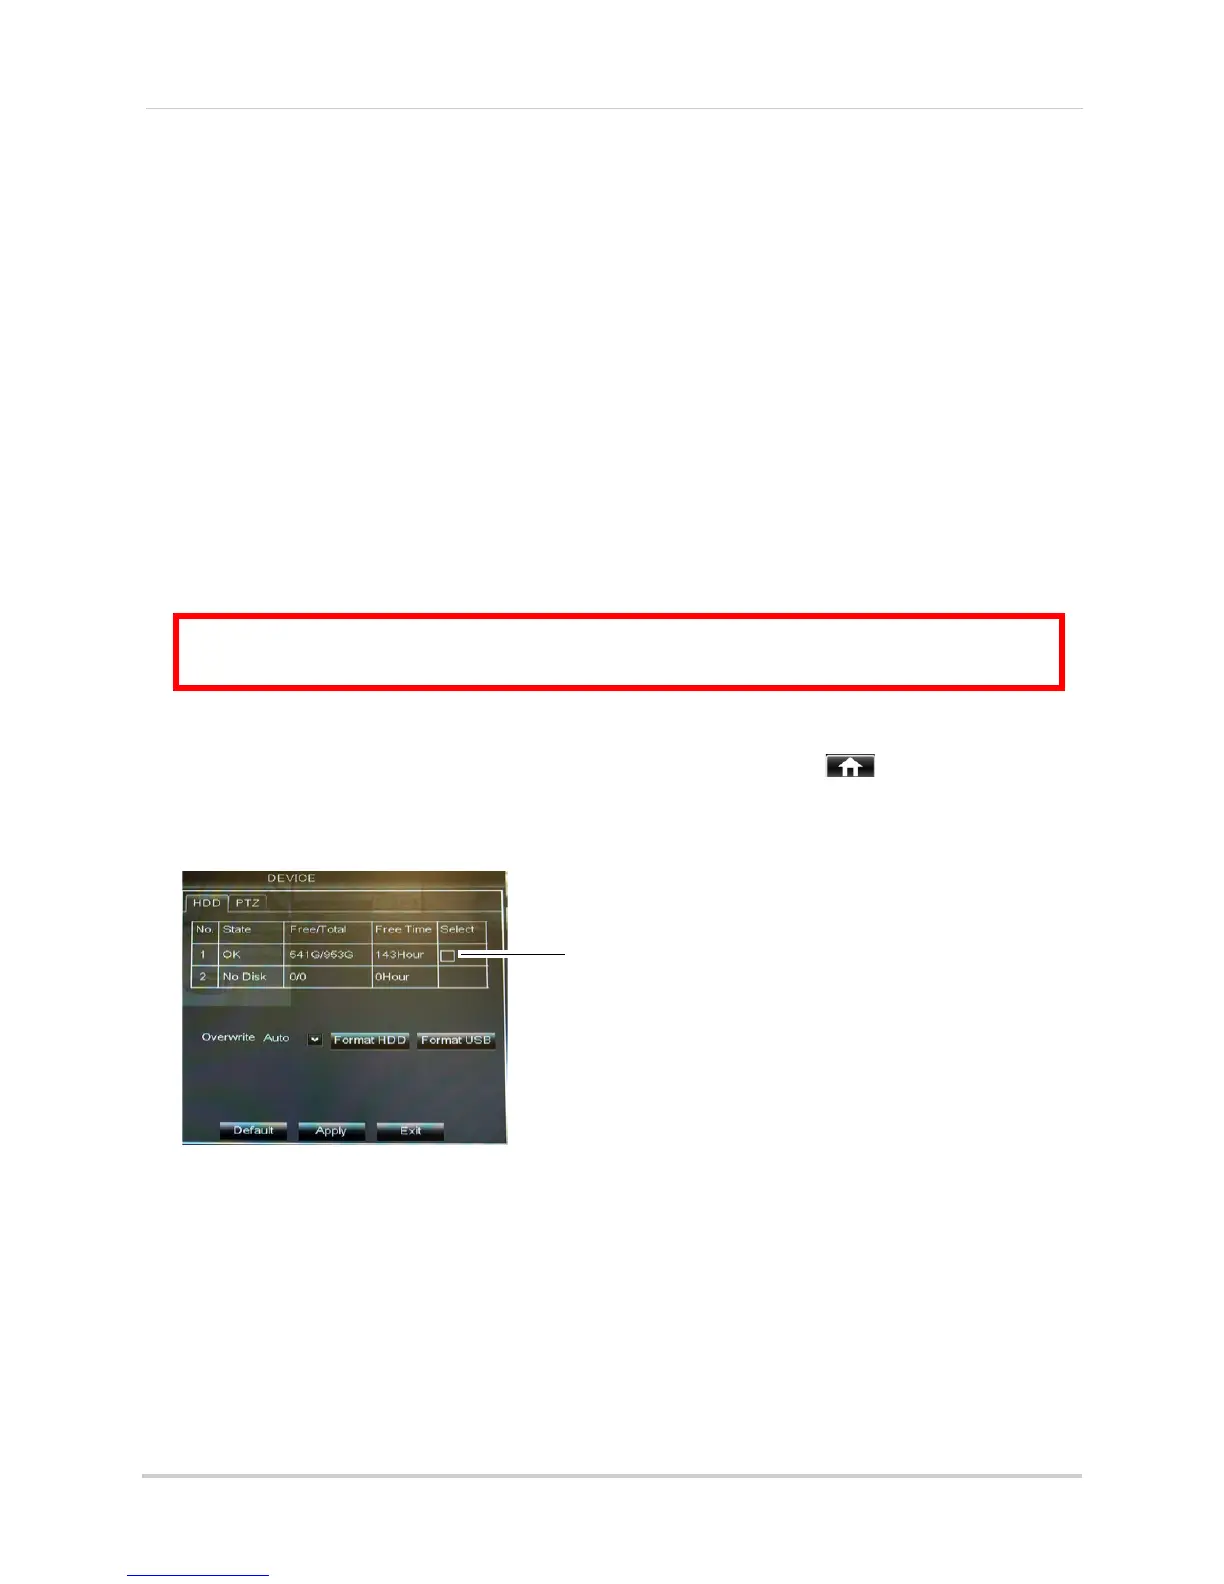
1 Right-click
to open the Menu Bar and click the Main Menu button ( ).
2 Cl
ick Device.
3 Click the checkbo
x under Select to choose the drive you wish to reformat.
4 Cl
ick Format HDD.
5 When the warning
window appears, click OK. Wait for the system to format the hard drive.
NOTE: Y
ou will notice that the size of the HDD and the free space are not the same. The system
uses a portion of the disk space for the operating system and initialization. This is
common in all security DVRs as well as computer hard drives.
ATTENTION: Formatting the HDD erases all data on the hard disk.
This step cannot be undone.