83
5. On test lead set labeled CT X/S connect the test lead binding posts X1 X2, X3, X4 and XN to
secondary of the current transformer X1, X2, X3, X4 and X5 (if less than 5 taps are available on the
CT, then connect the test set secondary output binding posts X1, X2… to the correlating secondary
of the current transformer with the EXCEPTION of connecting the test set secondary output
binding Xn to the most external secondary of the current transformer. For Example on a 3 Tap CT
Connect X1(test set) to X1(CT), X2( test set ) to X2 ( CT ), and Xn (test set ) to X3 ( CT)
6. On test lead set labeled CT H/P connect the test lead primary binding posts H1 and H2 to CT
primary bushings H1 and H2.Observe the polarity marks on the CT (H1 on the test set is polarity
terminal).
7. Turn Power ON/OFF switch to ON
8. After the boot up, select the “Nameplate Information” menu by selecting
Name Plate navigation button.
9. Fill in nameplate information about the CT. At a minimum, the number of taps and the secondary
current must be selected
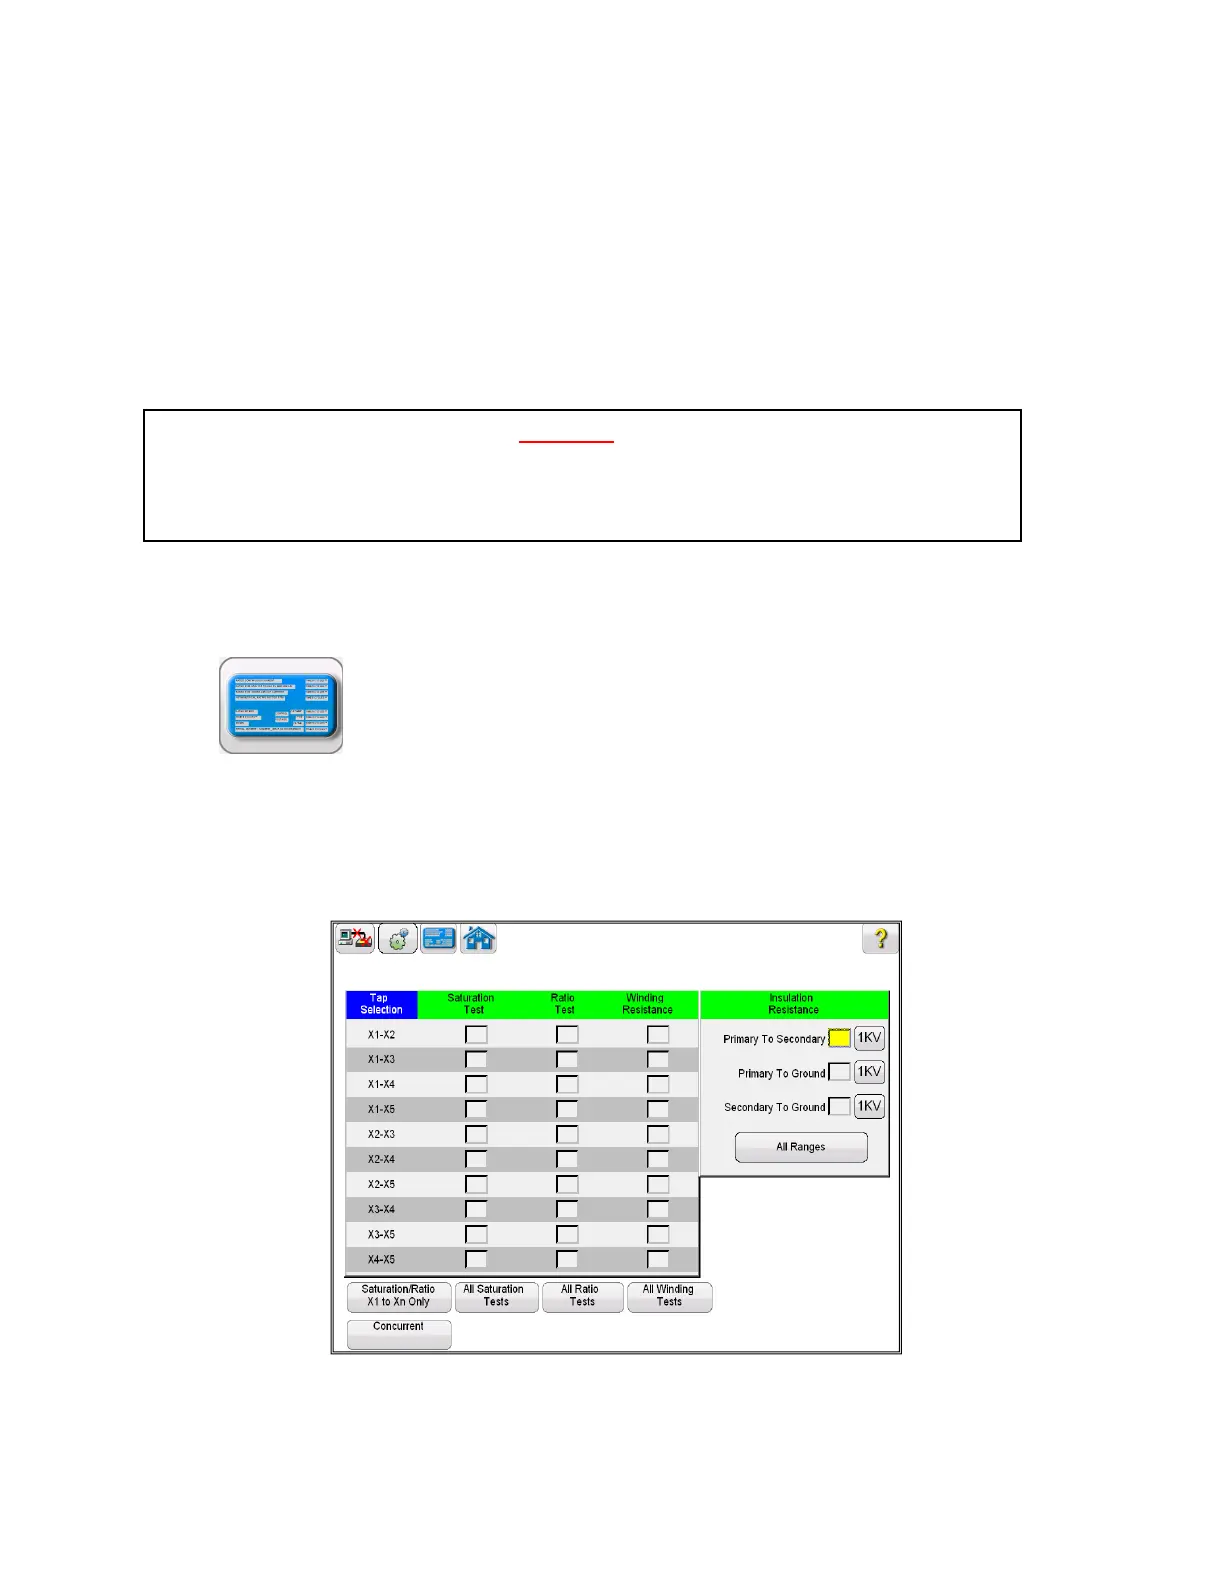
10. In the Home Screen, select the Run All Tests button. Within the Run All Test screen select
all of the desired tests by placing a check in the adjacent box
Figure 54 Run All Tests – Configuration