Step 2: Setup Network for Communication
through Ethernet
Chapter Five: Ethernet Interface
Setup and Configuration
45
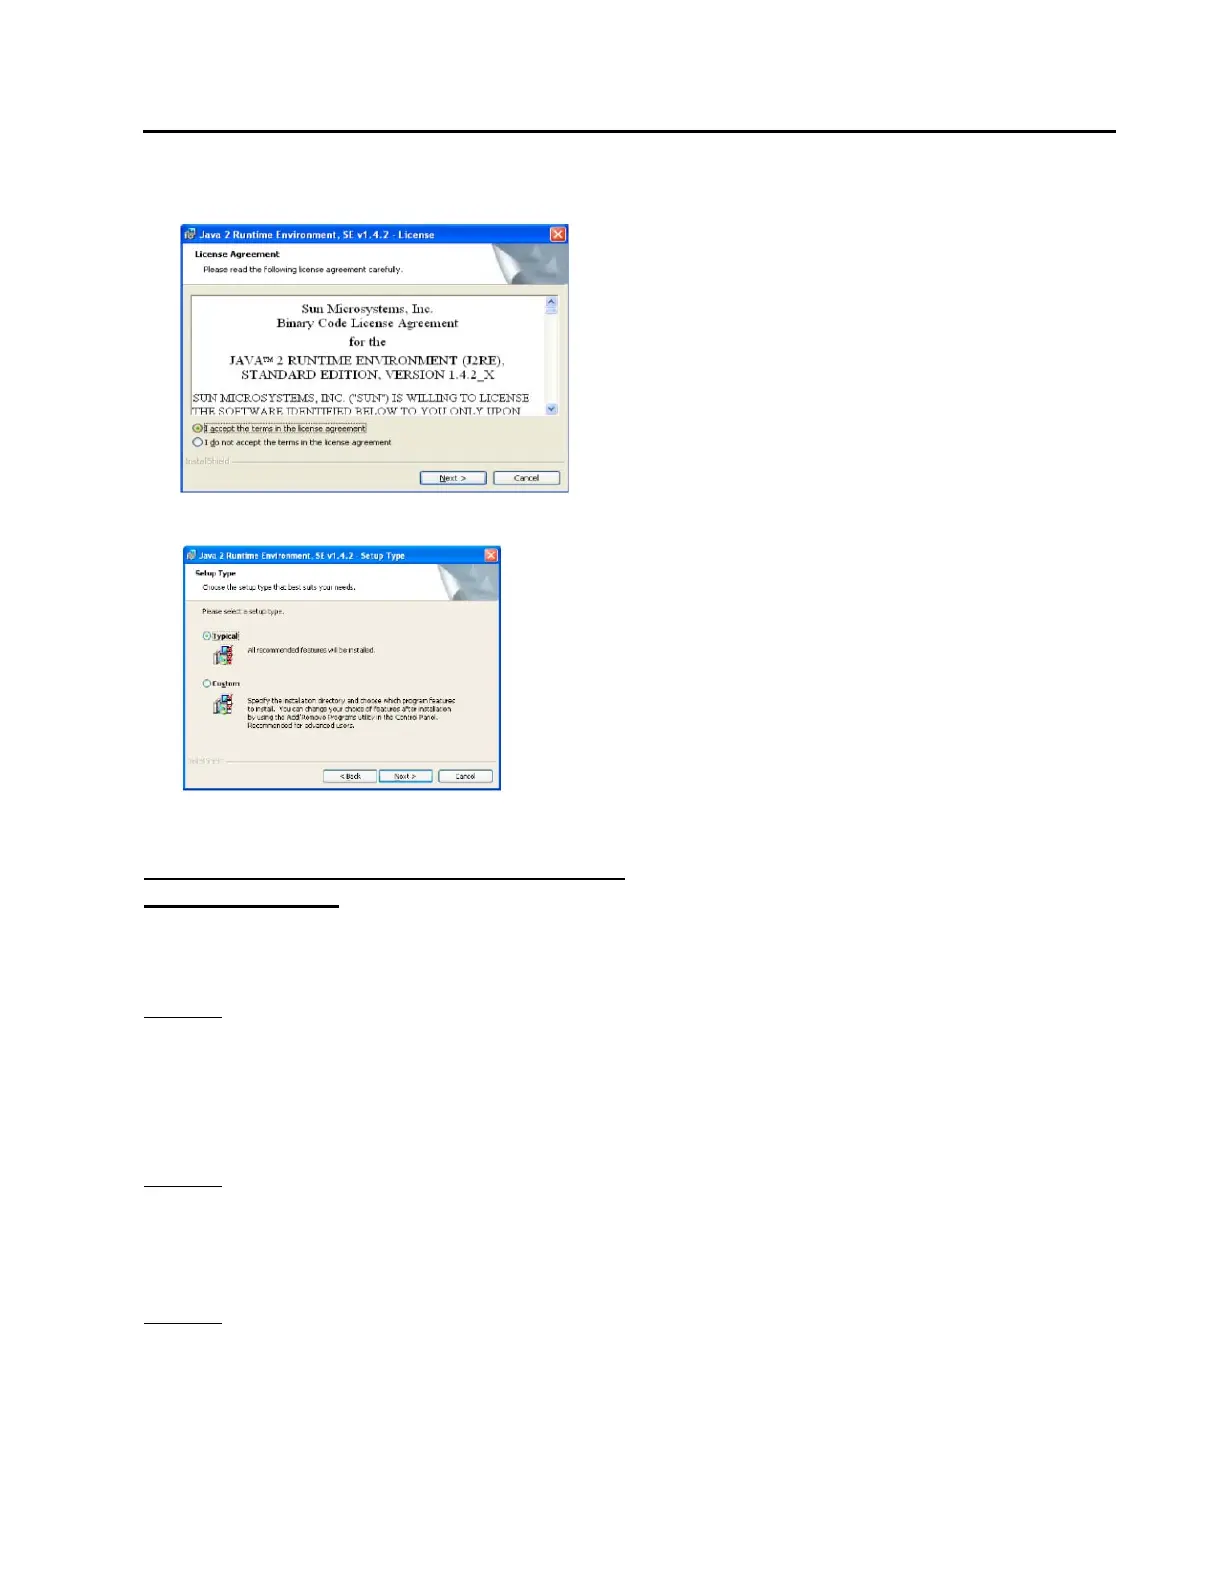
4. Read the license agreement, select “I accept...”, click “Next” to continue installation.
5. Select the “Typical” installation option and follow the prompts to install the Java plug-in.
6. Java plug-in is now complete.
Step 2: Setup Network for Communication
through Ethernet
There are three possible ways to setup your network for communication through Ethernet. Choose the correct
option based on the following criteria:
Option 1 (see below) [single port/single device]
o The Java applet discussed in Step 1 on page 44 has already been installed on your computer.
o You have no need to connect to the Internet.
o You only have one IP address, i.e. 192.168.2.X, to connect with.
o If your computer has more than one network card, this option may not work. Use option 2.
Option 2 (see page 47) [single port/multiple devices]
o The Java applet discussed in Step 1 on page 44 has already been installed on your computer.
o You have no need to connect to the Internet.
o You have one or Multiple IP addresses you want to connect with, i.e. 192.168.2.X, 10.X.X.X, etc.
Option 3 (see page 49) [multiple ports/multiple devices]
o The Java applet discussed in Step 1 on page 44 has or has not installed on your computer.
o You need to be able connect to the Internet while connecting to one or multiple units.
o You have Multiple IP addresses to connect with, i.e. 192.168.2.X, 10.X.X.X, etc.