8.4 Checking Version Number
8-3 ZM2371/ZM2372
8.4 Checking Version Number
The version number of ZM2371 / ZM2372 firmware is displayed after power-on.
Version display “3.2.2 Displays and Indications at Power “ON” ”
It is also to read out the version number by means of *IDN? (Query).
About commands “5.6.3.1 Common Commands”
Also check the test pattern (full dot display pattern) and the lamp for its full lighting that
are displayed after power-on.
8.5 Checking Isolation
Remove all power cord, cable and etc of ZM2371 / ZM2372 to separate it from others. Fix the
measurement range of multimeter to the range, which can be measured by the specified test
current. Set the multimeter to diode test mode (test current 1mA), and measure between the
outer conductor of each BNC connector on front panel of ZM2371 / ZM2372 and the earth
terminal (case) at lower left.
Make sure that the voltage is within the range stated below. When out of this range, it
might be possibly damaged.
H
CUR
vs. Case 0.4 to 0.8V (approx 0.6V) The value in ( ) shows the typical value
H
POT
vs. Case 0 to 0.1V (approx 7mV) at room temperature.
L
POT
vs. Case 0 to 0.1V (approx 7mV)
L
CUR
vs. Case 0 to 0.1V (approx 0mV)
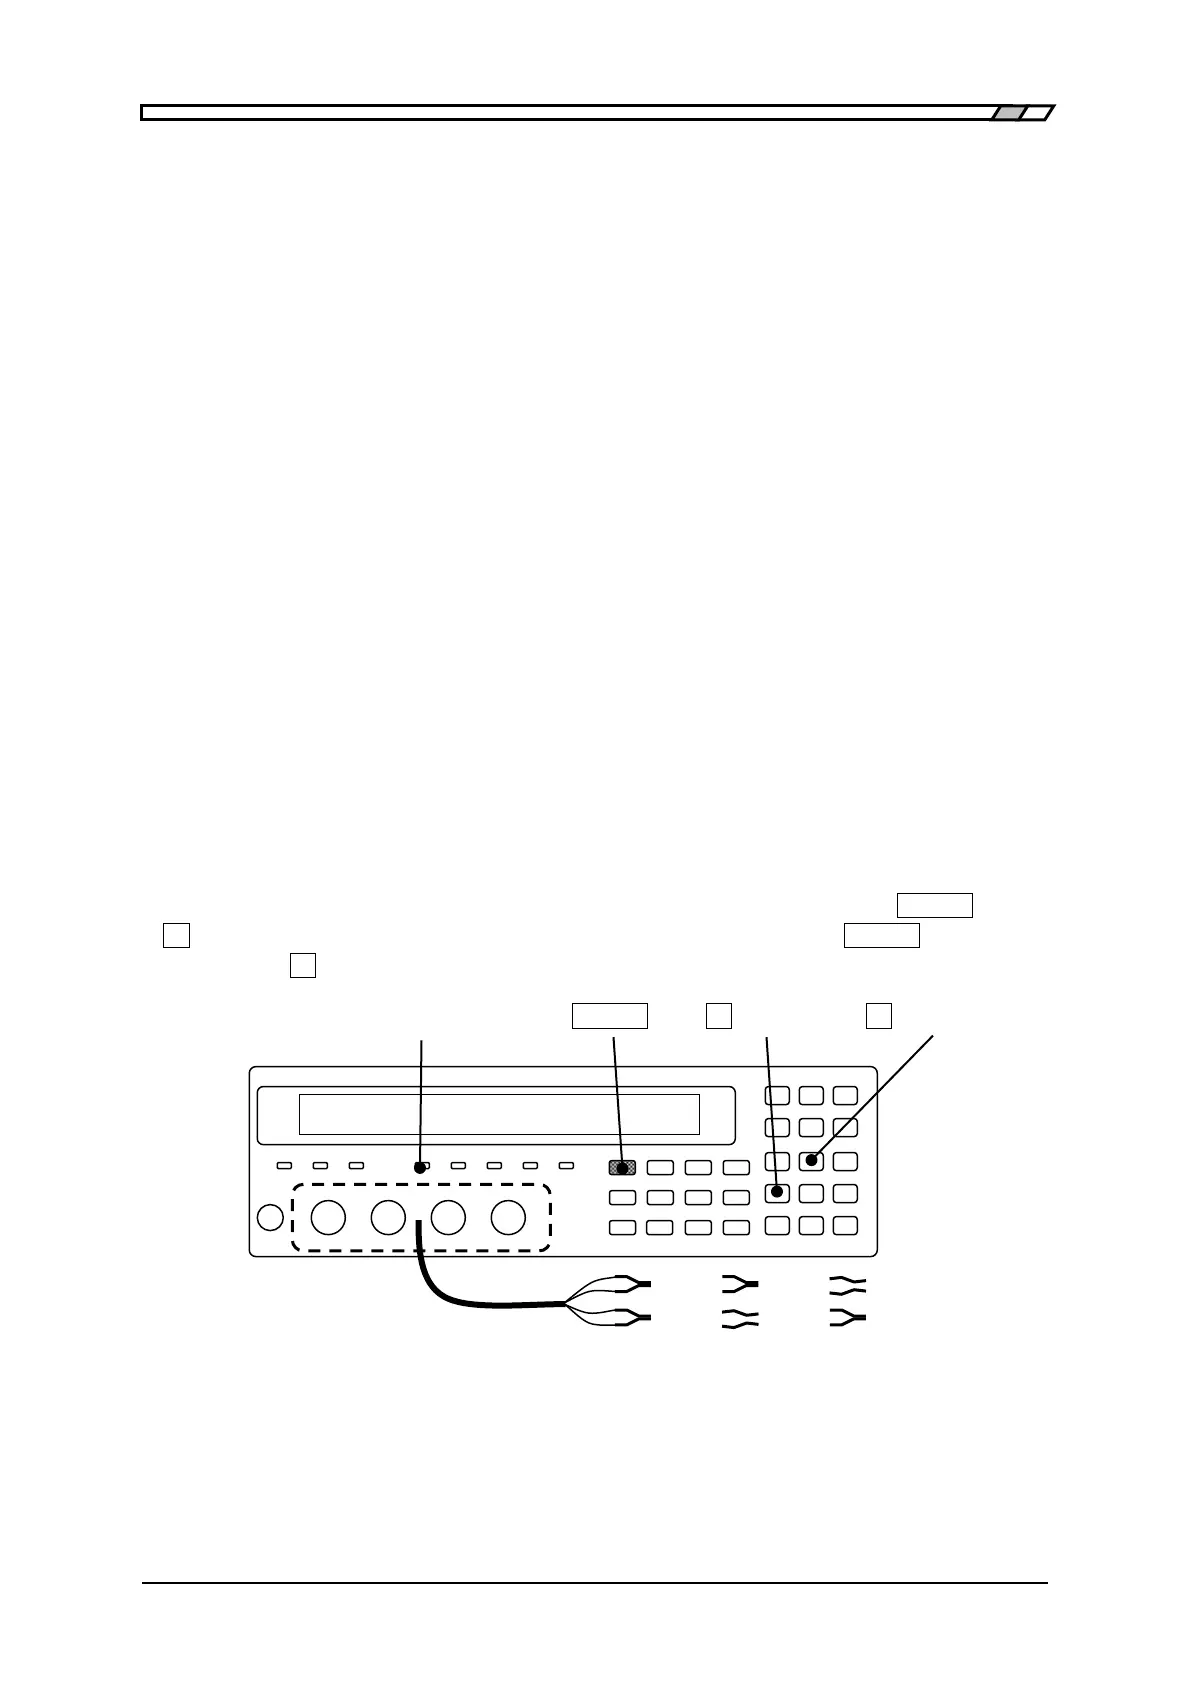
8.6 Checking the Contact Check Function
To use the contact check function of ZM2372, initialize it by the operation of
_
SHIFT
_
+ [INIT],
_
1
_
Key” and then enable the contact check function by the operation of
_
SHIFT
_
+
[CONTACT],
_
1
_
Key” so that contact check function can be checked.
CONTACT CHECK LAMP
_
SHIFT
_ _
0
_
| [INIT]
_
2
_
| [CONTACT]
Mount the kelvin clip test lead on the measurement terminal, and make sure that
measurement value normally displays when both sides of space between H terminals and
space between L terminals are closed, meanwhile, NC (No Contact) displays as
measurement value when either side of the above is opened.
 Loading...