3.5 Basic Operations
3-51 ZM2371/ZM2372
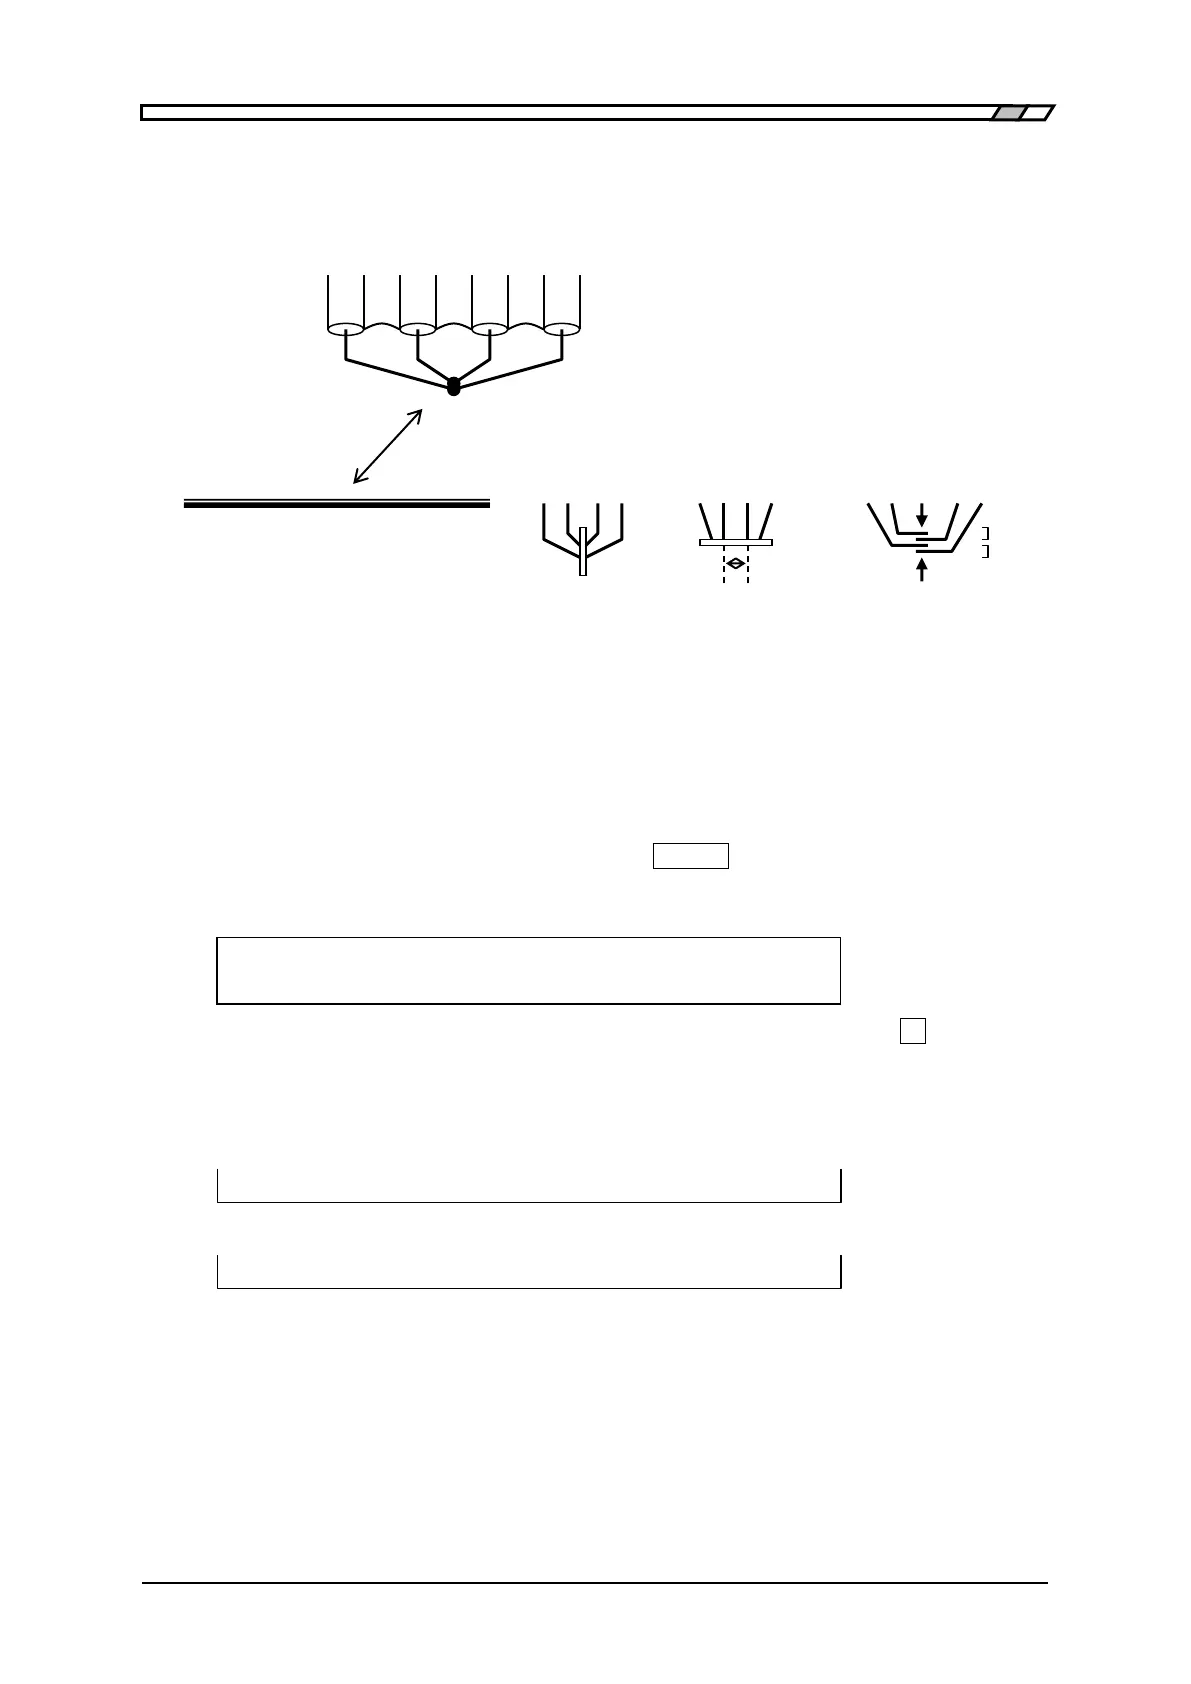
Measurement of SHORT correction value
First, short the measurement terminals.
Figure 3–8 Terminal processing at SHORT correction
To measure the SHORT correction value, press the
_
SHIFT
_
+ [SHORT] keys to display the
SHORT correction menu, and select Measure with a numeric key.
During the measurement of SHORT correction value, the following message is displayed.
SHORT Measurement (<900)
Running 9)ABORT
The measurement of SHORT correction value can be aborted by pressing the
_
9
_
key.
Upon completion of SHORT correction value measurement, the SHORT correction is enabled,
and the following completion message is displayed for a short time, and then the
measurement screen comes back.
Completed Correction ON
However, when measured value ≦900k, the following warning message is displayed.
Warning:Out of range
Same warning message is also displayed when the measurement failed by any reason. Even
if this warning message is displayed, the ZM2371 / ZM2372 use the obtained measured value
as SHORT correction value. However, the previous SHORT correction value is held for the
frequency at which the measurement failed.
This warning will disappear automatically. It also can be reset by operating any key.
Perform the EXIT operation to return to one-previous menu.
Connect 4 terminals H
CUR
, L
CUR
, H
POT
, L
POT
together.
Or, short with a metallic piece of low impedance.
Ideally, the voltage between H
POT
and L
POT
terminals
should be zero.
Retain positional relation of the cables, particularly the relation of HCUR - LCUR current
loop and HPOT - LPOT voltage loop same as that during DUT measurement. The loop
should be as small as possible to reduce the electromagnetic coupling.
Retain positional relation to
ambient conductors same as
that during DUT measurement
Connect outer conductor (shield) of 4
coaxial cables together